Using SWT from Git
Intro
As part of the Eclipse Git migration, SWT has moved all of its CVS projects into 2 Git repos first - one for sources and one for binaries.
Nowadays the binaries are also stored in the sources repository using Git Large File Storage (LFS) so that only one SWT Git repository exists.
For those new to the Git world, there are many resources available online that can provide an intro to Git. Some recommended ones:
- The git homepage has a documentation section with good links to tutorials.
- The online Pro Git book provides a more comprehensive overview of Git.
- The Git Large File Storage (LFS) provides a basic overview of Git-LFS.
Git Web View
SWT lives at GitHub. The SWT repo can be viewed online at:
The eclipse.platform.swt.binaries.git repository is now obsolete and effectively archived.Cloning the SWT repos
Anonymous git access to the SWT repositories can be obtained through either http or git protocols. To clone the SWT repos from the command line:Using EGit
While it is possible to use git (with git-lfs installed) only from the command line to develop SWT, it is recommended to use EGit to allow you to perform all git operations from within Eclipse. Here is a quick guide to help you get set up (see also Platform-releng/Git Workflows page for more workflow hints.).
The EGit User guide and especially its section about EGit's LFS support provide general help with EGit.
Installing EGit with LFS Support
You can install EGit and its LFS Support from Latest Eclipse Simultaneous Release, it's already available. From within Eclipse, you can select Help>Install New Software... and then select the 2020-03 (or newer) site from the 'Work With' combo box. From underneath the 'Collaboration' section select and install
Git integration for EclipseJava implementation of Git - optional LFS support
Getting the Source
Getting the source is a two step process. First you clone the repository to the location specified in the Git preferences pages, and then you must import the repos into your workspace. Note it is also possible to clone the repositiories via the command line tools and then just import them into your workspace.
Cloning the SWT repos
- Switch to the Git Repository Exploring perspective.
- Click on Clone a Git repository

- Paste one of the following URIs into the URI field, and EGit will fill in the rest for you. When finished, click Next.
For committer access, fork the repository and clone your own fork (substitute in proper userid):- https://github.com/userid/eclipse.platform.swt.git
- https://github.com/userid/eclipse.platform.swt.binaries.git
- Select master and any other branches that you are interested in. Click Next.
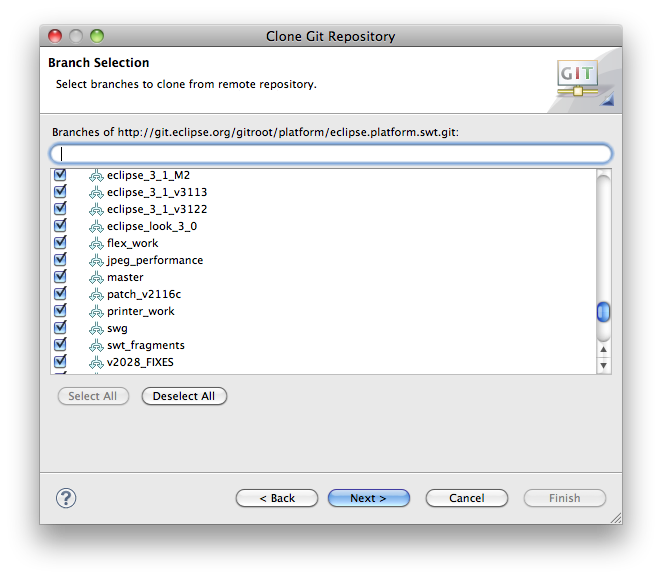
- Confirm the destination directory. Click Finish
Alternative - Adding an externally cloned SWT repo
Note: If you have cloned the repository with EGit you can skip this step. This step is just for people who have cloned a repo from the command line and want to import it.
- In the Git Repositories perspective, select the Add Git Repositories button
- Browse to the directory that contains the repo and click search.
- Select the found repos and click OK.
Importing the SWT bundles into your workspace
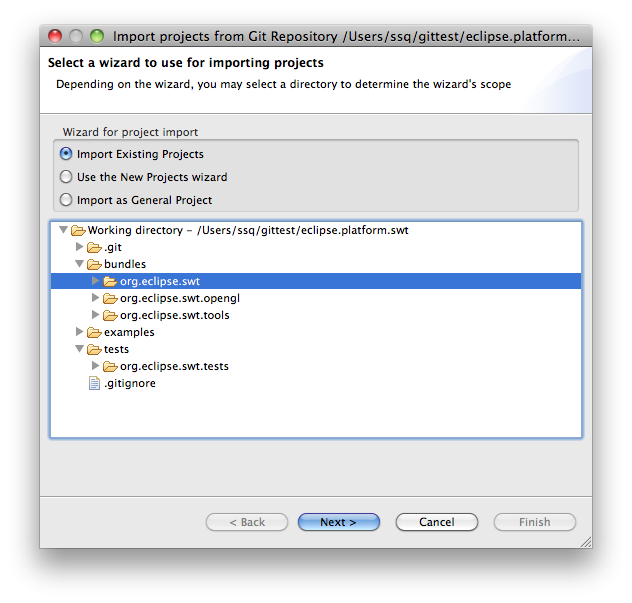
- Once you have a repo cloned, right click on it and select Import Projects... (These screenshots show importing the source repo first).
- Choose Import existing projects and click Next.
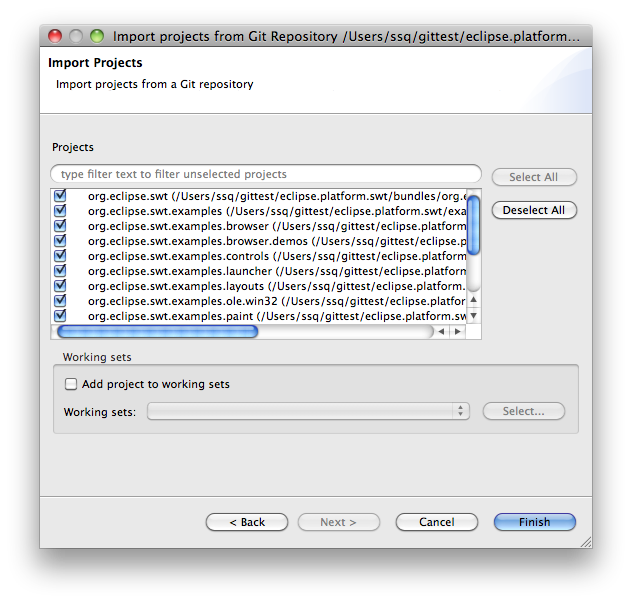
- Select which projects you want to import and click Finish. Although you can import all projects from
both repos, it might be better to select only the minimum set of projects you are interested in to keep
your workspace small (for example, org.eclipse.swt and org.eclipse.swt.cocoa.macosx if you are doing Cocoa
development).
- Now repeat the same steps to import the other repository into the workspace.
Configuring EGit
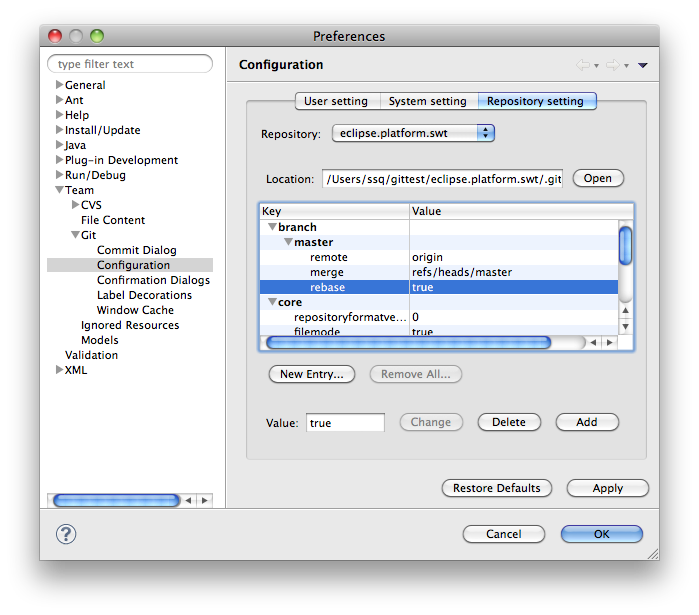
Open Eclipse Preferences..., and expand the Team item in the tree. Under the Git item, select Configuration. Check the user name and and email - this will be used on all commits.
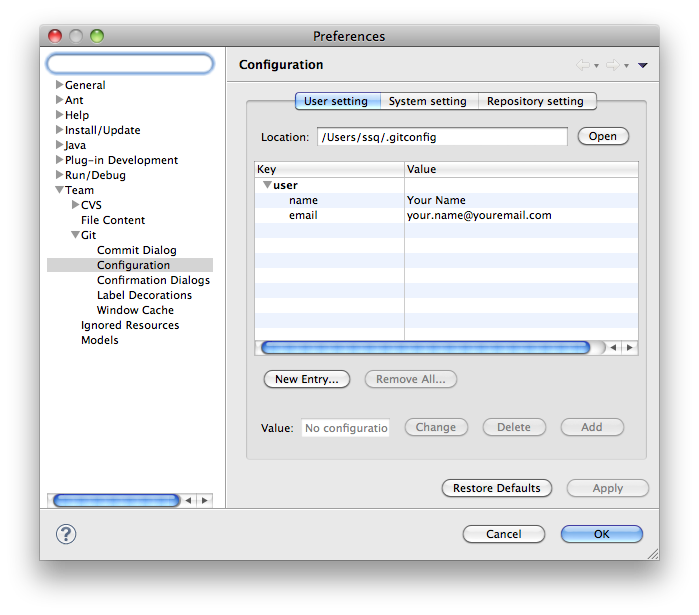
Next switch to the Repository Settings tab. Under the branch tree, select the branch you are working on (most likely master) and create a new key with a name branch.[branchname].rebase and a value of true. This will ensure that the history will stay linear when merging in changes from the remote repository.
Setting Up SWT
- Once you have imported the projects from both eclipse.platform.swt and eclipse.platform.swt.binaries into your workspace, you are ready
to switch the classpath to match whatever platform you are runnning with.
Each platform has a module for the binaries categorized by toolkit, OS, and CPU architecture. Examples:
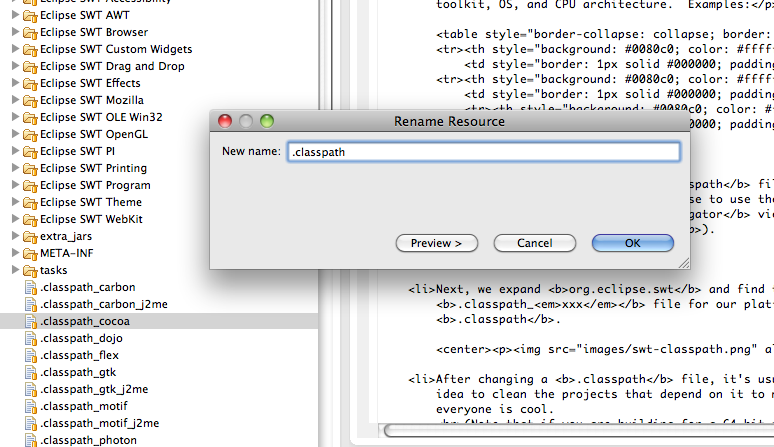
Windows org.eclipse.swt.win32.win32.x86 Mac OS X org.eclipse.swt.cocoa.macosx Linux GTK org.eclipse.swt.gtk.linux.x86 - SWT has a different Eclipse .classpath file for each platform, so weneed to set up Eclipse to use the right one. To do this we first show the Navigator view (Window > Show View > Navigator).
- Next, we expand org.eclipse.swt and find the
.classpath_xxx file for our platform and copy it to a file named
.classpath.
- After changing a .classpath file, it's usually a good
idea to clean the projects that depend on it to make sure
everyone is cool.
(Note that if you are building for a 64-bit platform, there is an extra step needed. Please see this FAQ for details).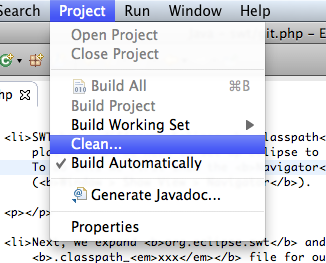
- We're ready to go! To test our checkout, let's find an SWT
application to run. How about the ControlExample.
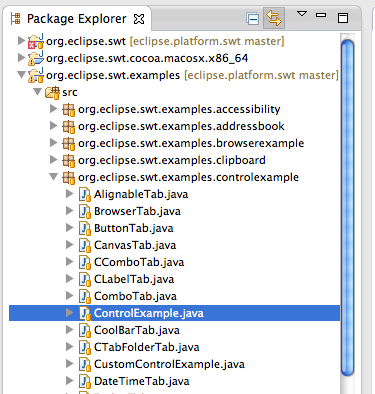
- After we've selected the ControlExample.java file, we can run it using Run > Run As > Java Application.
- Optionally you can setup SWT native build setup
- Windows native build setup page
- Linux native build setup page
- MAC native build setup page
And there you go!