This is the multi-page printable view of this section. Click here to print.
How-to guides
1 - Update software
By following the steps below you will install ahello
Debian package via a publicly available Eclipse Hono sandbox using Eclipse Kanto.
A couple of simple Eclipse Hono northbound business applications written in Python are provided to explore
the capabilities for remotely installing and monitoring.
On the edge side, a basic
install_hello.sh
script will be downloaded and executed.
Before you begin
To ensure that your edge device is capable to execute the steps in this guide, you need:
Debian-based linux distribution and the
aptcommand line toolIf you don’t have an installed and running Eclipse Kanto, follow Install Eclipse Kanto
If you don’t have a connected Eclipse Kanto to Eclipse Hono sandbox, follow Explore via Eclipse Hono
The software update application
Navigate to the
quickstartfolder where the resources from the Explore via Eclipse Hono guide are located and execute the following script:wget https://github.com/eclipse-kanto/kanto/raw/main/quickstart/hono_commands_su.pyExecuting
helloin the terminal will return that the command is not found
Install Debian package
To explore the software management, we will use two Python scripts to install and monitor the hello Debian package.
The location where the Python applications will run does not have to be your edge device as they communicate remotely
with Eclipse Hono only.
First, start the monitoring application that requires the configured Eclipse Hono tenant (-t) and will print all
received events triggered by the device:
python3 hono_events.py -t demo
In another terminal, we are ready to spin up a hello Debian package at the edge via executing the second application
that requires the Eclipse Hono tenant (-t) and the device identifier (-d):
python3 hono_commands_su.py -t demo -d demo:device
Verify
You can check out that the new package is installed on your edge device via executing:
hello
The command now displays: Hello, world!
Clean up
The installed hello Debian package can be removed via executing:
sudo apt remove hello
2 - Upload files
By following the steps below you will upload an example log file to your HTTP file server via a publicly available Eclipse Hono sandbox using Eclipse Kanto. A simple Eclipse Hono northbound business application written in Python is provided to explore the capabilities for remotely uploading and monitoring.
Before you begin
To ensure that all steps in this guide can be executed, you need:
servefileinstalledThis is a small Python HTTP server used in the example to serve the uploads. It does not have to be running on your edge device but it has to be accessible from there. You can install it by executing:
pip3 install servefileIf you don’t have an installed and running Eclipse Kanto on your edge device, follow Install Eclipse Kanto
If you don’t have a connected Eclipse Kanto to Eclipse Hono sandbox, follow Explore via Eclipse Hono
Navigate to the
quickstartfolder where the resources from the Explore via Eclipse Hono guide are located and execute the following script:wget https://github.com/eclipse-kanto/kanto/raw/main/quickstart/hono_commands_fu.py
Upload log file
By default, all files in /var/tmp/file-upload/ directory can be uploaded.
For example, grab the suite connector log file and place it in the directory via executing:
mkdir -p /var/tmp/file-upload/ && sudo cp /var/log/suite-connector/suite-connector.log /var/tmp/file-upload/
Choose a directory where the log file will be uploaded, open a new terminal there and run servefile:
servefile -u .
To explore the file upload, we will use a Python script to request and monitor the operation. The location where the Python application will run does not have to be your edge device as it communicates remotely with Eclipse Hono only.
Now we are ready to request the log file upload from the edge via executing the application
that requires the Eclipse Hono tenant (-t) and the device identifier (-d):
python3 hono_commands_fu.py -t demo -d demo:device
Verify
You can check out that the log file is on your HTTP file server by listing the content of servefile working directory.
Clean up
Stop servefile and clean up its working directory.
3 - Back up and restore files
By following the steps below you will back up a simple text file to an HTTP file server and then restore it back via a publicly available Eclipse Hono sandbox using Eclipse Kanto. A simple Eclipse Hono northbound business application written in Python is provided to explore the capabilities for remotely backing up and restoring files.
Before you begin
To ensure that all steps in this guide can be executed, you need:
servefileinstalledThis is a small Python HTTP server used in the example to serve the uploads and downloads. It does not have to be running on your edge device, but it has to be accessible from there. You can install it by executing:
pip3 install servefileIf you don’t have an installed and running Eclipse Kanto on your edge device, follow Install Eclipse Kanto
If you don’t have a connected Eclipse Kanto to Eclipse Hono sandbox, follow Explore via Eclipse Hono
The file backup and restore application
Navigate to the
quickstartfolder where the resources from the Explore via Eclipse Hono guide are located and execute the following script:wget https://github.com/eclipse-kanto/kanto/raw/main/quickstart/hono_commands_fb.py
Back up
By default, all directories in /var/tmp/file-backup/ or the directory itself can be backed up.
For this example, create a file data.txt which will be later backed up:
sudo mkdir -p /var/tmp/file-backup && sudo echo "This is the first line in the file!" >> /var/tmp/file-backup/data.txt
You can verify that the file was successfully created by executing the following command:
cat /var/tmp/file-backup/data.txt
This should produce This is the first line in the file! as an output.
Choose a directory where the text file will be uploaded, open a new terminal there and run servefile
with the flag -u to enable a file upload:
servefile -u .
To explore the file backup, we will use a Python script to request and monitor the operation. The location where the Python application will run does not have to be your edge device as it communicates remotely with Eclipse Hono only.
Now we are ready to request the text file backup from the edge via executing the application that requires the command
to execute (backup), Eclipse Hono tenant (-t), the device identifier (-d) and the host where the backup will
be uploaded to:
python3 hono_commands_fb.py backup -t demo -d demo:device -h localhost
You can check out that the backup file data.zip is on your HTTP file server by
listing the content of the servefile working directory.
Restore
To explore the restore capabilities you will first modify the data.txt file, and then you will restore it to
the version before the changes by using the backup, that was created earlier.
You can modify the data.txt file with the following command:
sudo echo "This is the second line in the file!" >> /var/tmp/file-backup/data.txt
You can verify that the file was successfully updated by executing the following command:
cat /var/tmp/file-backup/data.txt
This output should be:
This is the first line in the file!
This is the second line in the file!
Navigate to the terminal where servefile was started and terminate it.
Start it again with the flag -l to enable a file download:
servefile -l .
To explore the file restore, we will use a Python script to request and monitor the operation. The location where the Python application will run does not have to be your edge device as it communicates remotely with Eclipse Hono only.
Now we are ready to request the text file restore from the edge via executing the application that requires the command
to execute (restore), Eclipse Hono tenant (-t), the device identifier (-d) and the host where the backup file
will be downloaded from:
python3 hono_commands_fb.py restore -t demo -d demo:device -h localhost
Verify
You can check out that the original file is restored by executing the following command:
cat /var/tmp/file-backup/data.txt
This should produce This is the first line in the file! as an output.
Clean up
Stop servefile and clean up its working directory.
Remove the data.txt file from the /var/tmp/file-backup directory.
4 - Create and update the containers `Desired State`
Desired State using the update-manageBy following the steps below you will publish a simple Desired State specification via a publicly available Eclipse Hono sandbox and then the specification will be handled by the Eclipse Kanto Update Manager, which will trigger an OTA update on
the edge device.
A simple monitoring application will track the progress and the status of the update process.
Before you begin
To ensure that all steps in this guide can be executed, you need:
Debian-based linux distribution and the
aptcommand line toolIf you don’t have an installed and running Eclipse Kanto, follow Install Eclipse Kanto
If you don’t have a connected Eclipse Kanto to Eclipse Hono sandbox, follow Explore via Eclipse Hono
The update manager application
Navigate to the
quickstartfolder where the resources from the Explore via Eclipse Hono guide are located and execute the following script:wget https://github.com/eclipse-kanto/kanto/raw/main/quickstart/hono_commands_um.pyEnable the
containers update agentservice of theContainer Managementby adding the"update_agent": {"enable": true}property to thecontainer-managementservice configuration (by default located at/etc/container-management/config.json) and restart the service:systemctl restart container-management
Publish the Desired State specification
First, start the monitoring application that requires the configured Eclipse Hono tenant (-t) and an optional filter parameter (-f). It will print all
received feedback events triggered by the device:
python3 hono_events.py -t demo -f demo/device/things/live/messages/feedback
The starting point of the OTA update process is to publish the example Desired State specification:
python3 hono_commands_um.py -t demo -d demo:device -o apply
The Desired State specification in this case consists of single domain section definition for the containers domain and a three container components - influxdb, hello-world and alpine image.
Apply Desired State specification
The Update Manager receives the published Desired State to the local Mosquitto broker, splits the specification (in this case into single domain) and then
distributes the processed specification to the domain agents which initiates the actual update process logic on the domain agents side.
The update process is organized into multiple phases, which are triggered by sending specific Desired State commands (DOWNLOAD/UPDATE/ACTIVATE).
In the example scenario, the three images for the three container components will be pulled (if not available in the cache locally), created as containers during the UPDATING phase and
started in the ACTIVATING phase.
Monitor OTA update progress
During the OTA update, the progress can be tracked in the monitoring application fot the Desired State feedback messages, started in the prerequisite section above.
The Update Manager reports at a time interval of a second the status of the active update process. For example:
{
   "activityId":"e5c858cc-2057-41b0-bd5f-83aee0aad22e",
   "timestamp":1693201088401,
   "desiredStateFeedback":{
      "status":"RUNNING",
      "actions":[
         {
            "component":{
               "id":"containers:alpine",
               "version":"latest"
            },
            "status":"UPDATE_SUCCESS",
            "message":"New container instance is started."
         },
         {
            "component":{
               "id":"containers:hello-world",
               "version":"latest"
            },
            "status":"UPDATE_SUCCESS",
            "message":"New container instance is started."
         },
         {
            "component":{
               "id":"containers:influxdb",
               "version":"2.7.1"
            },
            "status":"UPDATING",
            "message":"New container created."
         }
      ]
   }
}
List containers
After the update process is completed, list the installed containers by executing the command kanto-cm list to verify if the Desired State is applied correctly.
The output of the command should display the info about the three containers, described in the Desired State specification. The influxdb is expected to be in RUNNING state and
the other containers in status EXITED. For example :
ID                                    |Name         |Image                               |Status   |Finished At |Exit Code
|-------------------------------------|-------------|------------------------------------|----------------------|---------
7fe6b689-eb76-476d-a730-c2f422d6e8ea  |influxdb     |docker.io/library/influxdb:1.8.4    |Running  |            |0
c36523d7-8d17-4255-ae0c-37f11003f658  |hello-world  |docker.io/library/hello-world:latest|Exited   |            |0
9b99978b-2593-4736-bb52-7a07be4a7ed1  |alpine       |docker.io/library/alpine:latest     |Exited   |            |0
Update Desired State specification
To update the existing Desired State run the command below. The update changes affect two containers - alpine and influxdb. Being not present in the updated Desired State specification, the alpine container will be removed from the system. The influxdb will be updated to version 1.8.5. The last container - hello-world is not affected and any events will be not reported from the container update agent for this particular container.
python3 hono_commands_um.py -t demo -d demo:device -o update
List updated containers
After the update process of the existing Desired State is completed, list again the available containers to the verify the Desired State is updated correctly.
The output of the command should display the info about the two containers, described in the Desired State specification. The influxdb is expected to be updated with the version 1.8.5 and in RUNNING state and hello-world container to be status EXITED with version unchanged. The alpine container must be removed and not displayed.
ID                                    |Name         |Image                               |Status   |Finished At |Exit Code
|-------------------------------------|-------------|------------------------------------|----------------------|---------
7fe6b689-eb76-476d-a730-c2f422d6e8ea  |influxdb     |docker.io/library/influxdb:1.8.5    |Running  |            |0
c36523d7-8d17-4255-ae0c-37f11003f658  |hello-world  |docker.io/library/hello-world:latest|Exited   |            |0
Remove all containers
To remove all containers, publish an empty Desired State specification (with empty components section):
python3 hono_commands_um.py -t demo -d demo:device -o clean
As a final step, execute the command kanto-cm list to verify that the containers are actually removed from the Kanto container management.
The expected output is No found containers..
5 - Monitor system metrics
By following the steps below you will be able to monitor the system metrics from your edge device via a publicly available Eclipse Hono sandbox using Eclipse Kanto. A simple Eclipse Hono northbound business application written in Python is provided to explore the capabilities for remotely monitoring the CPU and memory utilization.
Before you begin
To ensure that all steps in this guide can be executed, you need:
Plotlyis an open-source plotting library andDashis a framework for building data application in Python. They are used in this example to run a simple HTTP server and visualize the incoming system metrics data in real time, and they do not have to be running on your edge device. You can install them by executing:pip3 install plotly dashIf you don’t have an installed and running Eclipse Kanto on your edge device, follow Install Eclipse Kanto
If you don’t have a connected Eclipse Kanto to Eclipse Hono sandbox, follow Explore via Eclipse Hono
The system metrics application
Navigate to the
quickstartfolder where the resources from the Explore via Eclipse Hono guide are located and execute the following script:wget https://github.com/eclipse-kanto/kanto/raw/main/quickstart/hono_commands_sm.py
Monitor system metrics
To explore the system metrics, we will use a Python script to request and monitor the CPU and memory utilization. The location where the Python application will run does not have to be your edge device as it communicates remotely with Eclipse Hono only.
Now we are ready to request the system metrics from the edge via executing the application
that requires the Eclipse Hono tenant (-t) and the device identifier (-d):
python3 hono_commands_sm.py -t demo -d demo:device
Verify
You can check out that the CPU and memory utilization metrics are properly received and displayed by checking out the application dashboard (by default - http://127.0.0.1:8050).
6 - Verify signed container images
By following the steps below, you will sign a container image and push it to a local registry using anotation. Then a notation trust policy and the Kanto Container Management service will be configured in a way that running containers from the signed image via kanto-cm CLI will be successful, while running containers from unsigned images will fail.
Before you begin
To ensure that your edge device is capable to execute the steps in this guide, you need:
- If you don’t have an installed and running Eclipse Kanto, follow Install Eclipse Kanto
- Installed Notation CLI
- Installed and running Docker
Create an image and push it to a local registry using docker and than sign it with notation
Create and run a local container registry:
sudo kanto-cm create --ports 5000:5000 --e REGISTRY_STORAGE_DELETE_ENABLED=true --name registry docker.io/library/registry:latest
sudo kanto-cm start -n registry
Build a dummy hello world image and push it to the registry:
cat <<EOF | sudo docker build -t localhost:5000/dummy-hello:signed -
FROM busybox:latest
CMD [ "echo", "Hello World" ]
EOF
sudo docker push localhost:5000/dummy-hello:signed
export IMAGE=$(sudo docker inspect --format='{{index .RepoDigests 0}}' localhost:5000/dummy-hello:signed)
echo $IMAGE
Generate a key-pair with notation and add it as the default signing key:
notation cert generate-test --default "kanto"
Sign the image and store the signature in the registry:
notation sign $IMAGE
Configure notation truspolicy and container management verifier
Get the notation config directory and assign it to an environment variable to be used in the next steps of the guide:
export NOTATION_CONFIG=${XDG_CONFIG_HOME:-$HOME/.config}/notation
echo $NOTATION_CONFIG
Create a simple notation trustpolicy as a trustpolicy.json file in the notation config directory:
cat <<EOF | tee $NOTATION_CONFIG/trustpolicy.json
{
  "version": "1.0",
  "trustPolicies": [
    {
      "name": "kanto-images",
      "registryScopes": [ "*" ],
      "signatureVerification": {
        "level" : "strict"
      },
      "trustStores": [ "ca:kanto" ],
      "trustedIdentities": [ "*" ]
    }
  ]
}
EOF
Create a backup of the initial Kanto Container Management configuration that is found in /etc/container-management/config.json(the backup will be restored at the end of the guide):
sudo cp /etc/container-management/config.json /etc/container-management/config-backup.json
Configure the use of notation verifier, set its config directory, mark the local registry as an insecure one, and set the image expiry time to zero seconds, so the local cache of the images used in the how-to will be deleted upon container removal:
cat <<EOF | sudo tee /etc/container-management/config.json
{
  "log": {
    "log_file": "/var/log/container-management/container-management.log"
  },
  "containers": {
    "image_verifier_type": "notation",
    "image_verifier_config": {
      "configDir": "$NOTATION_CONFIG"
    },
    "insecure_registries": [ "localhost:5000" ],
    "image_expiry": "0s"
  }
}
EOF
Restart the Container Management service for the changes to take effect:
sudo systemctl restart container-management.service
Verify
Create and run a container from the signed image. The container prints Hello world to the console:
sudo kanto-cm create --name dummy-hello --rp no --t $IMAGE
sudo kanto-cm start --name dummy-hello --a
Make sure that a docker hub hello-world image is not cached locally, by removing any containers with this image, and verify that creating containers from it fails, as the image is not signed, and the signature verification fails:
sudo kanto-cm remove -f $(sudo kanto-cm list --quiet --filter image=docker.io/library/hello-world:latest)
sudo kanto-cm create --name dockerhub-hello --rp no --t docker.io/library/hello-world:latest
Clean up
Remove the created containers from the Kanto Container Management:
sudo kanto-cm remove -n dummy-hello
sudo kanto-cm remove -n registry -f
Restore the initial Kanto Container Management configuration and restart the service:
sudo mv -f /etc/container-management/config-backup.json /etc/container-management/config.json
sudo systemctl restart container-management.service
Remove the localy cached images from Docker:
sudo docker image rm localhost:5000/dummy-hello:signed registry:latest
Reset the notation configuration by removing the directory:
rm -r $NOTATION_CONFIG
Unset exported environment variables:
unset IMAGE NOTATION_CONFIG
7 - Offline explore edge device
By following the steps below, you will get the structure of the edge digital twins with all its features and properties using Eclipse Kanto. A simple Eclipse Hono northbound business application written in Python is provided to display the things’ and their features’ structure.
Before you begin
To ensure that your edge device is capable to execute the steps in this guide, you need:
If you don’t have an installed and running Eclipse Kanto on your edge device, follow Install Eclipse Kanto
If you don’t have a connected Eclipse Kanto to Eclipse Hono sandbox, follow Explore via Eclipse Hono
Stop
suite-connector.service. The local digital twins service is a replacement for the suite connector service, that is why either one of the services must be running.sudo systemctl stop suite-connector.serviceThe offline explore application
Navigate to the
quickstartfolder where the resources from the Explore via Eclipse Hono guide are located and execute the following script:wget https://github.com/eclipse-kanto/kanto/raw/main/quickstart/hono_commands_ldt.py
Configure Local digital twins
Open file /etc/suite-connector/config.json, copy tenantId, deviceId, authId and password.
{
    ...
    "tenantId": "demo",
    "deviceId": "demo:device",
    "authId": "demo_device",
    "password": "secret"
    ...
}
The local digital twins service uses the /etc/local-digital-twins/config.json to acquire all the remote communication, identification and
authentication data to establish the remote connection. Update the configuration as shown below and
replace tenantId, deviceId, authId and password with the settings that you copied in the previous step.
  {
    "logFile": "/var/log/local-digital-twins/local-digital-twins.log",
    "caCert": "/etc/local-digital-twins/iothub.crt",
    "thingsDb": "/var/lib/local-digital-twins/thing.db",
    "tenantId": "demo",
    "deviceId": "demo:device",
    "authId": "demo_device",
    "password": "secret"
  }
Save the configuration and start the local digital twins service using the following command:
sudo systemctl start local-digital-twins.service
Receive the structure of the edge device
Now we are ready to request the structure of the edge digital twins via executing the offline explore application that requires the local digital twins tenant (-t) and the device identifier (-d):
python3 hono_commands_ldt.py -t demo -d demo:device
Verify
On the shell there will be output of the structure of the edge digital twins with all its features and properties. Things with the following identifiers will be presented:
- demo:device
- demo:device:edge:containers
Clean up
Stop the local digital twins service and start suite connector service by executing:
sudo systemctl stop local-digital-twins.service && \
sudo systemctl restart suite-connector.service
8 - Build Yocto Image for Raspberry Pi
Building a Yocto Image for a Raspberry Pi involves several steps, including setting up the environment, download the necessary layers, configuring the build and compiling the image.
Before you begin
- Install the required packages required for the build on a Ubuntu/Debian system
sudo apt-get update
sudo apt install -y gawk wget git-core diffstat unzip texinfo gcc-multilib \
build-essential chrpath socat cpio python3 python3-pip python3-pexpect \
xz-utils debianutils iputils-ping libsdl1.2-dev xterm zstd liblz4-tool \
Clone the Yocto/Poky Repository
Verify the Yocto Version of Kanto availabe in meta-kanto layer, https://github.com/eclipse-kanto/meta-kanto, this example provides information for kirkstone branch.
Create a Source folder
mkdir sources
cd sources
If it is kirkstone branch then, clone poky for kirkstone version in source directory
git clone https://github.com/yoctoproject/poky.git
cd poky
git checkout kirkstone
Note : Change branch based on meta-kanto layer.
Add Meta Layers to the source directory
Based on the yocto version, clone the meta layers in the source directory
meta-raspberrypimeta-openembeddedmeta-virtualizationmeta-lts-mixinsClone meta-raspberry pi layer to sources directory
cd ..
git clone git://git.yoctoproject.org/meta-raspberrypi
cd meta-raspberrypi
git checkout kirkstone
Clone meta-openembedded layer to sources directory
cd ..
git clone https://github.com/openembedded/meta-openembedded.git
cd meta-openembedded
git checkout kirkstone
Clone meta-virtualization layer to sources directory
cd ..
git clone https://git.yoctoproject.org/git/meta-virtualization
cd meta-virtualization
git checkout kirkstone
Clone meta-lts-mixins layers to source directory
cd ..
git clone https://git.yoctoproject.org/git/meta-lts-mixins
cd meta-lts-mixins
git checkout kirkstone/go
Note : The above layer is required to get the updated go version to be added in the yocto build, since kanto requires go version 1.19 and above.
Add meta-kanto layer to the sources directory
Clone meta-kanto layer to the sources directory
cd ..
git clone https://github.com/eclipse-kanto/meta-kanto.git
cd meta-kanto
git checkout kirkstone
Note : Make sure all the layers cloned are of same yocto version ( kirkstone in this case)
Create Build Directory
After cloning all the required meta layers, move out of source directory to create build directory
cd ../..
source sources/poky/oe-init-build-env
Run the below command to view the layers present in
bblayers.conffilebitbake-layers show-layersNote : Resolve any dependendencies if occured while running bitbake command.
Configure bblayer.conf file
By Default in the bblayer.conf file some of the layers will be added
Add all the layers to the bblayers.conf file with below command
bitbake-layers add-layer /home/path/to/meta/layer/directoryThe following layers should be added in the bblayer.conf file
meta-raspberrypi
meta-openembedded
meta-virtualization
meta-lts-mixins
meta-openembedded/meta-oe
meta-openembedded/meta-python
meta-opemembedded/meta-networking
meta-openembedded/meta-filesystems
meta-kanto
Example to add layers to bblayers.conf file
while adding layers bitbake might have dependencies, add the dependent layers first. Example,
To add meta-kanto layer to bblayer.conf file which is kept at
/home/yocto/sources/meta-kantobitbake-layers add-layers /home/yocto/sources/meta-kantoAfter adding all the required layers in bblayer.conf file, verify again by running the below command
bitbake-layers show-layers
Configure local.conf file
Open local.conf file which is placed at the below location in build directory
vi conf/local.confChange the machine variable in local.conf file to raspberry pi machine
MACHINE ??= "raspberrypi4"Note: Check the sources/meta-raspberrypi/conf/machine for the availabe machines for raspberry pi.
Add required variables in local.conf file as shown and provided in the link below,
https://github.com/eclipse-kanto/meta-kanto# Add the required DISTRO_FEATURES DISTRO_FEATURES:append = " virtualization systemd" # Configure the kernel modules required to be included MACHINE_ESSENTIAL_EXTRA_RRECOMMENDS += "kernel-modules" # System initialization manager setup VIRTUAL-RUNTIME_init_manager = "systemd" DISTRO_FEATURES_BACKFILL_CONSIDERED = "sysvinit" VIRTUAL-RUNTIME_initscripts = "systemd-compat-units" # Add the Eclipse Kanto components IMAGE_INSTALL:append = " mosquitto" IMAGE_INSTALL:append = " suite-connector" IMAGE_INSTALL:append = " aws-connector" IMAGE_INSTALL:append = " azure-connector" IMAGE_INSTALL:append = " software-update" IMAGE_INSTALL:append = " file-upload" IMAGE_INSTALL:append = " file-backup" IMAGE_INSTALL:append = " update-manager" IMAGE_INSTALL:append = " container-management" IMAGE_INSTALL:append = " local-digital-twins"Run bitbake `target-name’ availabe as shown below,
  Common targets are:
  core-image-minimal
  core-image-full-cmdline
  core-image-sato
  core-image-weston
  meta-toolchain
  meta-ide-support
Note : If any build issues comes up, resolve the issue and run the bitbake `target-name’ command again for the build.
Final Build Image Repository Location
After the successful build, the image will be availabe at the below location.
build/tmp/deploy/images/`machine_name`/
Run & Test the image with QEMU (Quick Emulator)
If RaspberryPi device is not availabe, the image can be run and tested on QEMU. Make the below changes to run on QEMU.
In `build/conf/local.conf’ file
Change the machine variable name to relevant qemu arch as shown below by changing the
MACHINEvarilabe from raspberrypi4 to ‘qemux86_64`# You need to select a specific machine to target the build with. There are a selection # of emulated machines available which can boot and run in the QEMU emulator: # #MACHINE ?= "qemuarm" #MACHINE ?= "qemuarm64" #MACHINE ?= "qemux86" #MACHINE ?= "qemux86-64" # This sets the default machine to be qemux86-64 if no other machine is selected: MACHINE ??= "qemuarm64"Run bitbake
target-namecommand by sourcing theoe-init-build-envscriptIn the same build directory run the below command to run qemu
runqemu qemuarm64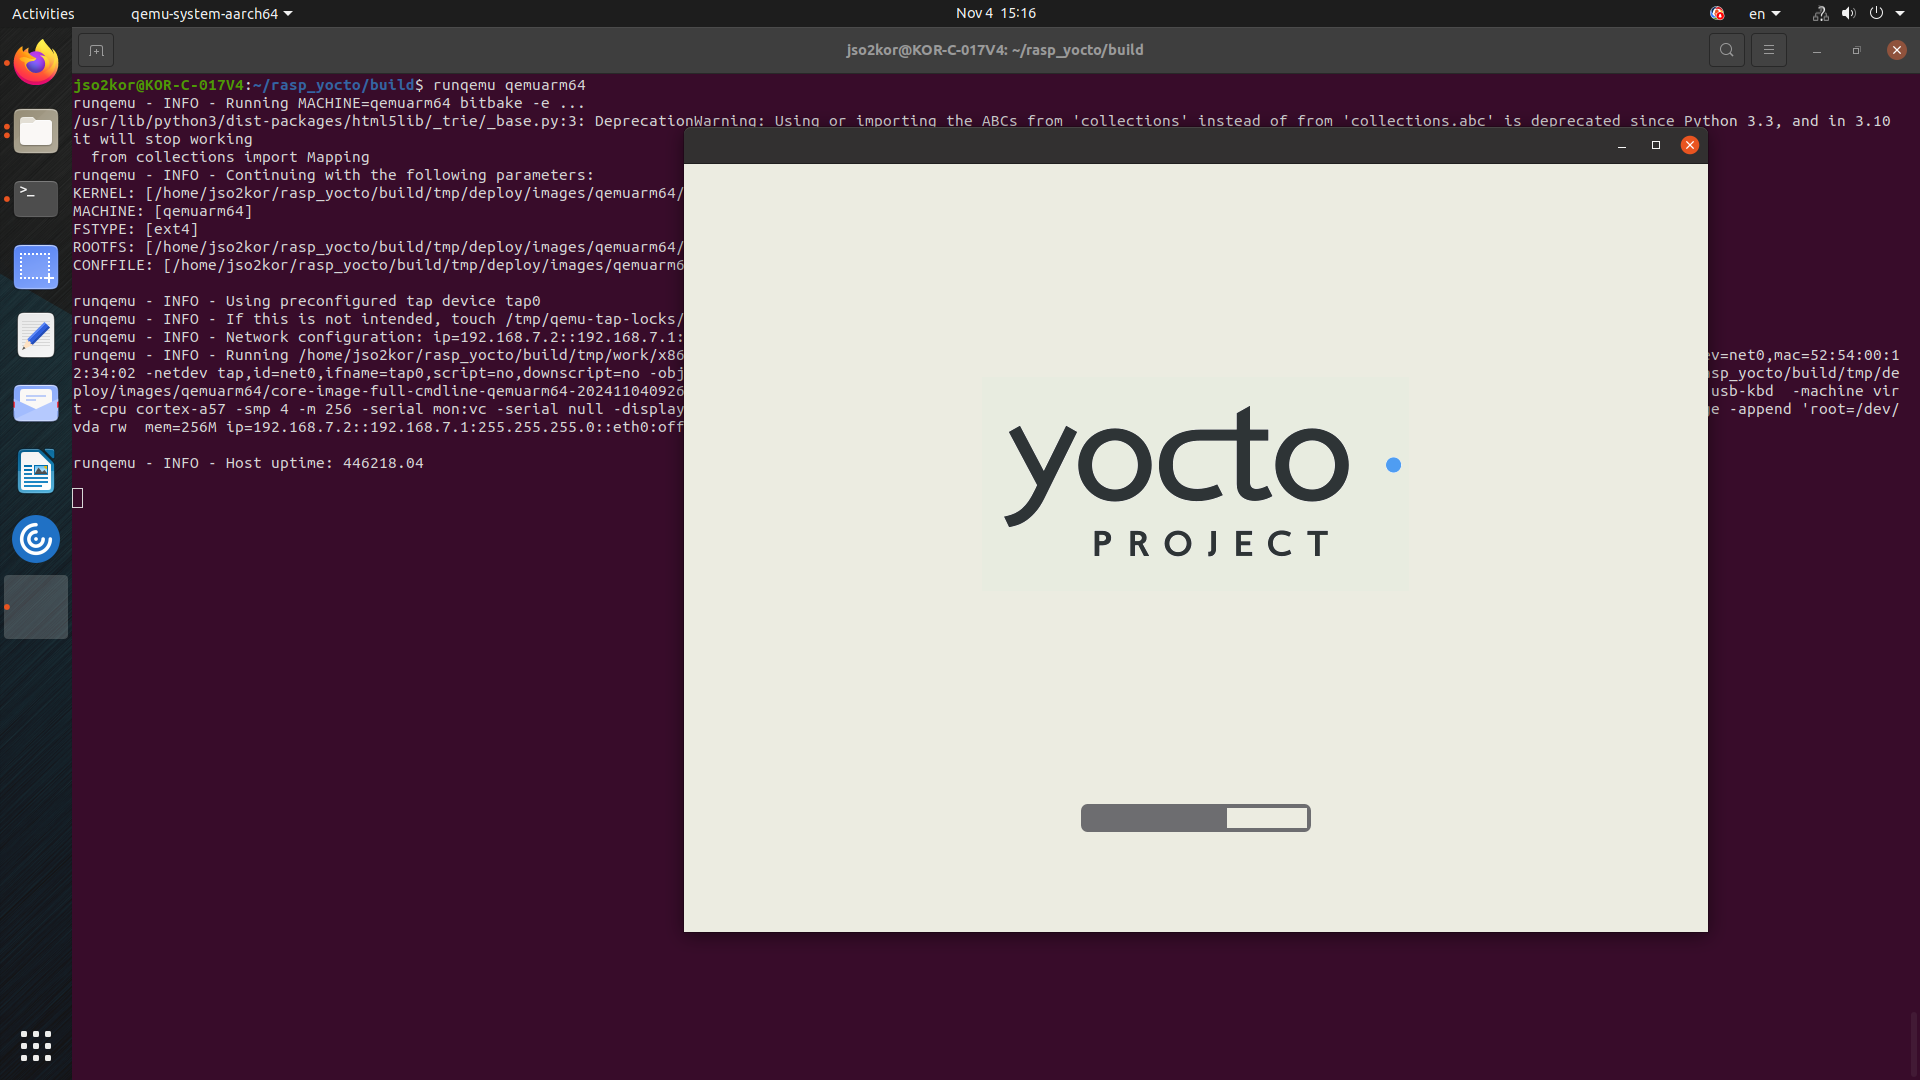
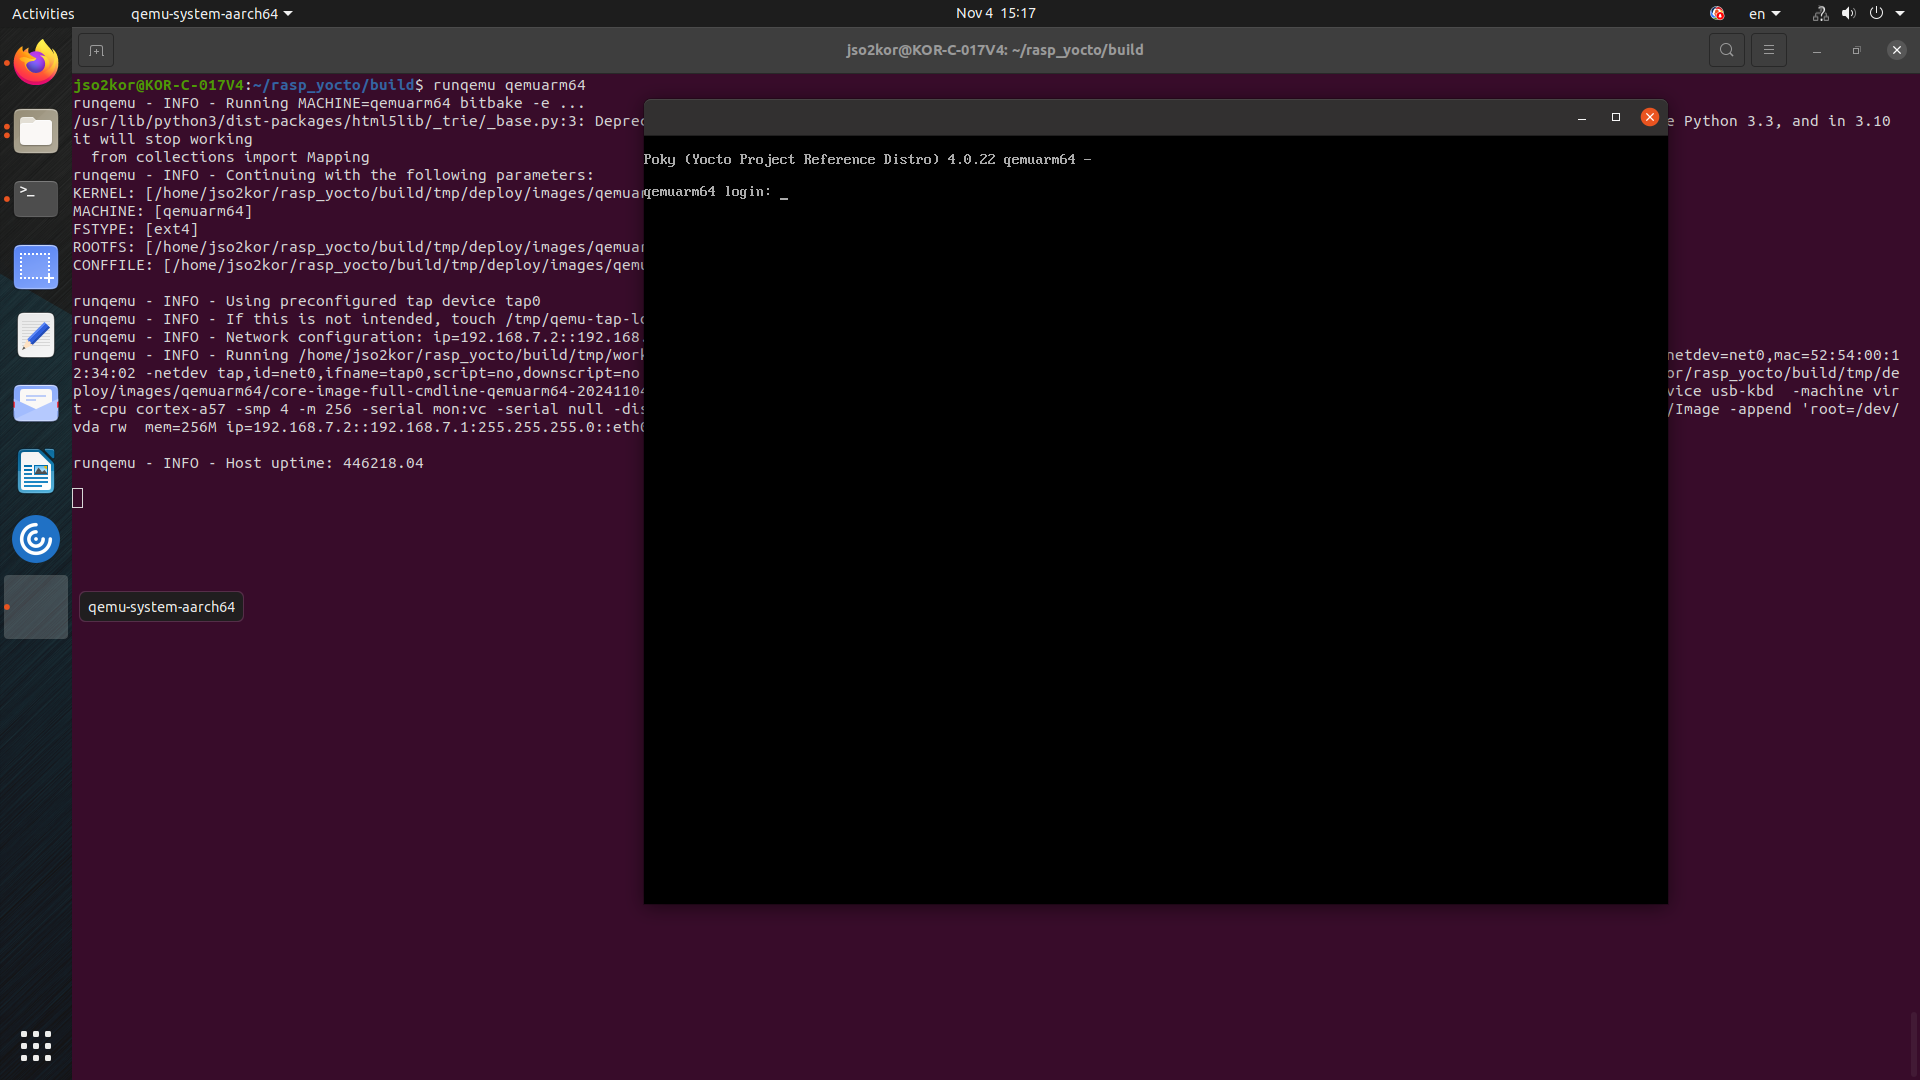
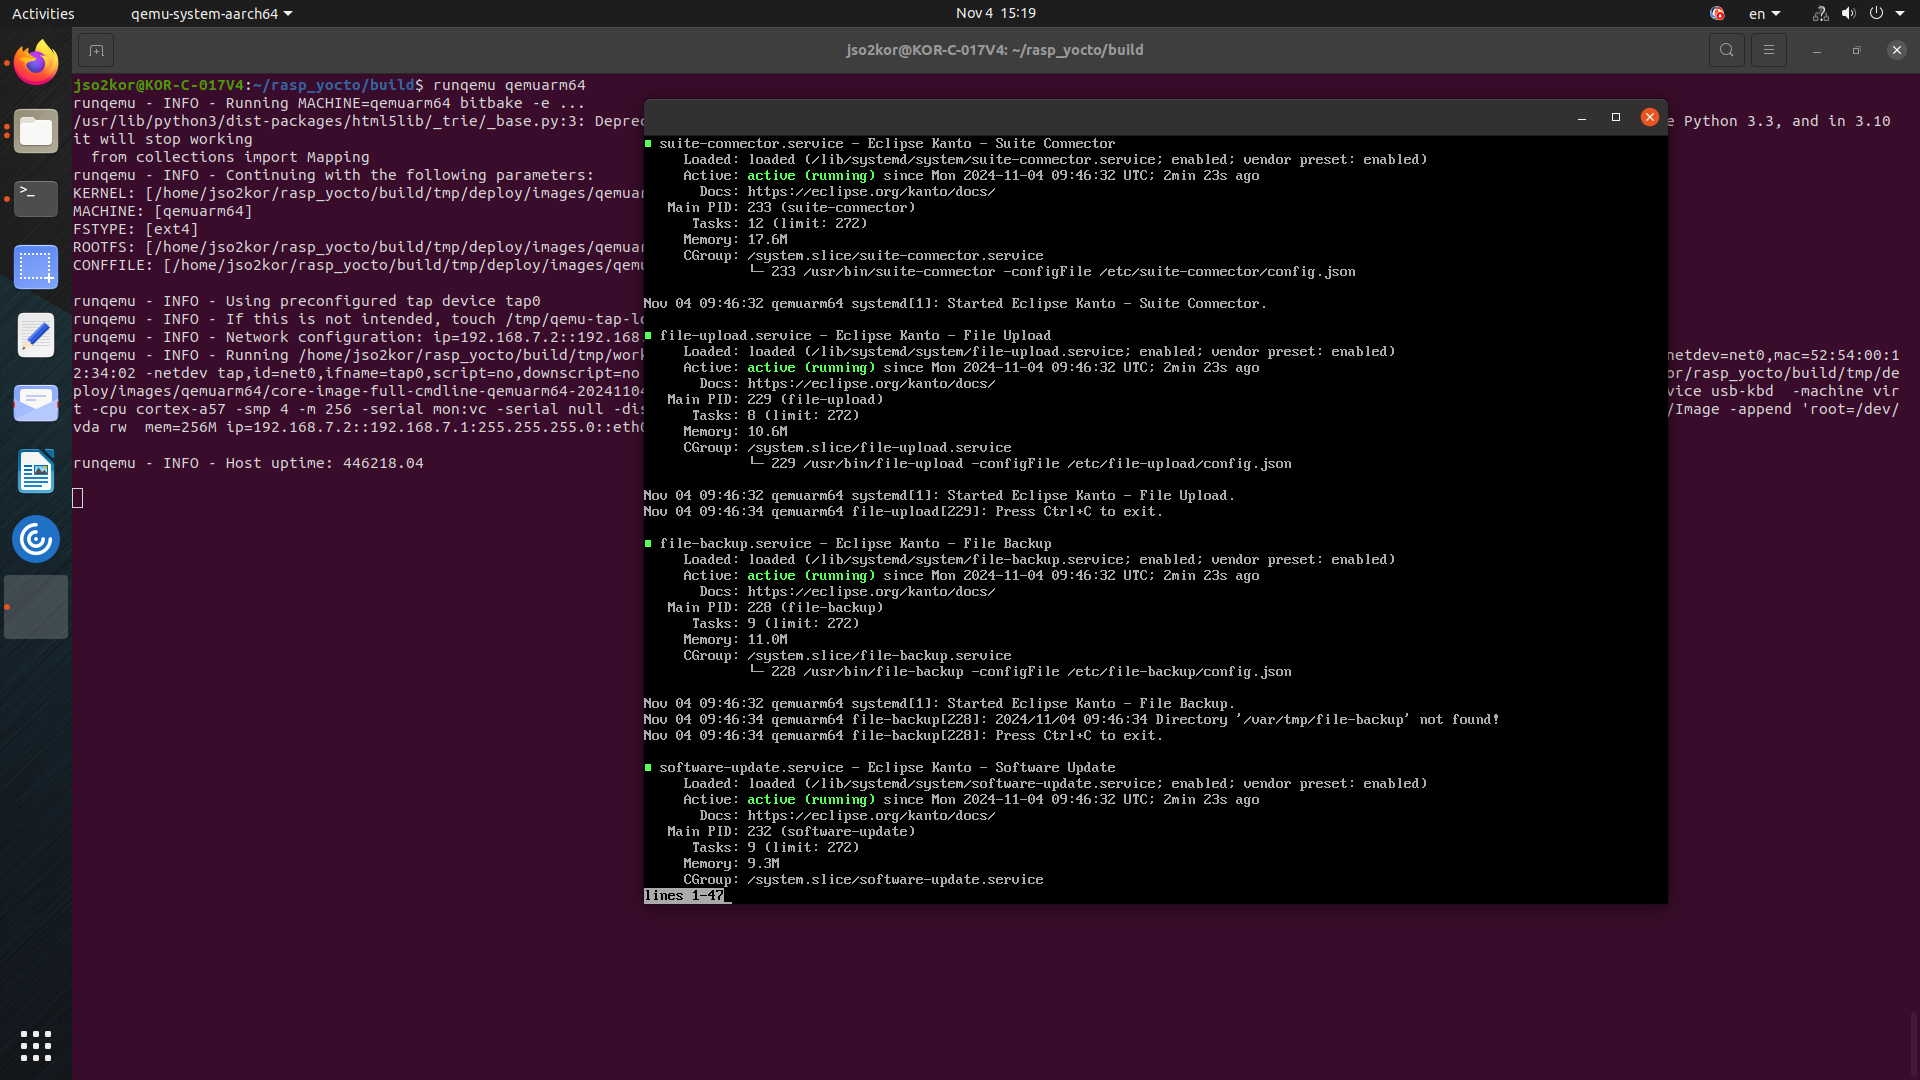
The above command will open a window which boots as “YOCTO PROJECT” and it enters to command line window. Enter login as `root’, and check for kanto components with the below commands.
systemctl status \
suite-connector.service \
container-management.service \
software-update.service \
file-upload.service \
file-backup.service \
system-metrics.service \
kanto-update-manager.service
All listed services must be in an active running state.
Flash the image on Raspberry Pi
The build image will be availabe at
build/tmp/deploy/images/raspberrypi4/Identify the SD Card Device with the below command to find the device name of your SD card
lsblkFlash the image to sd card
sudo dd if=/path/to/image.wic of=/dev/sdX bs=4M status=progressBoot the Raspberry Pi,
Insert the SD card into your Raspberry Pi and power it on. The Pi should boot from the Yocto image.Login to your device and run the below command to verify the kanto components.
systemctl status \
suite-connector.service \
container-management.service \
software-update.service \
file-upload.service \
file-backup.service \
system-metrics.service \
kanto-update-manager.service