Native Install v17
How to install and run SW360 v17.0.0
These instructions worked on Ubuntu 20.04 and has detailed explanations for newcomers.
This is a guide with detailed explanation of how to install and run SW360 natively on you local machine.
It includes installation of all dependencies manually, which will not use docker or other container system during the installation or run.
SW360 is an Open Source project. The SW360 repository and SW360 website repositories are published on GitHub.
1. Overview
1.1 SW360 Portal
A software component catalogue application - designed to work with FOSSology.
SW360 is a server with a REST interface and a Liferay CE portal application to maintain your projects / products and the software components within. It can manage SPDX files for maintaining the license conditions and maintain license information.
This material helps user to install SW360 17.0.0
1.2 Environment
| Package Name | Version |
|---|---|
| Ubuntu | 20.04 |
| Apt | 2.0.2 |
| Wget | 1.20.3 |
| Curl | 7.68.0 |
| Git | 2.25.1 |
| Maven | 3.6.0 |
| OpenJDK | 11.0.5 |
2.Install & Config proxy for Environment
2.1 Apt
2.2 Wget
2.3 Curl
2.4 Git
2.5 Maven
2.6 OpenJDK
2.1 Apt
Create file with name proxy.conf in folder /etc/apt/apt.conf.d
$ sudo gedit /etc/apt/apt.conf.d/proxy.conf
Add the following line few files proxy.conf
    Acquire {
        HTTP::proxy "http://username:password@server:port";
        HTTPS::proxy "http://username:password@server:port";
    }
2.2 Wget
Create file ~/.wgetrc
$ sudo gedit ~/.wgetrc
Add the following line few files ~/.wgetrc
	use_proxy=yes
	  http_proxy=http://username:password@server:port
	  https_proxy=http://username:password@server:port
2.3 Curl
2.3.1 Install Curl
$ sudo apt update$ sudo apt install curl
2.3.2 Config proxy
Create file
~/.curlrc$ sudo gedit ~/.curlrc
Add the following line few files
~/.curlrc
proxy=http://username:password@server:port/
2.4 Git
2.4.1 Install Git
$ sudo apt update$ sudo apt install git
2.4.2 Config proxy
Create file
~/.gitconfig$ sudo gedit ~/.gitconfig
Add the following line few files
~/.gitconfig[http] proxy = http://username:password@server:port sslverify = false [https] proxy = http://username:password@server:port
2.5 Maven
2.5.1 Install Maven
*Go to back Home in Terminal
$ sudo apt update$ sudo apt install maven
2.5.2 Config proxy for Maven
- Create Folder with path
/home/user/.m2
$ mkdir /home/user/.m2
- Create File in Folder
.m2
$ touch /home/user/.m2/settings.xml
Copy the following lines into tag
      <settings>
          <proxies>
              <proxy>

                  <id>optional1</id>

                  <active>true</active>

                  <protocol>http</protocol>

                  <username>username</username>

                  <password>password</password>

                  <host>server</host>

                  <port>port</port>

                  <nonProxyHosts>local.net</nonProxyHosts>

              </proxy>

              <proxy>

                 <id>optional1</id>

                  <active>true</active>

                  <protocol>http</protocol>

                  <username>username</username>

                  <password>password</password>

                  <host>server</host>

                  <port>port</port>

                  <nonProxyHosts>local.net</nonProxyHosts>

              </proxy>
          </proxies>
      </settings>
2.6 OpenJDK 11
- And install OpenJDK 11
$ sudo apt install openjdk-11-jdk
- Check version:
$ java --version- Output:
openjdk version "11.0.15" 2022-04-19 OpenJDK Runtime Environment (build 11.0.15+10-Ubuntu-0ubuntu0.18.04.1) OpenJDK 64-Bit Server VM (build 11.0.15+10-Ubuntu-0ubuntu0.18.04.1, mixed mode, sharing)- Install JDK successfully
3. Native install 17.0.0 (without docker-compose)
The installation consists of some tasks::
3.1 Install A Liferay Community Edition bundled with Tomcat and download dependencies as OSGi modules
3.2 Install Couchdb version 3.2.2
3.3 Install Couchdb Lucene
3.4 Clone Project sw360 with version 17.0.0
3.5 Install Thrift version 16.0
3.6 Compiling and deploying
3.7 Version Management Table
3.1 Install A Liferay Community Edition bundled with Tomcat
Make folder
workin path of work:/home/user$ mkdir work
Download Liferay Portal CE 7.4.3.18 GA18
$ cd work$ wget https://github.com/liferay/liferay-portal/releases/download/7.4.3.18-ga18/liferay-ce-portal-tomcat-7.4.3.18-ga18-20220329092001364.tar.gz -O liferay-ce-portal-tomcat-7.4.3.18-ga18.tar.gz
Extract downloaded file
$ tar -xzf liferay-ce-portal-tomcat-7.4.3.18-ga18.tar.gz
Set Environment for
${LIFERAY_INSTALL}$ export LIFERAY_INSTALL=/opt/liferay-ce-portal-7.4.3.18-ga18
Create
portal-ext.propertiesfile inliferay-ce-portal-7.4.3.18-ga18folderCopy content from https://github.com/eclipse/sw360/blob/sw360-17.0.0-M1/frontend/configuration/portal-ext.properties to portal-ext.properties
Edit
portal-ext.properties: uncomment below lines# default.admin.password=sw360fossy # default.admin.screen.name=setup # default.admin.email.address.prefix=setup # default.admin.first.name=Setup # default.admin.last.name=AdministratorAdd lines to setup Postgres. Change jdbc.default.username, jdbc.default.password
    # Postgres configuration
    jdbc.default.driverClassName=org.postgresql.Driver
    jdbc.default.url=jdbc:postgresql://localhost:5432/lportal
    jdbc.default.username=${postgres_user}
    jdbc.default.password=${postgres_password}
- Add lines to setup passsword policies
    # Passsword policies
    passwords.default.policy.change.required=false
    company.security.send.password.reset.link=false
    company.security.auto.login=false
    company.security.auth.type=emailAddress
    company.security.strangers=false
    company.security.strangers.with.mx=false
    company.security.strangers.verify=false
Remove files in folder
hypersonicwith path:/home/user/work/liferay-ce-portal-7.4.3.18-ga18/data/hypersonic$ rm -rf /home/user/work/liferay-ce-portal-7.4.3.18-ga18/data/hypersonic/*
Move folder
liferay-ce-portal-7.4.3.18-ga18to/opt$ sudo mv liferay-ce-portal-7.4.3.18-ga18 /opt
3.2 Install Database
3.2.1 Install Couch DB
- To install from aptitute type:
$ sudo apt update
$ sudo apt install -y couchdb
You may refer to the bottom Native Installation 14 version CouchDB manual configuration for setting credentials.
After, run CouchDb service, check if it’s working:
$ sudo systemctl start couchdb.service
- Check if CouchDB is responding:
$ curl localhost:5984
- This should return json containing version information
- You can use “start/stop/status/restart” command with systemctl for controlling CouchDB service.
Install Couchdb Lucene
SW360 uses for searching the contents of the couchdb databases a lucene-based server named couchdb-lucene
Run command download Couchdb Lucene
wget --no-check-certificate https://github.com/rnewson/couchdb-lucene/archive/v2.1.0.tar.gz -O couchdb-lucene.tar.gz
Note extract couchdb-lucene to folder
workwith path of work:/home/user/worktar -xzf couchdb-lucene.tar.gz
Run command:
cd couchdb-lucene-2.1.0sed -i "s/allowLeadingWildcard=false/allowLeadingWildcard=true/" ./src/main/resources/couchdb-lucene.inised -i "s/localhost:5984/admin:password@localhost:5984/" ./src/main/resources/couchdb-lucene.iniwget https://raw.githubusercontent.com/sw360/sw360vagrant/master/shared/couchdb-lucene.patchpatch -p1 < couchdb-lucene.patchmvn clean install war:warcp target/couchdb-lucene-*.war /opt/liferay-ce-portal-7.4.3.18-ga18/tomcat-9.0.56/webapps/couchdb-lucene.war
3.2.2 Install PostgreSQL
- Install PostgerSQL manually, you can install through “apt install” too:
$ sudo apt install zlib1g-dev -y
$ sudo apt install libreadline-dev -y
$ wget https://download.postgresql.org/pub/source/v10.14/postgresql-10.14.tar.gz
$ tar -xvf postgresql-10.14.tar.gz
$ cd postgresql-10.14/
$ mkdir -p  /PATH_TO/sw360postgres
$ ./configure -prefix=/PATH_TO/sw360postgres
$ make
$ sudo make install
- Set the paths for Postgres in the .bashrc otherwise you have to export them each time. Use same procedure as before in 3rd step.
$ vim ~/.bashrc
- Got to the end of the .bashrc file and add following lines, make sure to add correct paths of previously configured sw360postgres. Here $HOME is the absolute path of your user, such as “/home/username”:
$ export PATH=$HOME/sw360postgres/bin:$PATH
$ export PGDATA=$HOME/sw360postgres/data
$ export LD_LIBRARY_PATH=$HOME/sw360postgres/lib
$ export PGPORT=5432
- Check if paths have been set, result must be the absolute paths:
$ echo $PATH
$ echo $PGDATA
$ echo $LD_LIBRARY_PATH
$ echo $PGPORT
- After paths are set, postgres service can be run:
$  cd /PATH_TO/sw360postgres/bin
$ ./initdb --encoding=UTF8 --no-locale
$ ./pg_ctl start
- You will see that the server has started.
- Note: If you installed through “apt install” then start the postgres service by following command, where after @ comes the installed version, if postgres isn’t running you won’t be able to connect to the server, and the error message is not explaining well that server isn’t actually running at the moment:
sudo systemctl status postgresql@12-main.service
sudo systemctl start postgresql@12-main.service
- Postgres will create an user with username ${ubuntu_user} (username login to ubuntu)
- Use theses command to change password of user ${ubuntu_user} in postgres sql.
$ psql postgres
postgres=# \du
postgres=# create database lportal;
postgres=# ALTER USER ${ubuntu_user} WITH PASSWORD 'sw360fossy';
postgres=# ALTER ROLE ${ubuntu_user} with superuser;
postgres=# \q
- Connect to postgres shell, and check users information
$ psql -d lportal
# \du
# \dt
# \l
3.3 Install CVE-Search
- Follow these detailed instructions:
[https://github.com/cve-search/cve-search/blob/master/docs/source/getting_started/installation.rst]
- To connect it to SW360, see following instructions:
https://www.eclipse.org/sw360/docs/deployment/deploy-cve-search/
Notes:
- In the instruction be careful with setting apt link for mongodb, if somehow it destroys your “sudo apt update” command, go to “/etc/apt/sources.list” file and comment out the broken line, that’s probably the one you lately added at the end of the file. This happens because some PPA are outdated but remain in the instructions.
3.4 Clone sw360 with version 17.0.0
Clone sw360 source code to folder
workwith path:/home/user/work$ git clone https://github.com/eclipse/sw360
Checkout to tag 17.0.0 version
$ cd sw360$ git checkout sw360-17.0.0-M1
export path to repository sw360
$ export SW360_REPOSITORY=/home/user/work/sw360
3.5 Install Thrift version 0.16
For thrift, we need version 0.16. The installation script in Path:
${SW360_REPOSITORY}/scripts/install-thrift.shRun command to install libraries:
$ sudo apt-get install -y clang-tidy$ sudo apt-get install flex$ sudo apt-get install -y clang-tools$ sudo apt-get install bison$ sudo apt-get install cmake
Run command:
$ chmod +x install-thrift.sh$ sudo ./install-thrift.sh
In case there is thrift in the package management of the OS you re running on, just make sure, you have version 0.16
Check version thrift
$ thrift --versionOutput:
Thrift version 0.16.0- Install Thrift successfully
3.6 Config properties files with Sw360 (sw360 17.0.0)
Create folder
sw360in path/etc/sudo mkdir sw360
Create 2 folder
authorizationandrestin path/etc/sw360sudo mkdir authorizationsudo mkdir rest
Create file
application.ymlin path/etc/sw360/authorizatonwith content:
#
# Copyright Siemens AG, 2017, 2019. Part of the SW360 Portal Project.
#
# This program and the accompanying materials are made
# available under the terms of the Eclipse Public License 2.0
# which is available at https://www.eclipse.org/legal/epl-2.0/
#
# SPDX-License-Identifier: EPL-2.0
#

# Port to open in standalone mode
server:
  port: 8090

# Connection to the couch databases. Will be used to store client credentials
couchdb:
  url: http://localhost:5984
  database: sw360oauthclients
  # if your couchdb does not use authentication, pls just don't use the settings for username and password
  username: admin
  password: password

jwt:
  secretkey: sw360SecretKey

spring:
  jackson:
    serialization:
      indent_output: true

# Common SW360 properties
sw360:
  # The url of the Liferay instance
  sw360-portal-server-url: ${SW360_PORTAL_SERVER_URL:http://127.0.0.1:8080}
  # The id of the company in Liferay that sw360 is run for
  sw360-liferay-company-id: ${SW360_LIFERAY_COMPANY_ID:20101}
  # Allowed origins that should be set in the header
  cors:
    allowed-origin: ${SW360_CORS_ALLOWED_ORIGIN:#{null}}

security:
  # Configuration for enabling authorization via headers, e.g. when using SSO
  # in combination with a reverse proxy server
  customheader:
    headername:
      # You have to enable authorization by headers explicitly here
      enabled: false
      # Attention: please make sure that the proxy is removing there headers
      # if they are coming from anywhere else then the authentication server
      intermediateauthstore: custom-header-auth-marker
      email: authenticated-email
      extid: authenticated-extid
      # also available - at least in saml pre auth - are "givenname", "surname" and "department"

  oauth2:
    resource:
      id: sw360-REST-API
- Create file
application.ymlin path/etc/sw360/restwith content:
#
# Copyright Siemens AG, 2017. Part of the SW360 Portal Project.
# Copyright Bosch.IO GmbH 2020
#
# This program and the accompanying materials are made
# available under the terms of the Eclipse Public License 2.0
# which is available at https://www.eclipse.org/legal/epl-2.0/
#
# SPDX-License-Identifier: EPL-2.0
#

server:
  port: 8091

management:
  endpoints:
    enabled-by-default: false
    web:
      base-path:
  endpoint:
    health:
      enabled: true
      show-details: always
    info:
      enabled: true
    web:
      base-path: /

spring:
  servlet:
    multipart:
      max-file-size: 500MB
      max-request-size: 600MB

# logging:
#   level:
#     org.springframework.web: DEBUG

security:
  oauth2:
    resource:
      id: sw360-REST-API
      jwt:
        keyValue: |
          -----BEGIN PUBLIC KEY-----
          MIIBIjANBgkqhkiG9w0BAQEFAAOCAQ8AMIIBCgKCAQEApz8Cr1o5yHMv/FUdF5uy
          VptilqdWtNvw5S6Tr4IaQ4XR9QPt8nlRsjOngfG4QCcKMBWJISldFg8PlJWUBeV+
          6TwQUidxokl2GbO6/+QA+lz1a5Ei1Y1pcnvFeRb2pdYlH3Yg6fXMxS6QwDLk27pZ
          5xbpSDIGISDesyaIMvwaKdhAbFW/tTb/oJY7rCPvmYLT80kJzilijJ/W01jMMSHg
          9Yi5cCt1eU/s78co+pxHzwNXO0Ul4iRpo/CXprQCsSIsdWkJTo6btal1xzd292Da
          d+9xq499JEsNbcqLfCq8DBQ7CEz6aJjMvPkvZiCrFIGxC/Gqmw35DQ4688rbkKSJ
          PQIDAQAB
          -----END PUBLIC KEY-----

sw360:
  thrift-server-url: ${SW360_THRIFT_SERVER_URL:http://localhost:8080}
  test-user-id: admin@sw360.org
  test-user-password: sw360-password
  couchdb-url: ${SW360_COUCHDB_URL:http://localhost:5984}
  cors:
    allowed-origin: ${SW360_CORS_ALLOWED_ORIGIN:#{null}}
- Create file
couchdb.propertiesin path/etc/sw360with content:
#
# Copyright Siemens AG, 2020. Part of the SW360 Portal Project.
#
# This program and the accompanying materials are made
# available under the terms of the Eclipse Public License 2.0
# which is available at https://www.eclipse.org/legal/epl-2.0/
#
# SPDX-License-Identifier: EPL-2.0
#

couchdb.url = http://localhost:5984
couchdb.user = admin
couchdb.password = password
couchdb.database = sw360db
couchdb.usersdb = sw360users
couchdb.attachments = sw360attachments
lucenesearch.limit = 10000
- Create file
sw360.propertiesand/etc/sw360with content:
# Copyright Siemens AG, 2016-2017. Part of the SW360 Portal Project.
#
# This program and the accompanying materials are made
# available under the terms of the Eclipse Public License 2.0
# which is available at https://www.eclipse.org/legal/epl-2.0/
#
# SPDX-License-Identifier: EPL-2.0
#

# common property file for the backend services
backend.url= http://localhost:8080

licenseinfo.spdxparser.use-license-info-from-files=true
mainline.state.enabled.for.user=false

# settings for the mail utility:
# if host is not set, e-mailing is disabled
MailUtil_host=
MailUtil_from=__No_Reply__@sw360.org
MailUtil_port=25
MailUtil_enableStarttls=
MailUtil_enableSsl=
MailUtil_isAuthenticationNecessary=
MailUtil_login=
MailUtil_password=
MailUtil_enableDebug=
MailUtil_supportMailAddress=

# text patterns for mail utility
defaultBegin = \
*** This is an automatically generated email, please do not reply. ***\n\n\
Dear SW360-user,\n\n
defaultEnd = \
With best regards,\n\
SW360-support
unsubscribeNoticeBefore =\n\n*** If you do not wish to receive mails from SW360, please notify:
unsubscribeNoticeAfter =. ***

subjectForNewModerationRequest= New moderation request
subjectForUpdateModerationRequest= Update on moderation request
subjectForAcceptedModerationRequest= Your moderation request has been accepted
subjectForDeclinedModerationRequest= Your moderation request has been declined
subjectForDeclinedUserModerationRequest= Your request for a SW360 user account has been declined
subjectForNewComponent= New component created
subjectForUpdateComponent= Component updated
subjectForNewRelease= New release created
subjectForUpdateRelease= Release updated
subjectForNewProject= New project created
subjectForUpdateProject= Project updated
subjectForNewClearingRequest= New clearing request <%s> for Project <%s>
subjectForClearingRequestComment= New comment added in clearing request <%s> for Project <%s>
subjectForUpdatedClearingRequest= Your clearing request <%s> has been updated for Project <%s>
subjectForClosedClearingRequest= Your clearing request <%s> has been closed for Project <%s>
subjectForRejectedClearingRequest= Your clearing request <%s> has been rejected for Project <%s>
subjectForUpdatedProjectWithClearingRequest= Project <%s> with clearing request <%s> updated

textForNewModerationRequest= a new moderation request has been added to your SW360-account.\n\n
textForUpdateModerationRequest= \
one of the moderation requests previously added to your \
SW360-account has been updated.\n\n
textForAcceptedModerationRequest= your moderation request to change the %s %s has been accepted by one of the moderators.\n\n
textForDeclinedModerationRequest= your moderation request to change the %s %s has been declined by one of the moderators.\n\n
textForDeclinedUserModerationRequest= your request for a SW360 user account has been declined by one of the administrators.\n\n
textForNewComponent= a new component %s, in which you take part, has been created.\n\n
textForUpdateComponent= the component %s, in which you take part, has been updated.\n\n
textForNewRelease= a new release %s %s, in which you take part, has been created.\n\n
textForUpdateRelease= the release %s %s, in which you take part, has been updated.\n\n
textForNewProject= a new project %s %s, in which you take part, has been created.\n\n
textForUpdateProject= the project %s %s, in which you take part, has been updated.\n\n
textForClosedClearingRequest= your clearing request with id: %s for the project %s has been closed by the clearing team.\n\n
textForRejectedClearingRequest= your clearing request with id: %s for the project %s has been rejected by the clearing team.\n\n
#attachment.store.file.system.location=/opt/sw360tempattachments
#enable.attachment.store.to.file.system=false
#attachment.store.file.system.permission=rwx------
#attachemnt.delete.no.of.days=30

#Uncomment the below file location if the log4j2.xml file is placed inside etc/sw360 folder.
#sw360changelog.config.file.location=/etc/sw360/log4j2.xml
enable.sw360.change.log=false
sw360changelog.output.path=sw360changelog/sw360changelog
- Configure the sw360ChangeLog path
1. Create log4j2.xml file
- Based on log4j2.xml file from https://github.com/eclipse/sw360/blob/main/build-configuration/resources/log4j2.xml, update the content as below, then place this file to etc/sw360 folder.
<?xml version="1.0" encoding="UTF-8"?>
<!--
~ Copyright (c) Bosch.IO GmbH 2020.
~
~ All rights reserved. This program and the accompanying materials
~ are made available under the terms of the Eclipse Public License v2.0
~ which accompanies this distribution, and is available at
~ http://www.eclipse.org/legal/epl-v20.html
~
~ SPDX-License-Identifier: EPL-2.0
-->
<Configuration status="WARN">
    <Appenders>
        <Console name="Console" target="SYSTEM_OUT">
            <PatternLayout pattern="%d{yyyy-MM-dd HH:mm:ss} %-5p %c{1}:%L - %m%n"/>
        </Console>
        <!-- environment variables can be set in the format of "$ {env: LOG_ROOT}" -->
        <RollingFile name="ChangeLogFile" fileName="${env:FILE_PATH}/sw360changelog.log"
                filePattern="${env:FILE_PATH}/sw360changelog-%d{yyyy-MM-dd}-%i.log" >
            <PatternLayout pattern="%m%n"/>
            <Policies>
                <SizeBasedTriggeringPolicy size="10MB" />
            </Policies>
            <DefaultRolloverStrategy max="10"/>
        </RollingFile>
    </Appenders>
    <Loggers>
        <Logger name="org.eclipse.sw360" level="info"/>
         <Logger name="sw360changelog" level="debug" >
            <AppenderRef ref="ChangeLogFile" />
        </Logger>
        <Logger name="org.eclipse.sw360" level="debug" additivity="false">
            <AppenderRef ref="Console"/>
        </Logger>
        <Root level="warn">
            <AppenderRef ref="ChangeLogFile"/>
        </Root>
    </Loggers>
</Configuration>
Set the environment variable for the changelog directory (
${env:FILE_PATH}/sw360changelog.log)Create Folder
sw360changeloginvar/log/:$ sudo mkdir sw360changelog
If
/var/log/sw360changelogfolder requires permission, set permission for this folder:$ sudo chown -R $USER:$USER /var/log/sw360changelog
$ export FILE_PATH=/var/log/sw360changelog
NOTE: I suggest the path ${env:FILE_PATH} to use LIFERAY_INSTALL env variable
2. Enable changelog config
Add the following lines to the sw360.properties file (or uncomment if they are existing)
sw360changelog.config.file.location=/etc/sw360/log4j2.xmlenable.sw360.change.log=true
3. Compile and deploy
Set
sw360.liferay.company.id = 20099insw360.propertiesfileSet the environment variable for the LIFERAY_INSTALL directory
$ export LIFERAY_INSTALL=/opt/liferay-ce-portal-7.4.3.18-ga18
Note: Should add -DskipTests when building sw360 to avoid test data write to log file
To clean everything and install without running the tests
$ mvn clean install -DskipTests
For deployment, run the command
$ cd /home/user/work/sw360$ mvn package -P deploy -Dbase.deploy.dir=. -Dliferay.deploy.dir=${LIFERAY_INSTALL}/deploy -Dbackend.deploy.dir=${LIFERAY_INSTALL}/tomcat-9.0.56/webapps -Drest.deploy.dir=${LIFERAY_INSTALL}/tomcat-9.0.56/webapps -DskipTests
4. Start and configure Liferay
Set the environment variable for the LIFERAY_INSTALL directory
$ export LIFERAY_INSTALL=/opt/liferay-ce-portal-7.4.3.18-ga18
Start liferay
$ ${LIFERAY_INSTALL}/tomcat-9.0.56/bin/startup.sh
Log
$ tail -f ${LIFERAY_INSTALL}/tomcat-9.0.56/logs/*
SW360 URL:
https://localhost:8080
5. How to check the logs
- Edit (update) a project, component, or release in SW360.
- Then check the logs in
${FILE_PATH}/sw360changelog/sw360changelog.logfile \
3.7 Compile and deploy
- Start Database
- Turn on the CouchDB and Postgres services
$ sudo systemctl start couchdb.service
$ sudo systemctl start postgres@@12-main.service
- Check if both are running:
$ sudo systemctl status couchdb.service
$ sudo systemctl status postgres@@12-main.service
- You should be able to see something like this:
... systemd[1]: Started PostgreSQL Cluster 12-main.
...
... halt systemd[1]: Started Apache CouchDB.
install python and pip
$ sudo apt-get install python3 -y$ sudo -E apt-get install python3-pip -y
install mkdocs
- Without proxy:
$ sudo -E pip3 install mkdocs$ sudo -E pip3 install mkdocs-material
- Via proxy:
$ sudo -E pip3 install --proxy="http://username:password@hostname:port" mkdocs$ sudo -E pip3 install --proxy="http://username:password@hostname:port" mkdocs-material
- Without proxy:
Set Environment for
${LIFERAY_INSTALL}$ cd /home/user/work/sw360$ export LIFERAY_INSTALL=/opt/liferay-ce-portal-7.4.3.18-ga18
To clean everything and install without running the tests
$ mvn clean install -DskipTests
For deployment run the command
mvn clean package -P deploy -Dbase.deploy.dir=. -Dliferay.deploy.dir=${LIFERAY_INSTALL}/deploy -Dbackend.deploy.dir=${LIFERAY_INSTALL}/tomcat-9.0.56/webapps -Drest.deploy.dir=${LIFERAY_INSTALL}/tomcat-9.0.56/webapps -Dtest=org/eclipse/sw360/rest/resourceserver/restdocs/* -Dhelp-docs=true -Dsurefire.failIfNoSpecifiedTests=false
3.7.1 Start and Configure Liferay
Set Environment for
${LIFERAY_INSTALL}$ export LIFERAY_INSTALL=/opt/liferay-ce-portal-7.4.3.18-ga18
After run command “mvn clean install -DskipTests” above, copy dependency in folder
/home/user/work/sw360/utils/jarsto${LIFERAY_INSTALL}/osgi/modules$ cd /home/user/work/sw360/utils/jars$ sudo cp *.jar /opt/liferay-ce-portal-7.4.3.18-ga18/osgi/modules/
We also suggest you change the environment settings (frontend/configuration/setenv.sh) to avoid the lack of memory before making and building SW360.
$ sudo rm -rf ${LIFERAY_INSTALL}/tomcat-9.0.56/bin/setenv.sh$ sudo cp /home/user/work/sw360/frontend/configuration/setenv.sh ${LIFERAY_INSTALL}/tomcat-9.0.56/bin/
Start liferay
$ ${LIFERAY_INSTALL}/tomcat-9.0.56/bin/startup.sh
Log
$ tail -f ${LIFERAY_INSTALL}/tomcat-9.0.56/logs/catalina.out
Url SW360 :
https://localhost:8080
3.7.2 Configure Liferay Portal
- Can follow the steps in the following link https://www.eclipse.org/sw360/docs/deployment/legacy/deploy-liferay7.3 or follow these steps:
Import users
- Open the panel on the left side by clicking the button on the top left.
- Click on
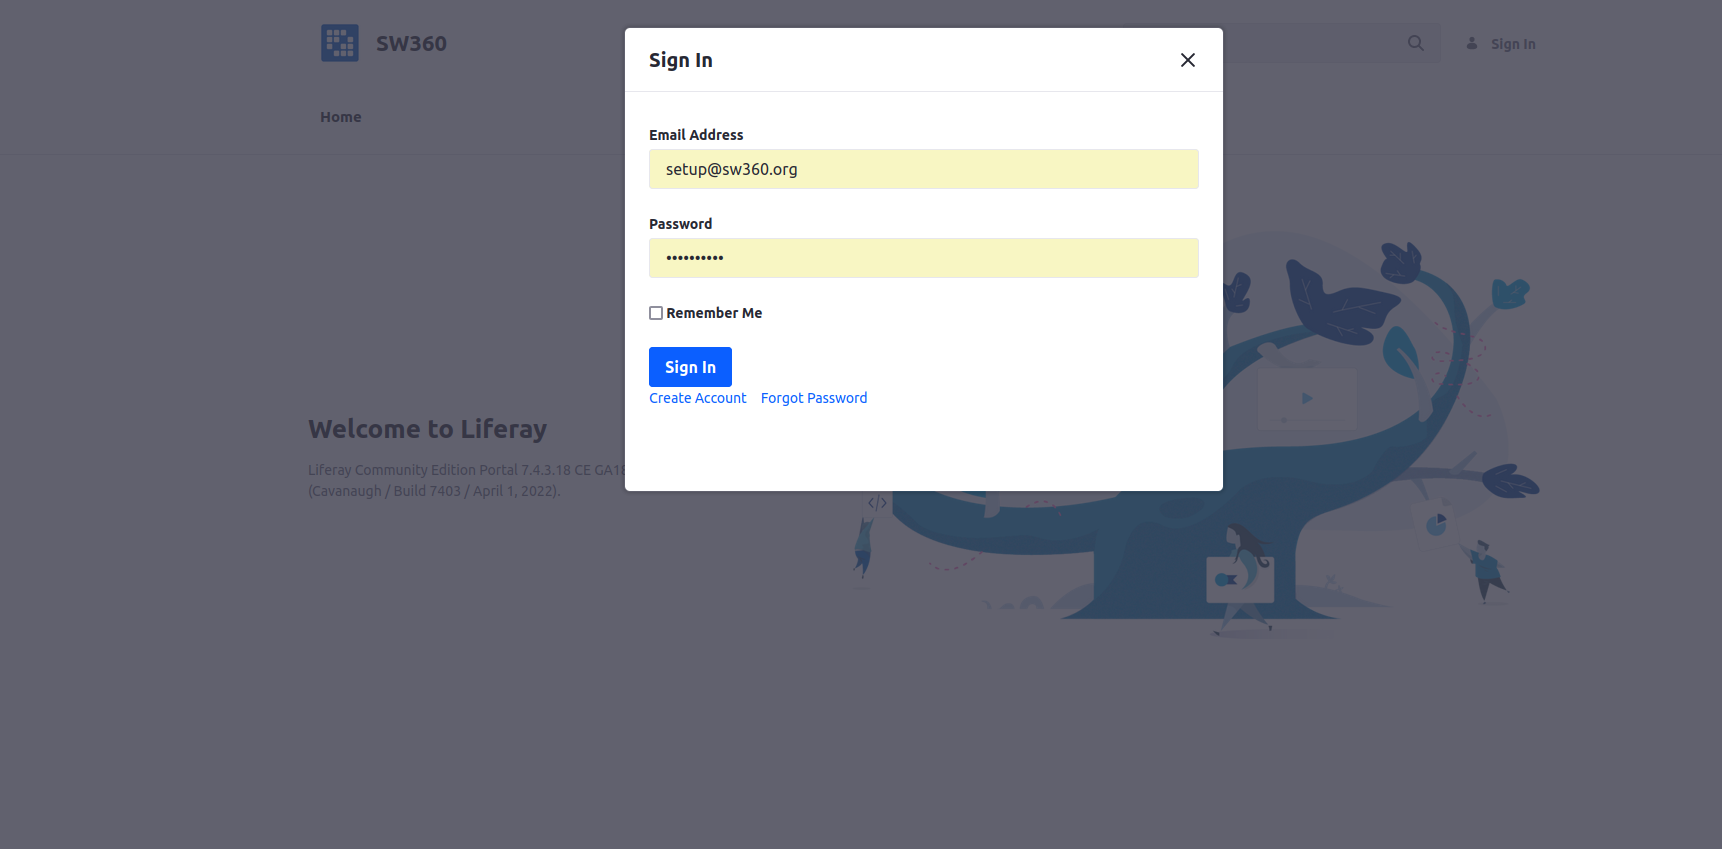
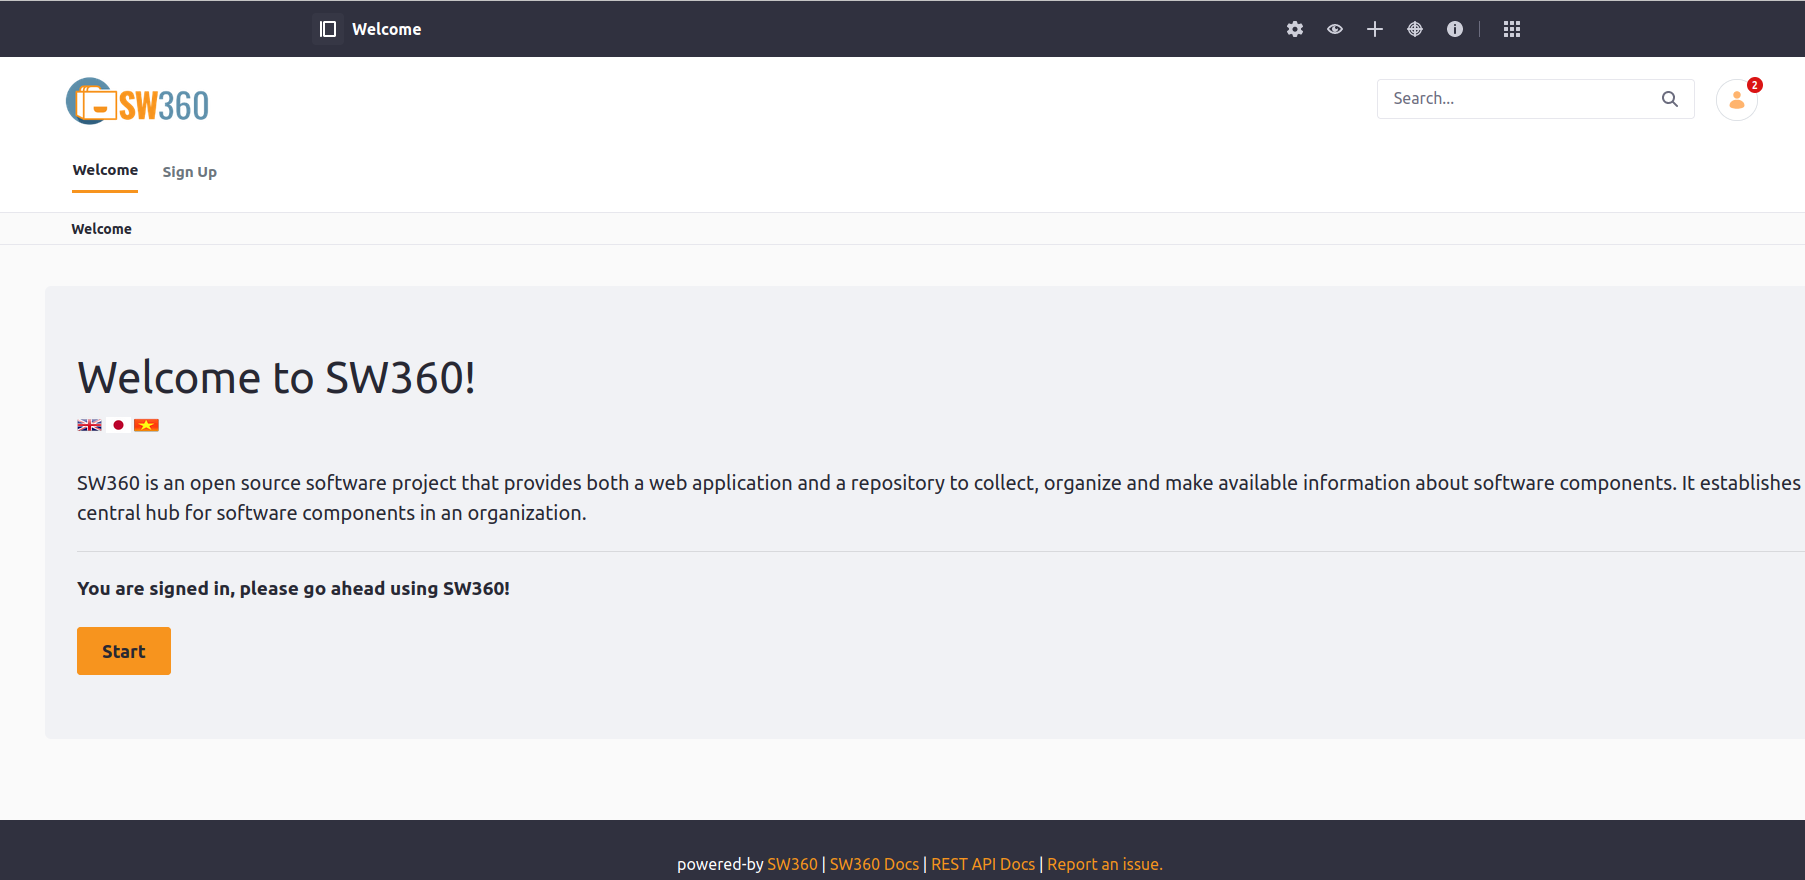
SW360on the top right to go to the homepage. - Click on
Startinside the “Welcome” section. - Go to
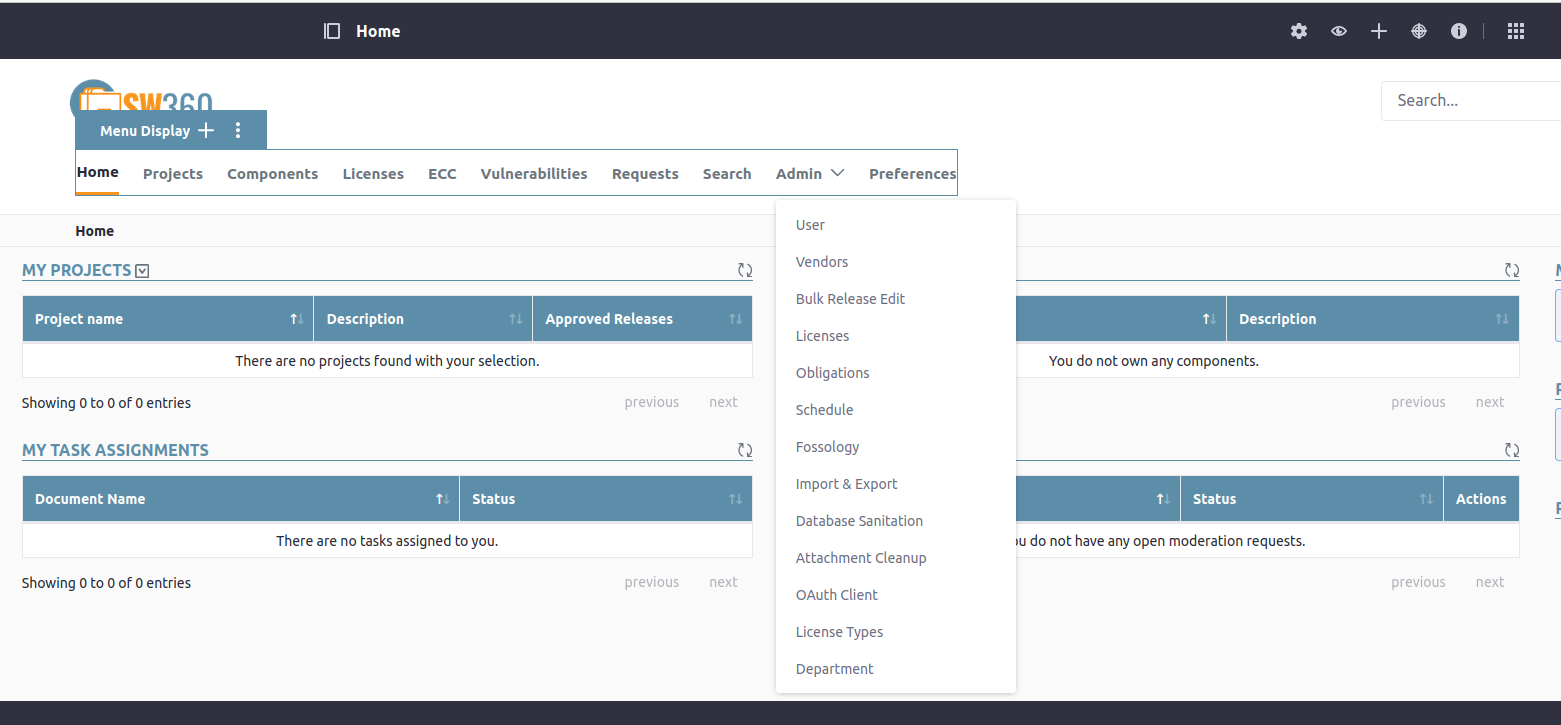
Admin->User(URL:/group/guest/users). - Scroll down to section
UPLOAD USERS, select a user file from the very beginning and clickUpload Userson the right side. A user file can be found here in the sw360vagrant project * Download:$ wget https://github.com/sw360/sw360vagrant/blob/master/shared/test_users_with_passwords_12345.csv
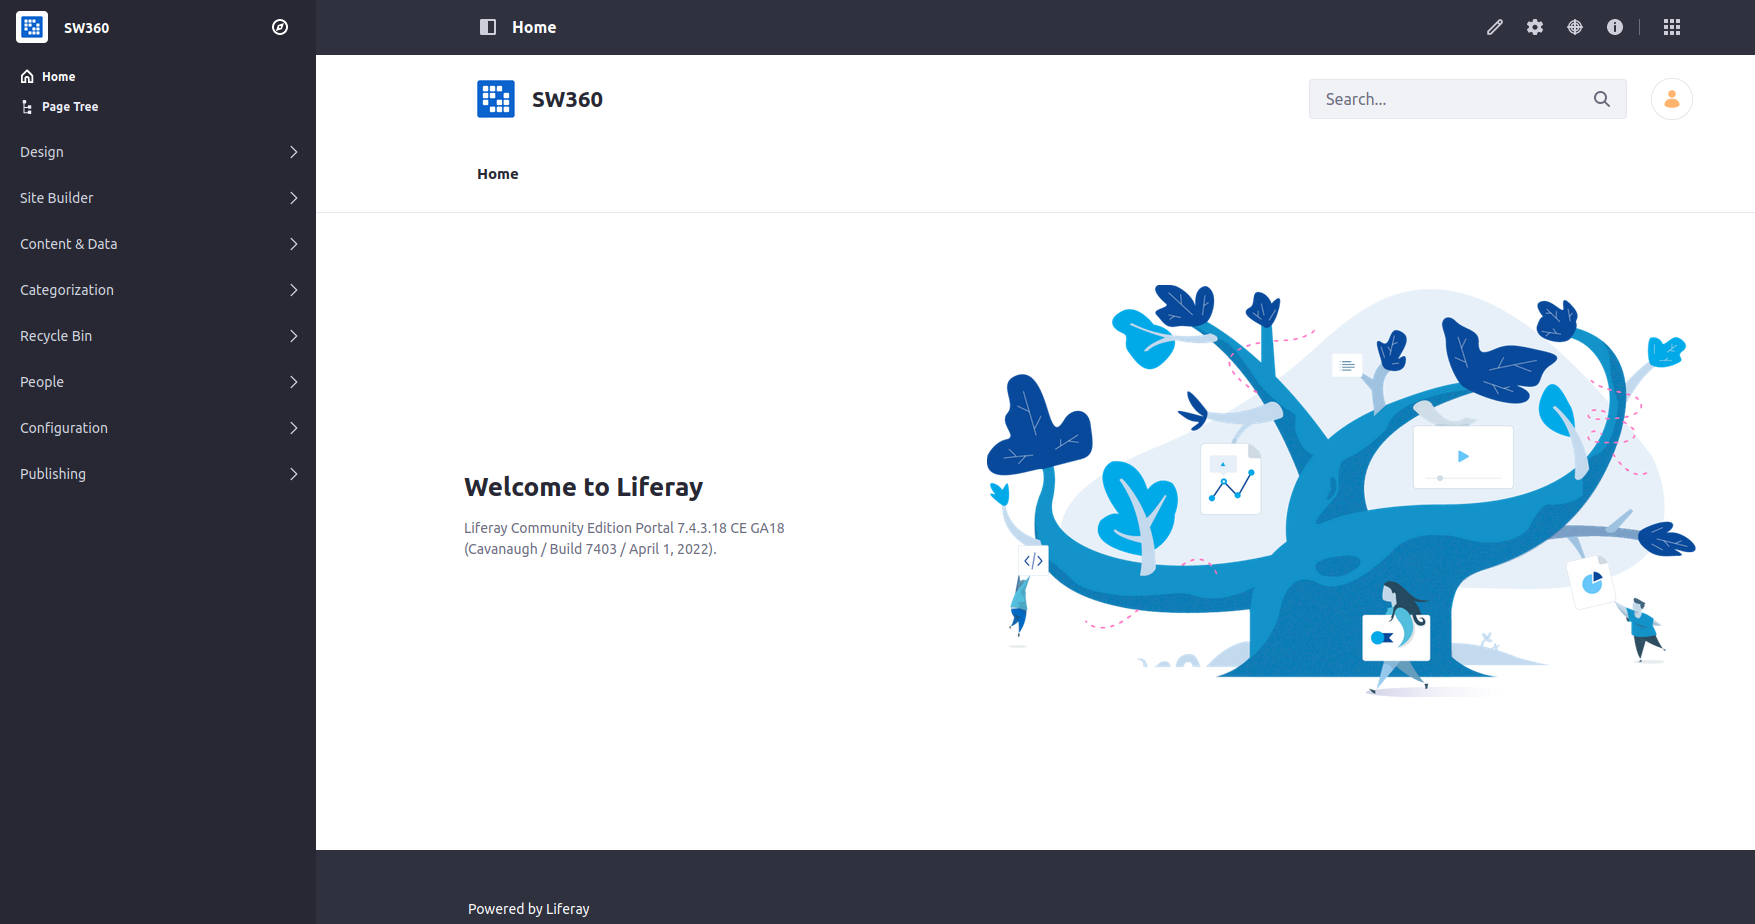
Setup liferay:
After successful , Then if you open the server with the URL https://localhost:8080/ the following screen should appear:
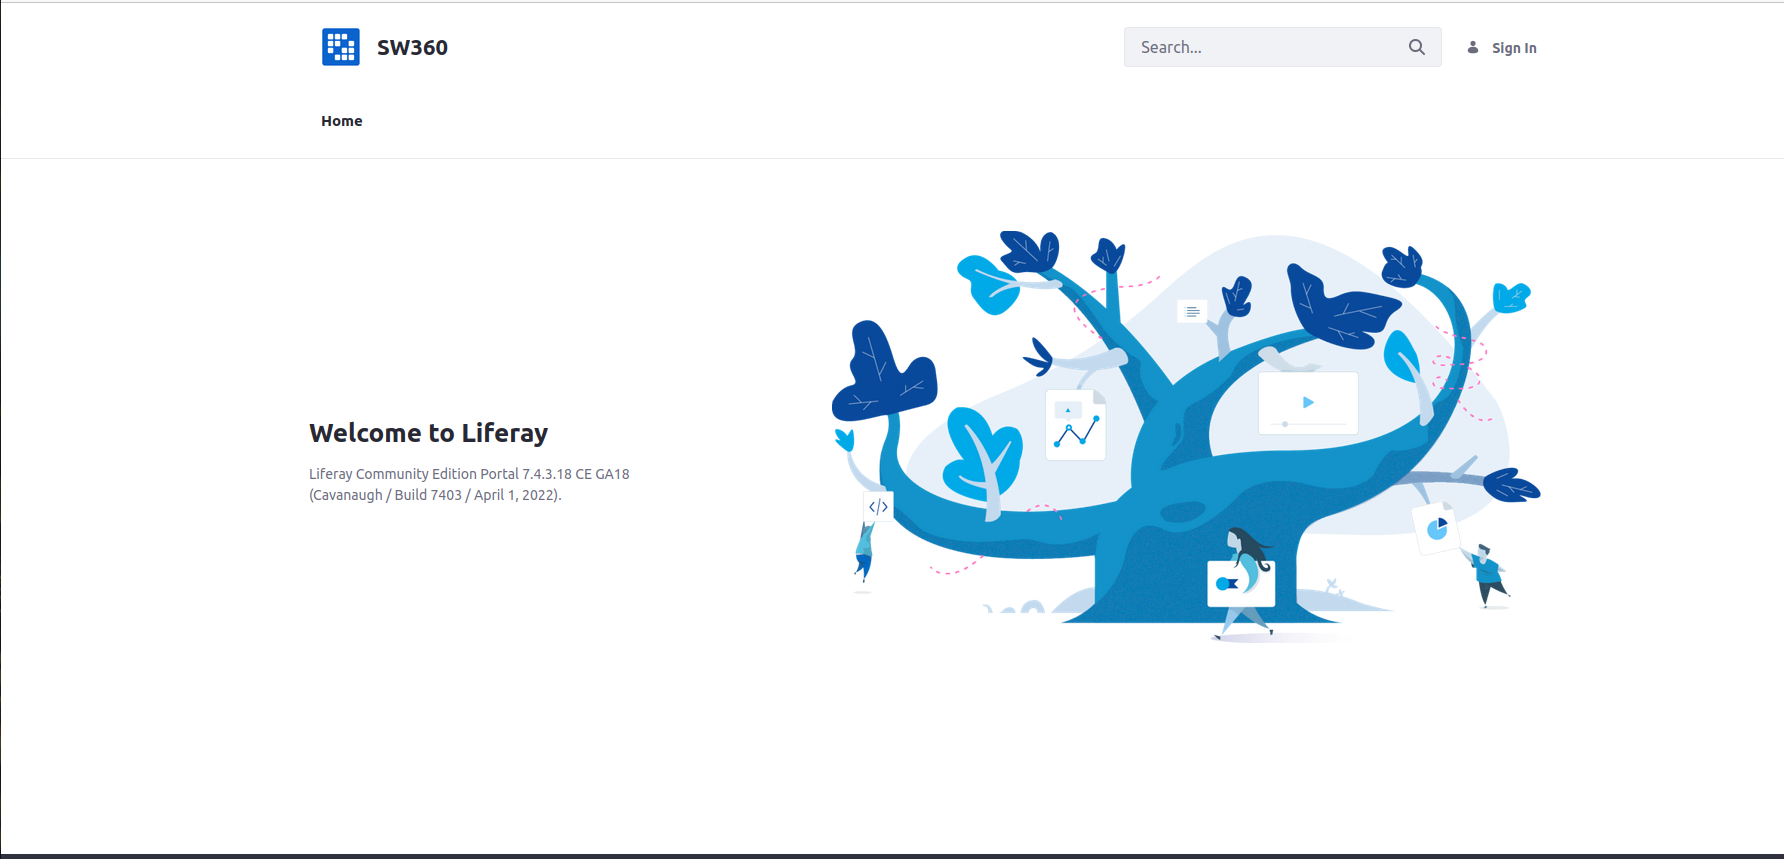
Note that the actual image changes with every liferay version. If there is weird html output without images and plain text, then likely some port settings did not work and the pages generated have wrong URLs inside.
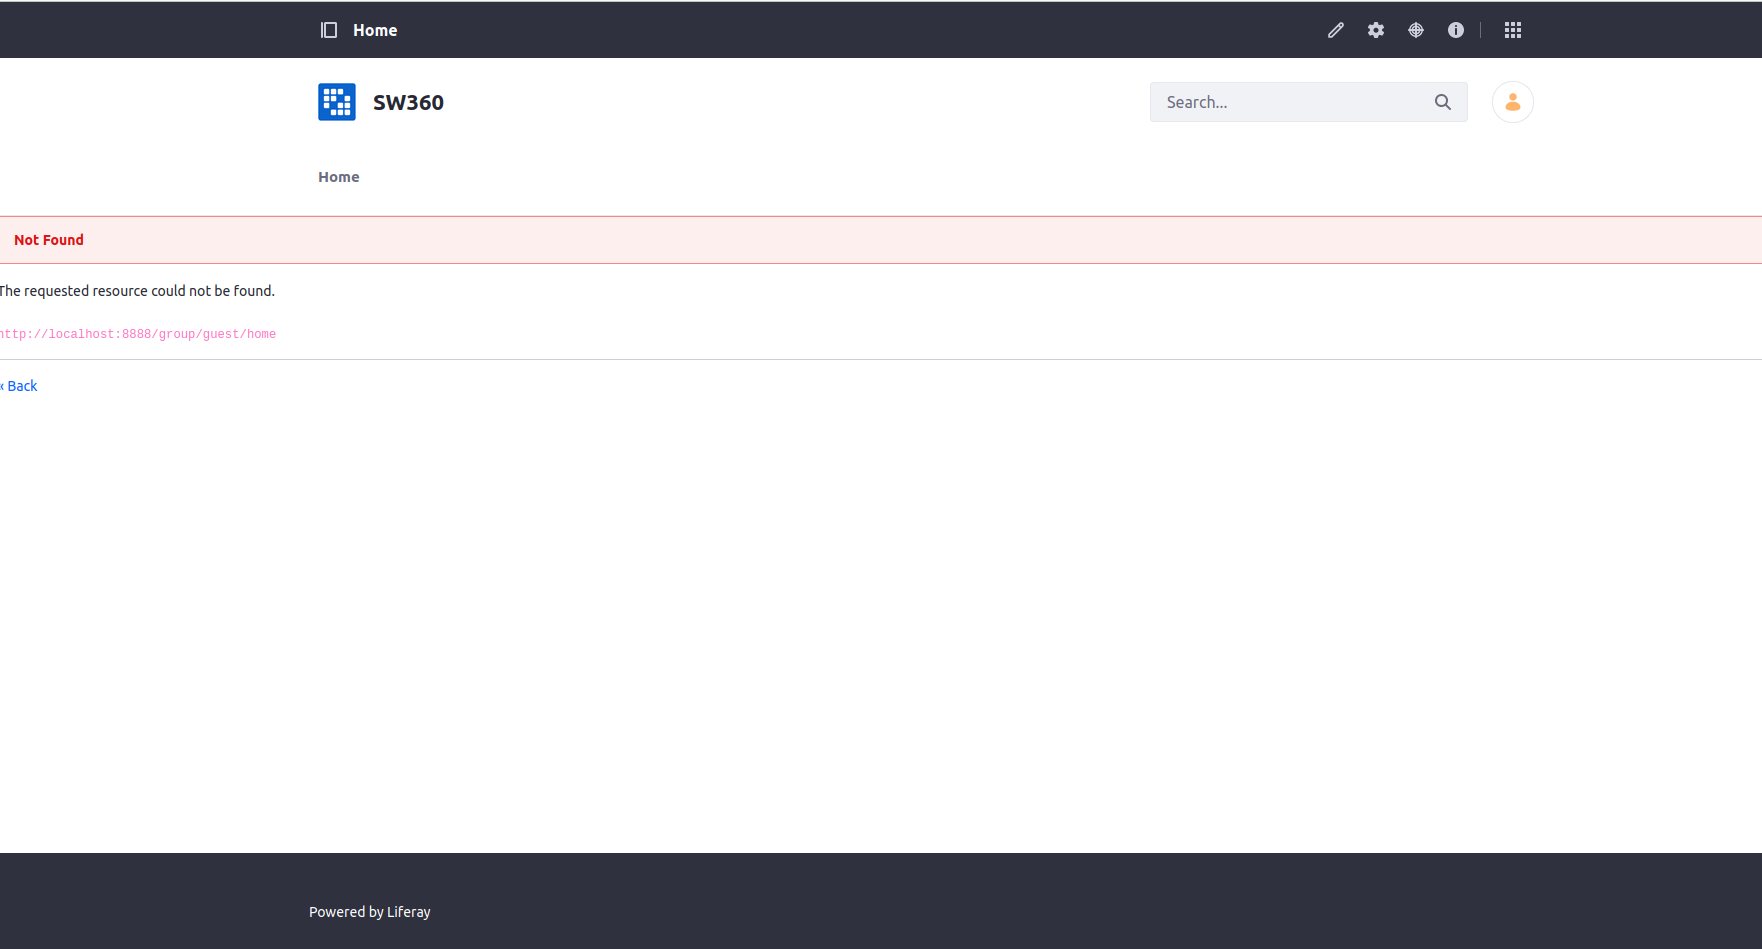
After login the sw360 is not setup, thus the server does not display much, but a screen like the following:
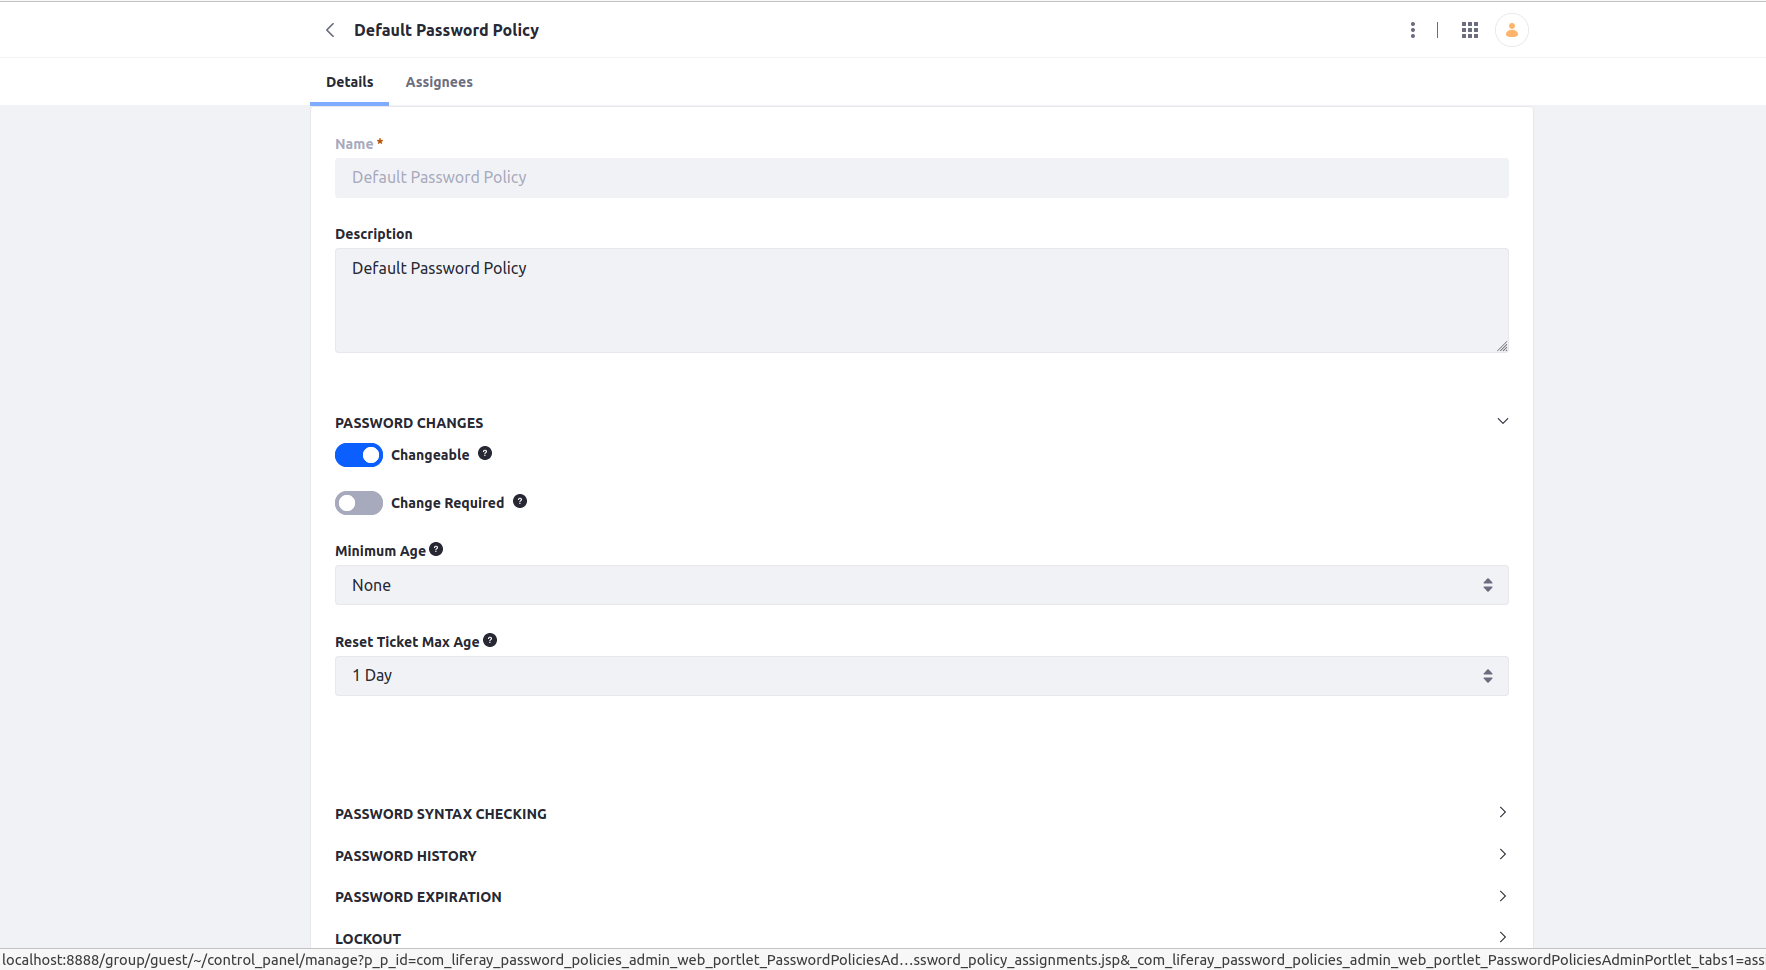
User and Login Settings in Liferay
Go into the control panel area by clicking the items icon (nine small cubes) in the upper right corner and select the control panel tab:

Edit this password policy and disable change Required if you wish to do so. Click on Save_the bottom of the page to save the selection.
Then, go: in Configuration > Instance Settings > Users >
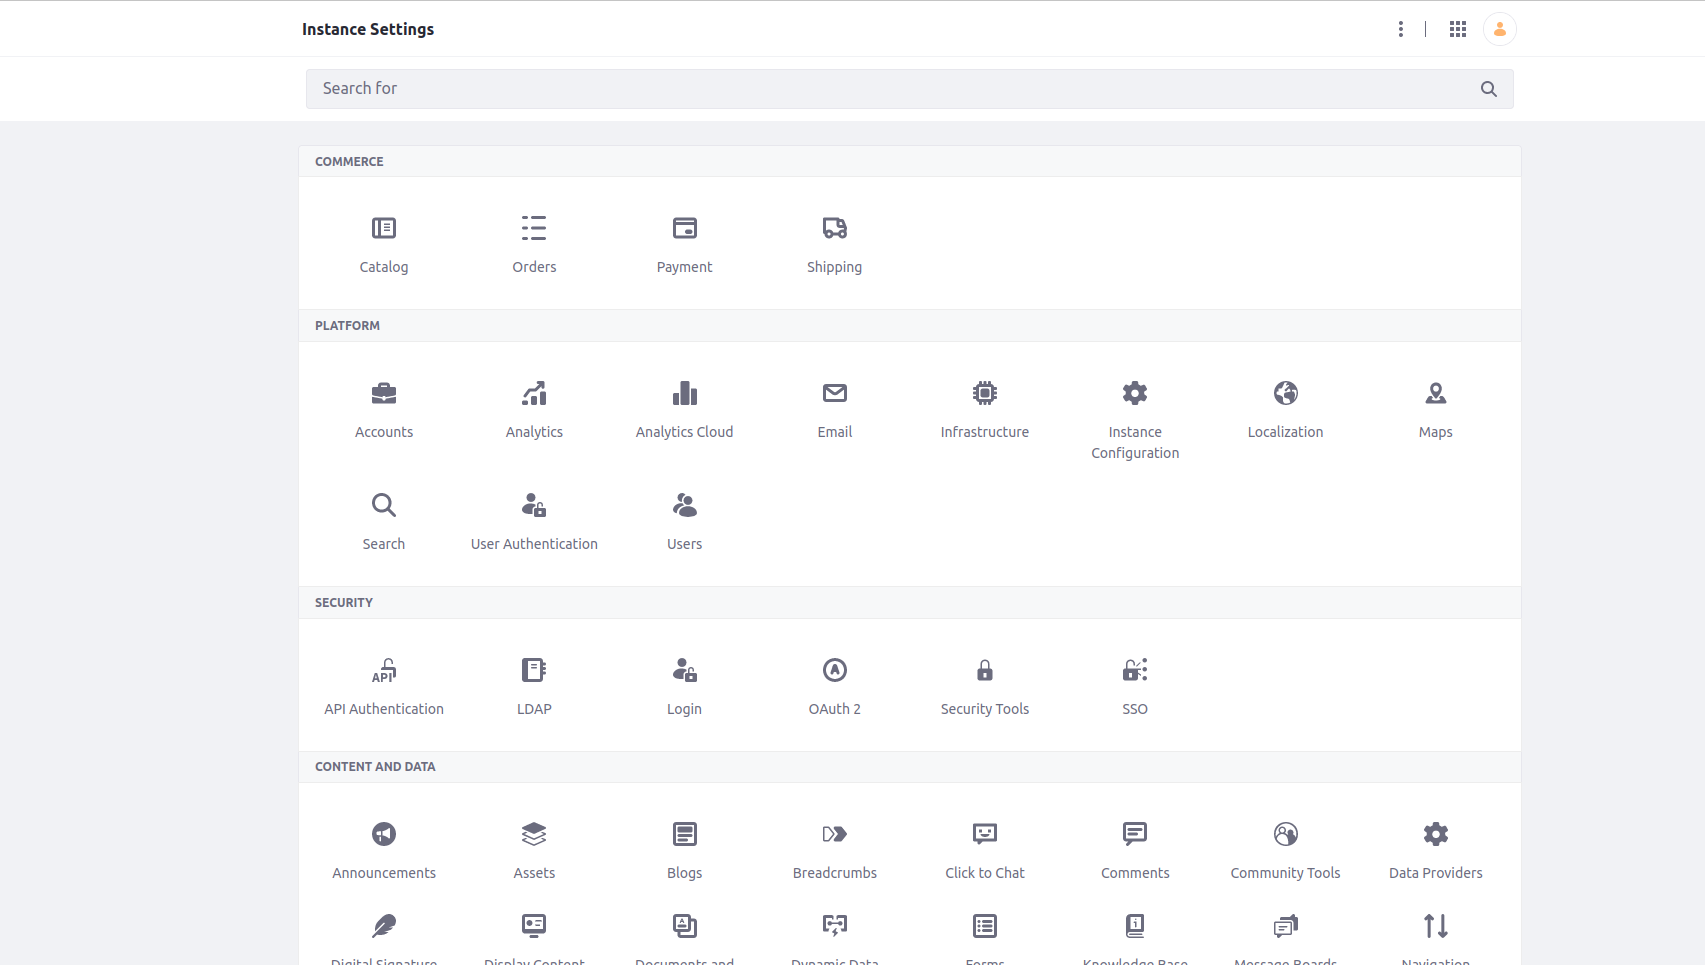
In this area, select Default User Associations to enter SW360 and apply it also to existing users. Click on Save to save the selection:
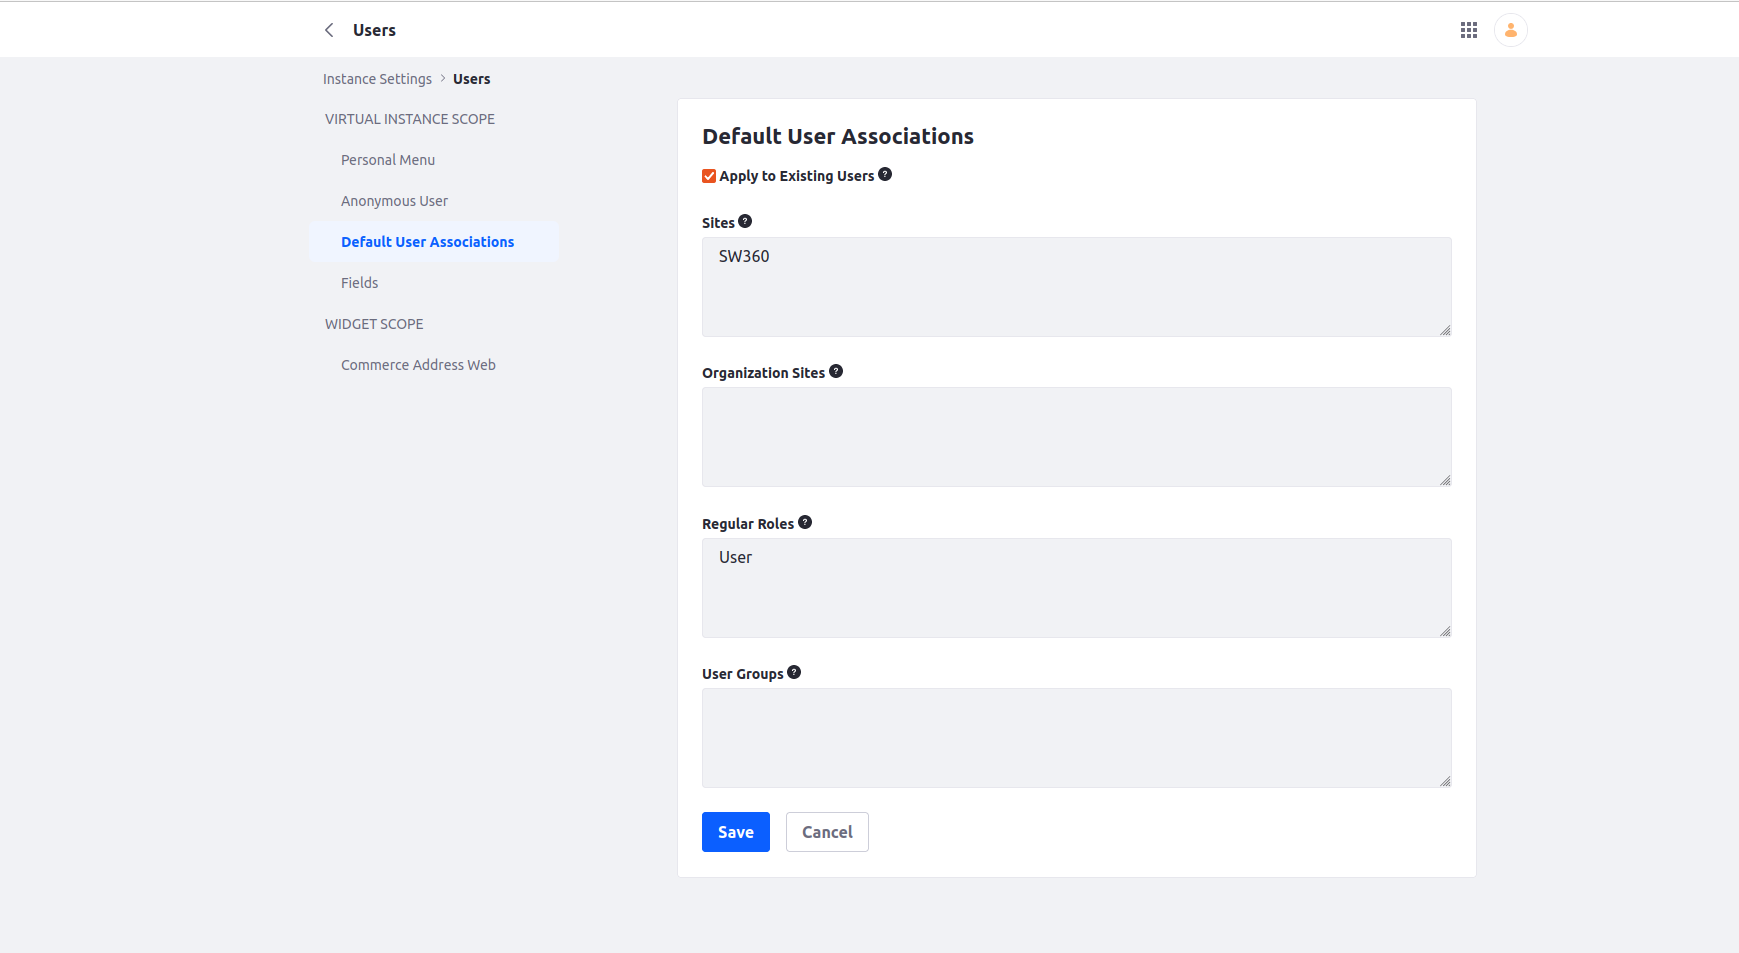
Then, in Configuration > Instance Settings > User Authentication > General to disable all kind of auto login to make sure only authenticated users can log in. You may want to switch off the e-mail verification, because for most of the development times it will not be of much value.
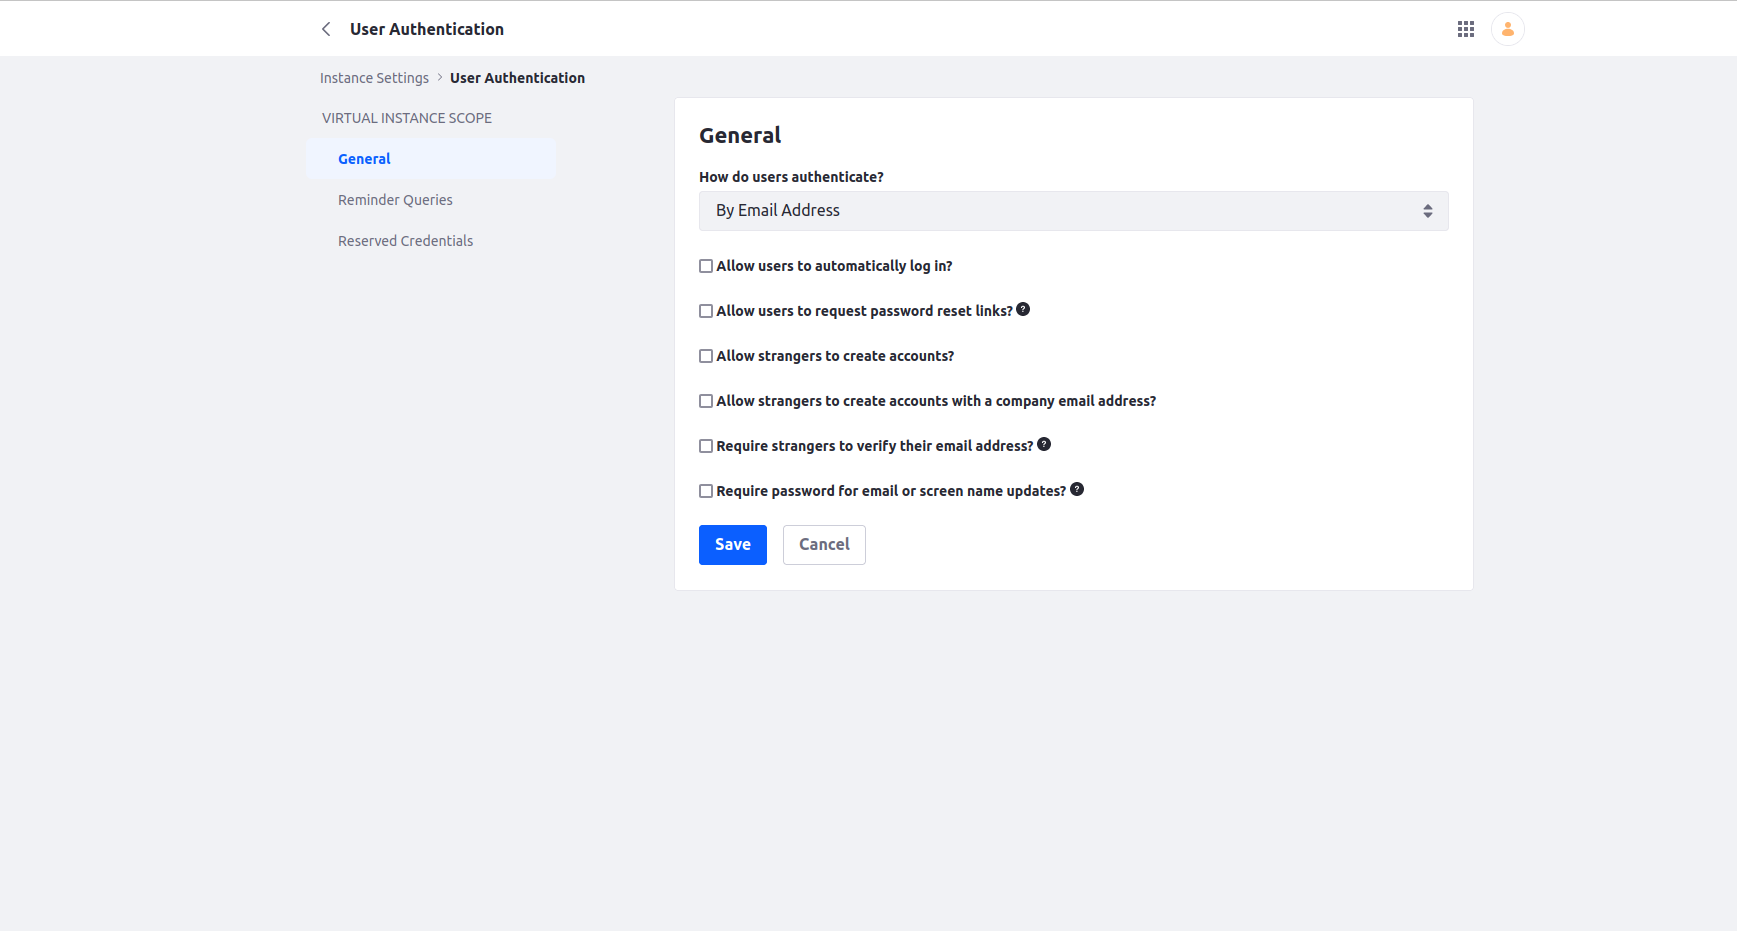
Finally, sice Liferay 7.4 some of the bundled modules need to be activated:
- jquery
- font awesome
In oder to do this, please select from the Configuration > System Settings > Third Party and go to jquery, select the enablement and click on Update:
Do the same for Font Awesome:
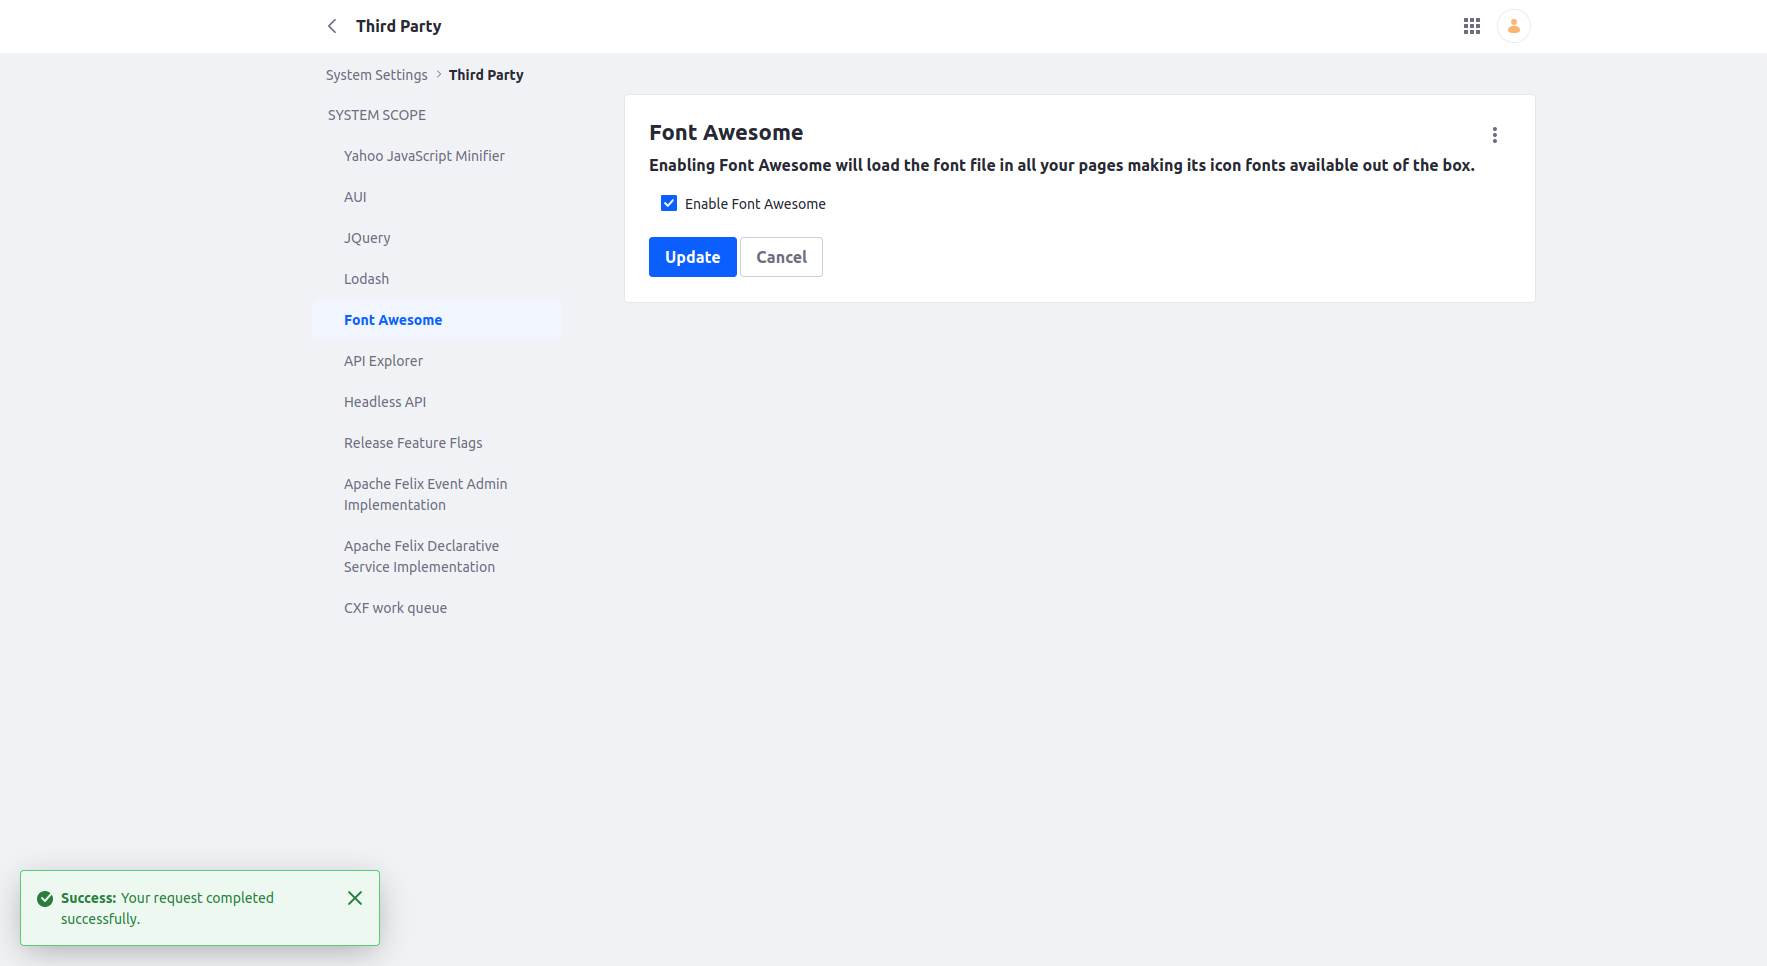
Note that you need to reload the browser or load a new browser window to take changes to effect.
Setup SW360 for Liferay: Import *.lar Files
For the setup of SW360 in Liferay, the portal description files, *.lar files need not be imported. there is no way except from doing this in the UI. If we are wrong with this, please let us know, because it is very annoying that these ever occurring steps cannot be automated with Liferay.
In order to go ahead, switch to the SW360 area where you can apply site settings:
The go into > Publishing > Import which shows like this:
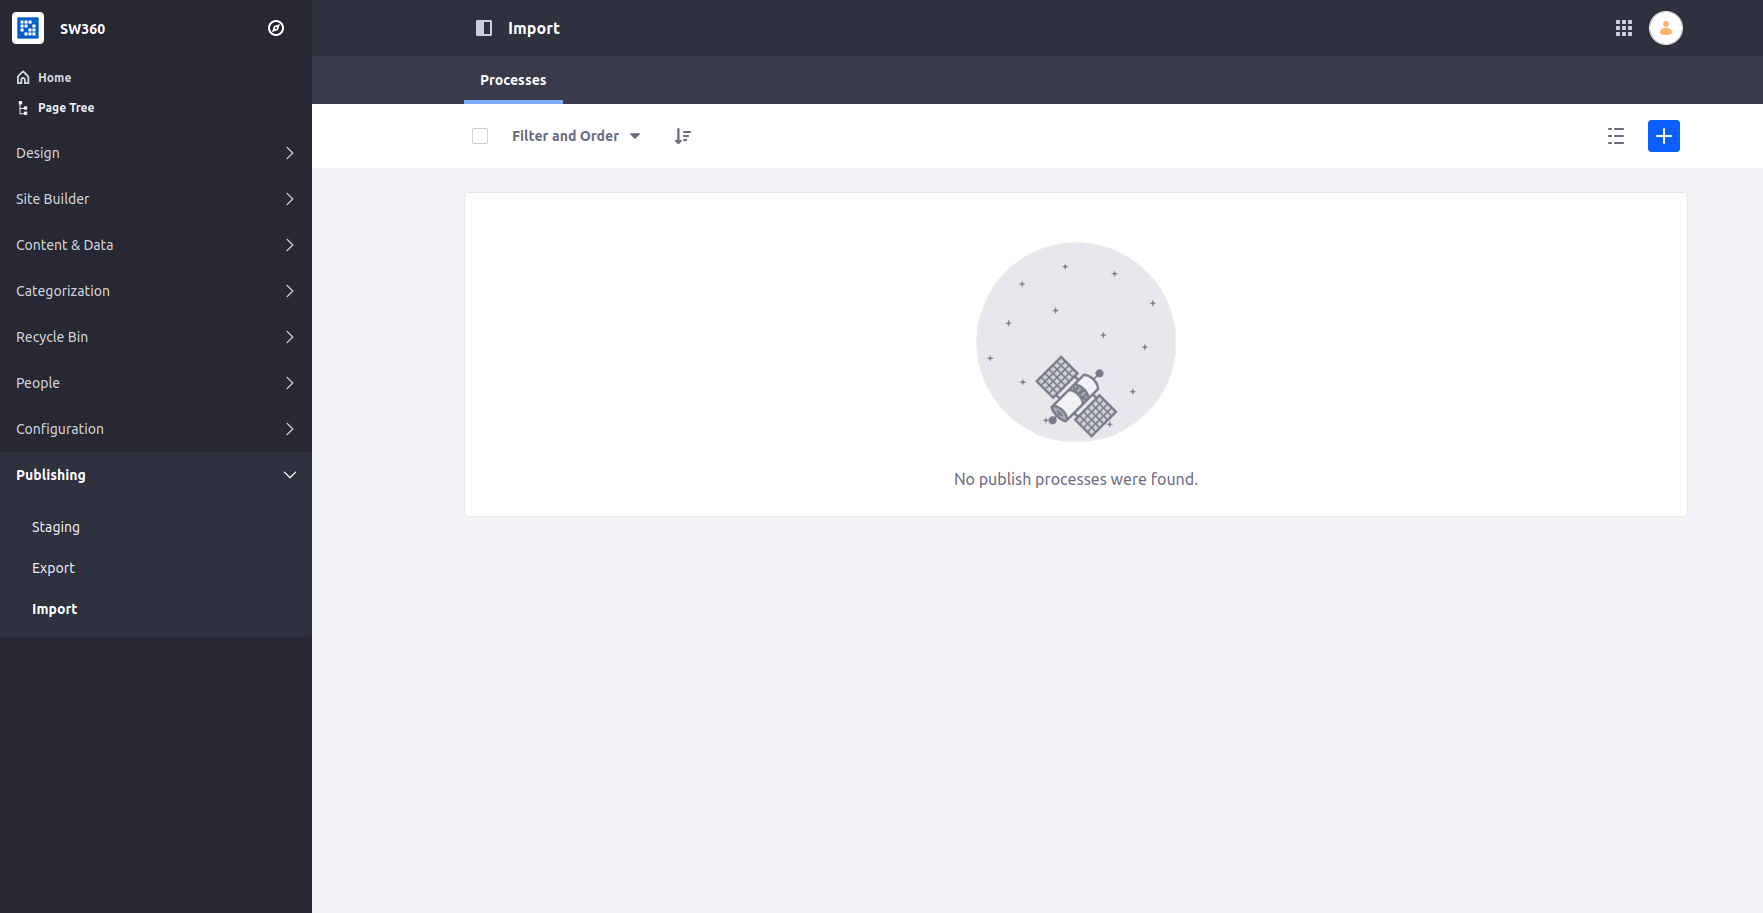
Then, click on the plus sign in order to import the *.lar file for public pages. You will find the lar files in the frontend/configuration folder of the sw360 repository.
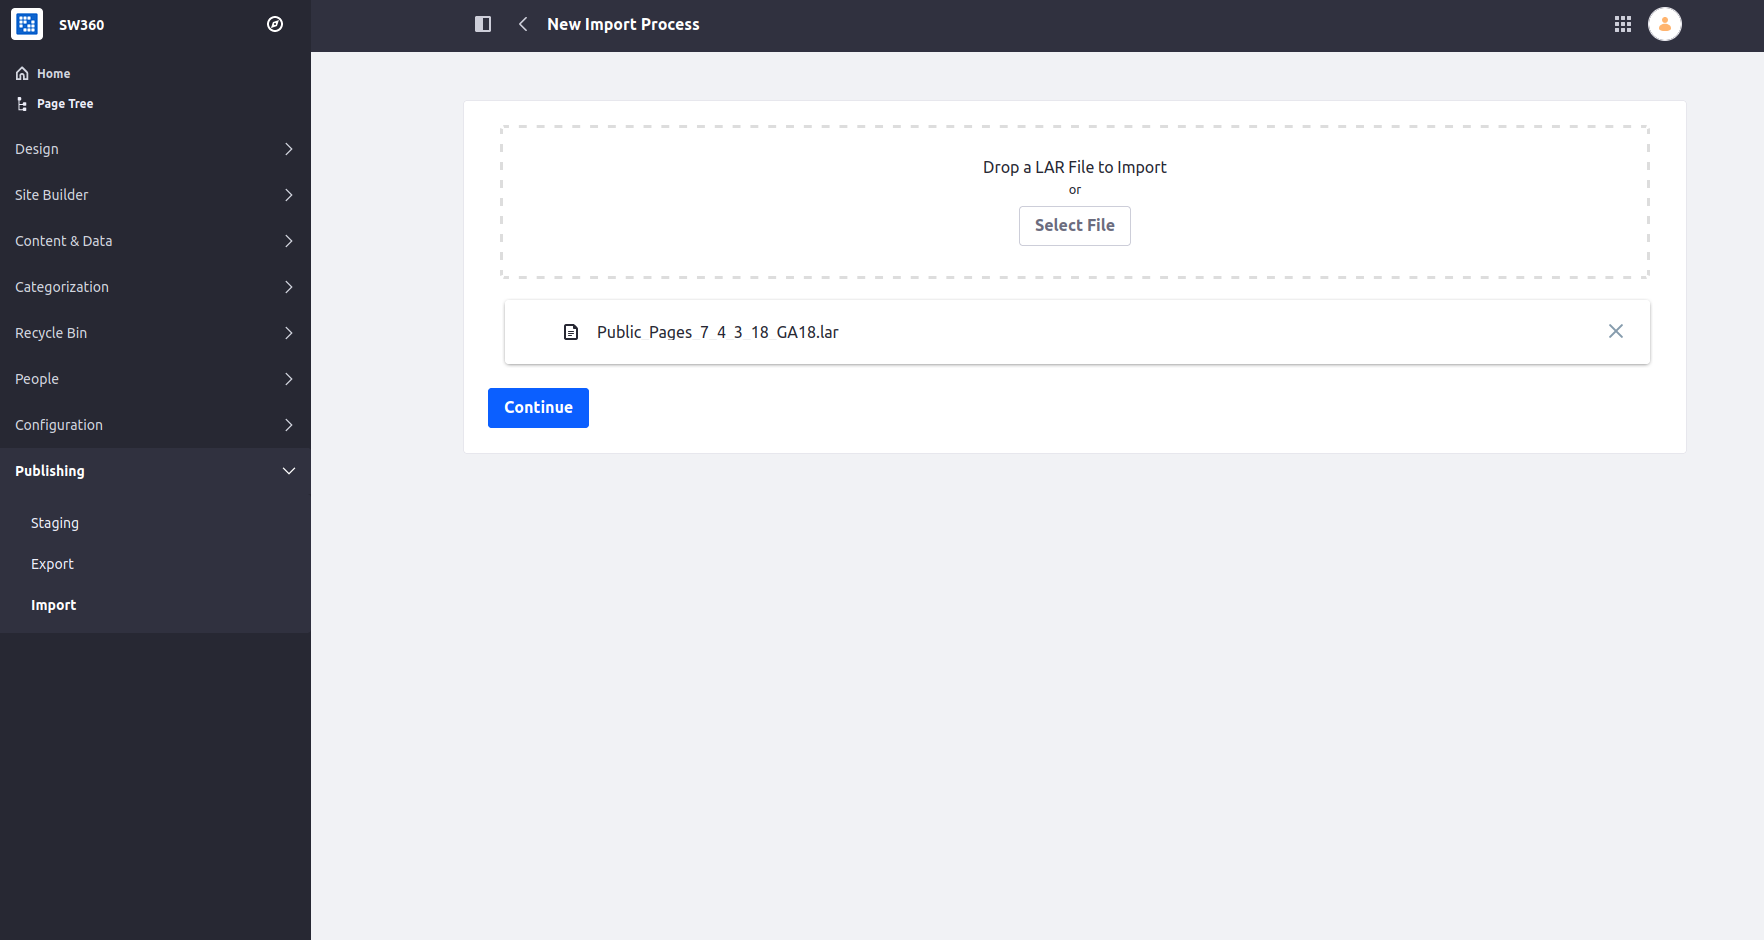
As for import settings, follow the selection as shown on the screenshot. It is very important that for the Public_Pages_7_4_3_18_GA18.lar file the selection Public_Pages_7_4_3_18_GA18.lar is made.
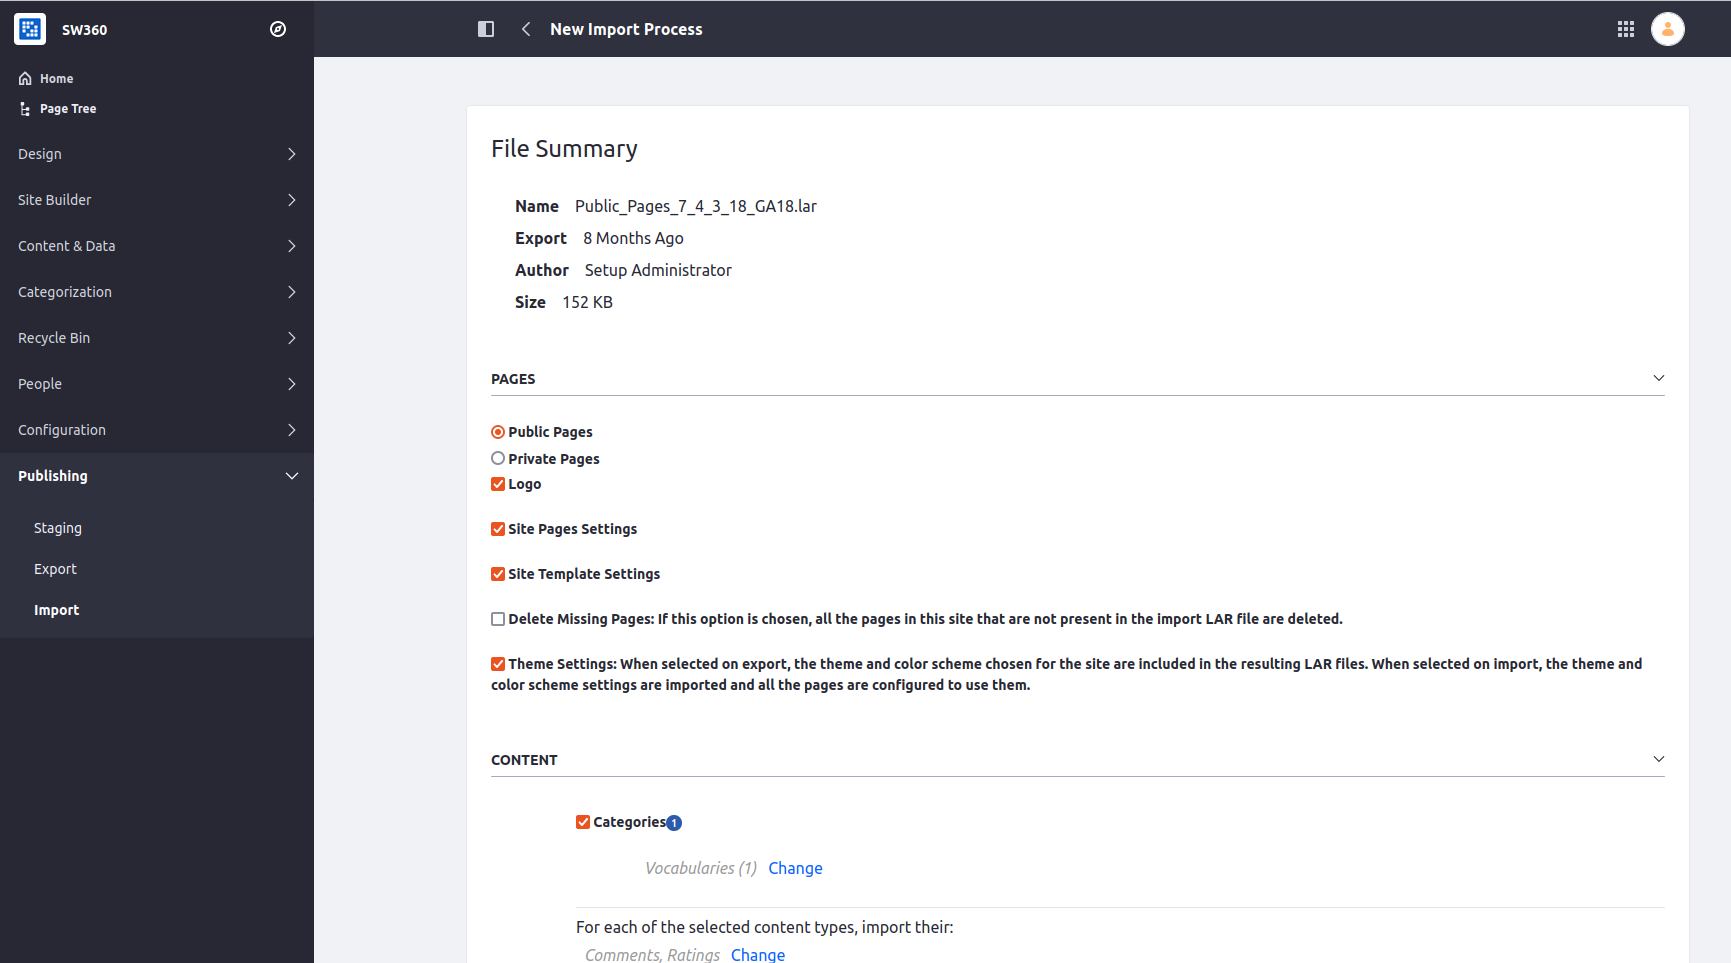
Importing permission makes sure that pages are visible according to users rights. For public pages, it is irrelevant_the moment. Overwriting and the write as current user needs to be selected.
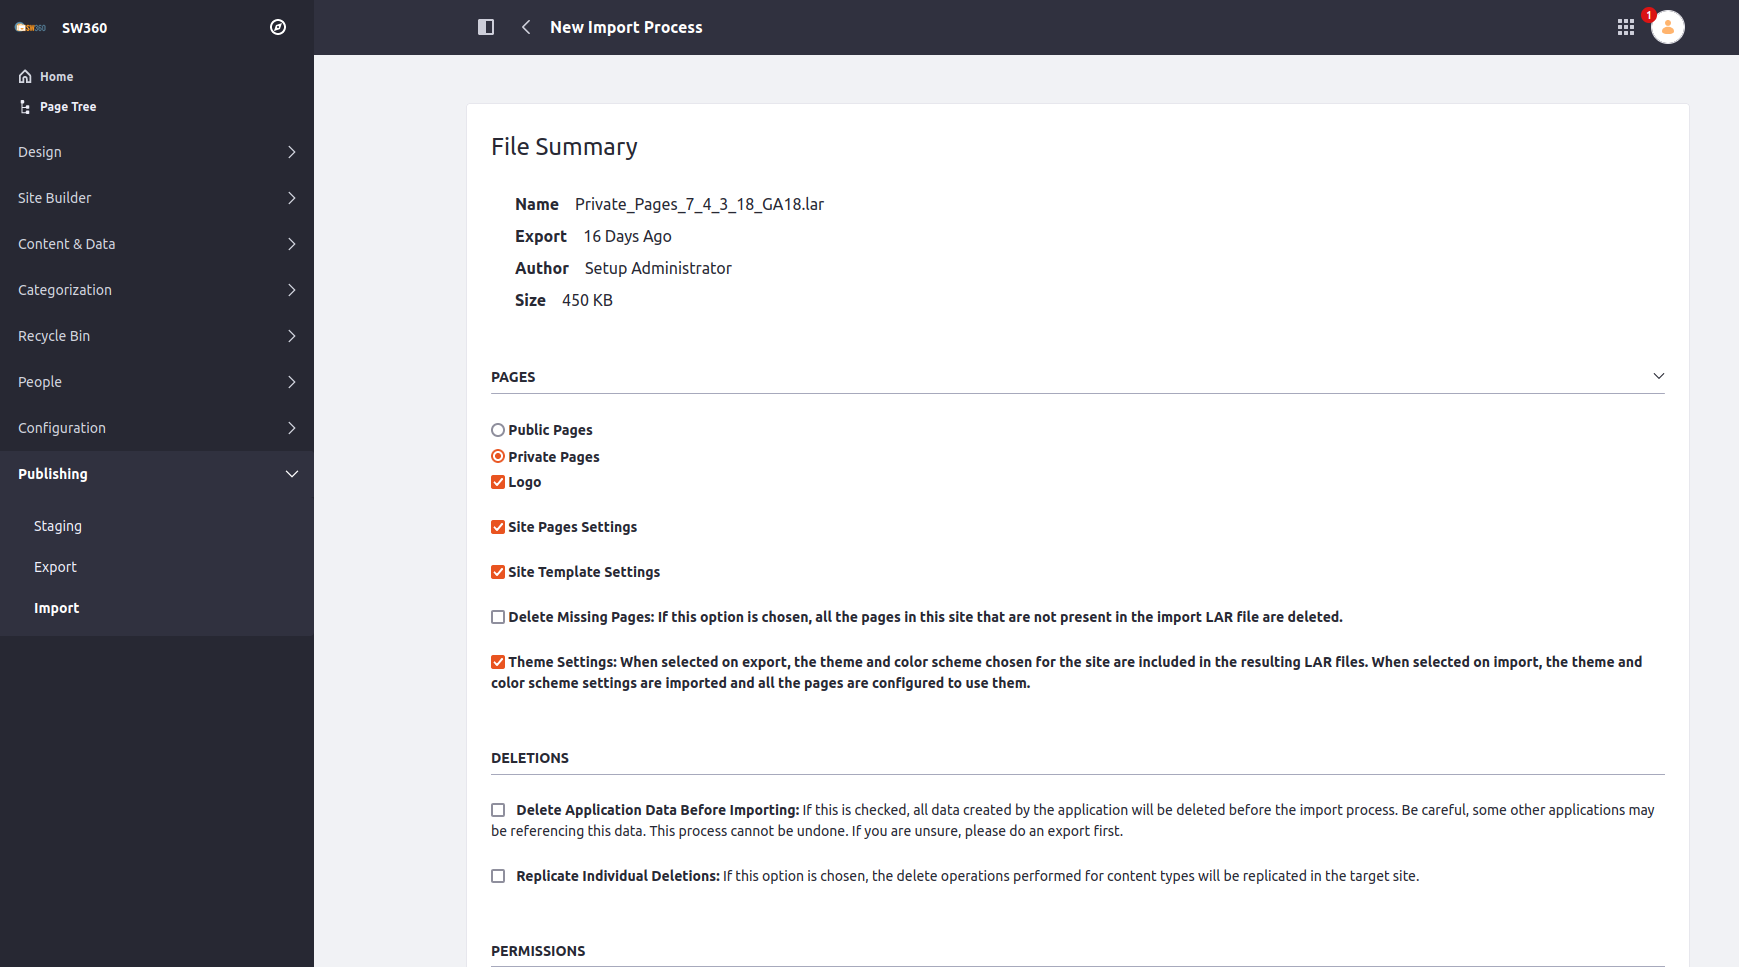
After successful importing, the same steps shall be repeated for the Private_Pages_7_4_3_18_GA18.lar file.
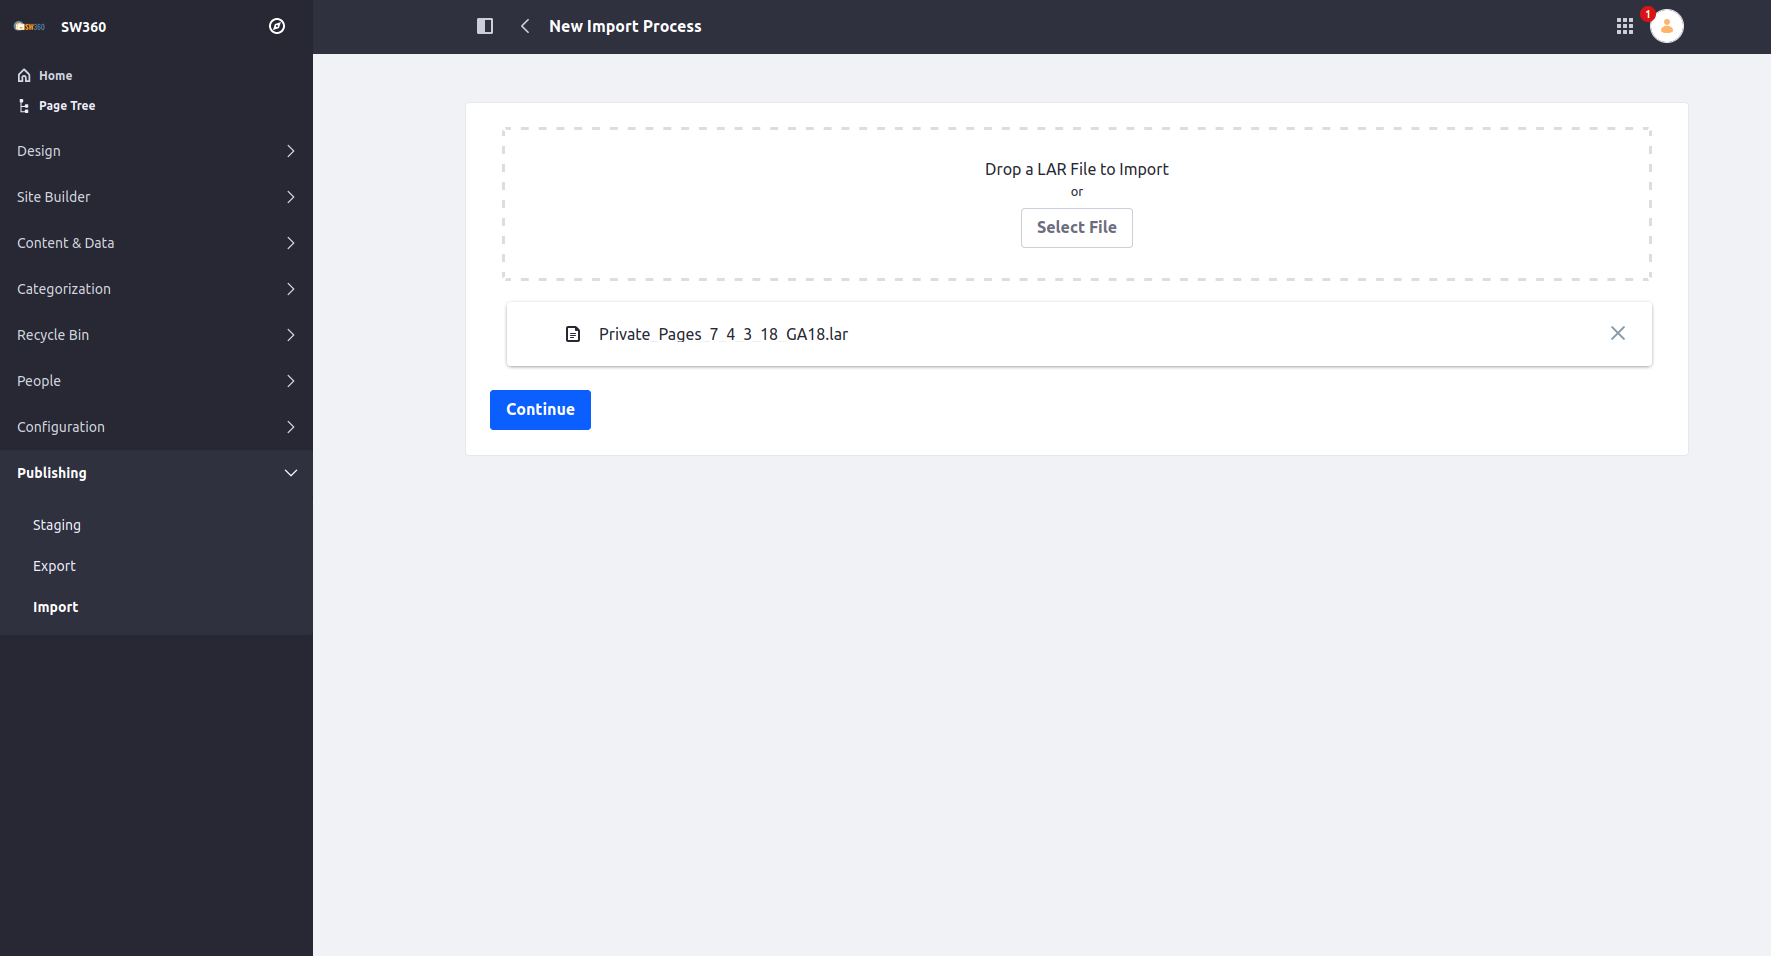
Make sure that Private_Pages_7_4_3_18_GA18.lar is selected. Follow the other selections made as shown on the screenshot … importing permissions … mirror with overwriting, use the current author …
If you click then the liferay logo_the upper left corner where the SW360 is, you will return to the application and the following screen should appear:
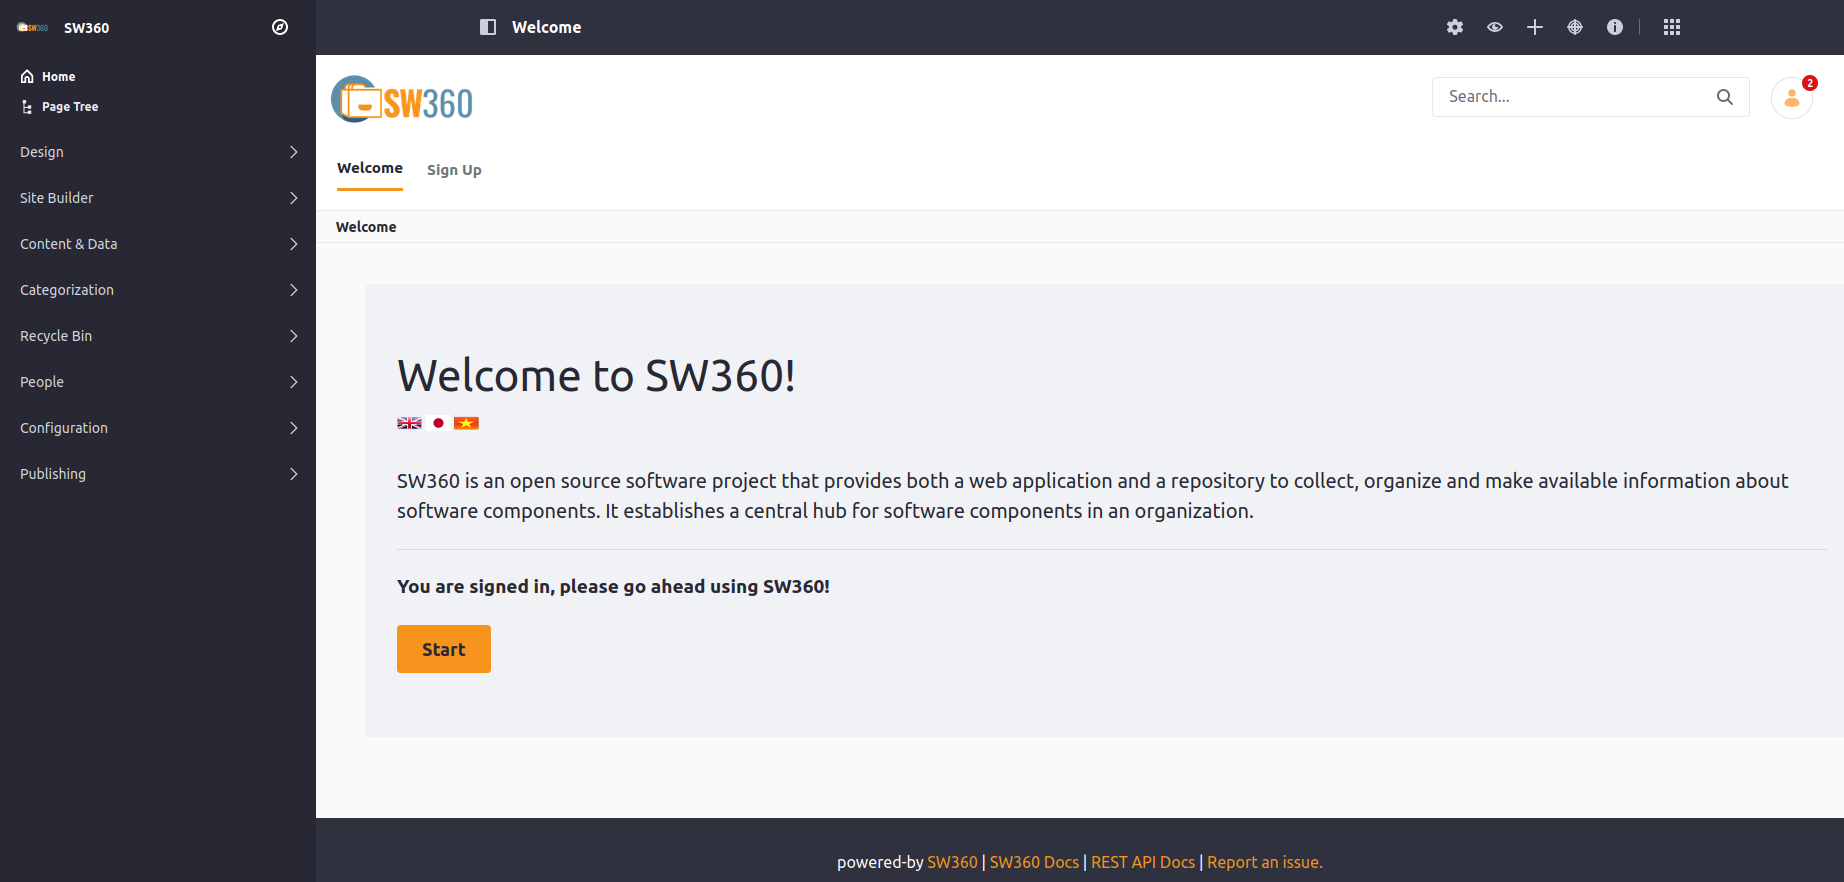
You can close the left menu area by clicking on the upper left icon:
Click Start to open the private pages. You are still logged in, so the setup account is used to view the pages.
Important The setup account does not belong to a group. Thus, not all view are functional because they require a group membership to work correctly.
Import User Accounts for Testing
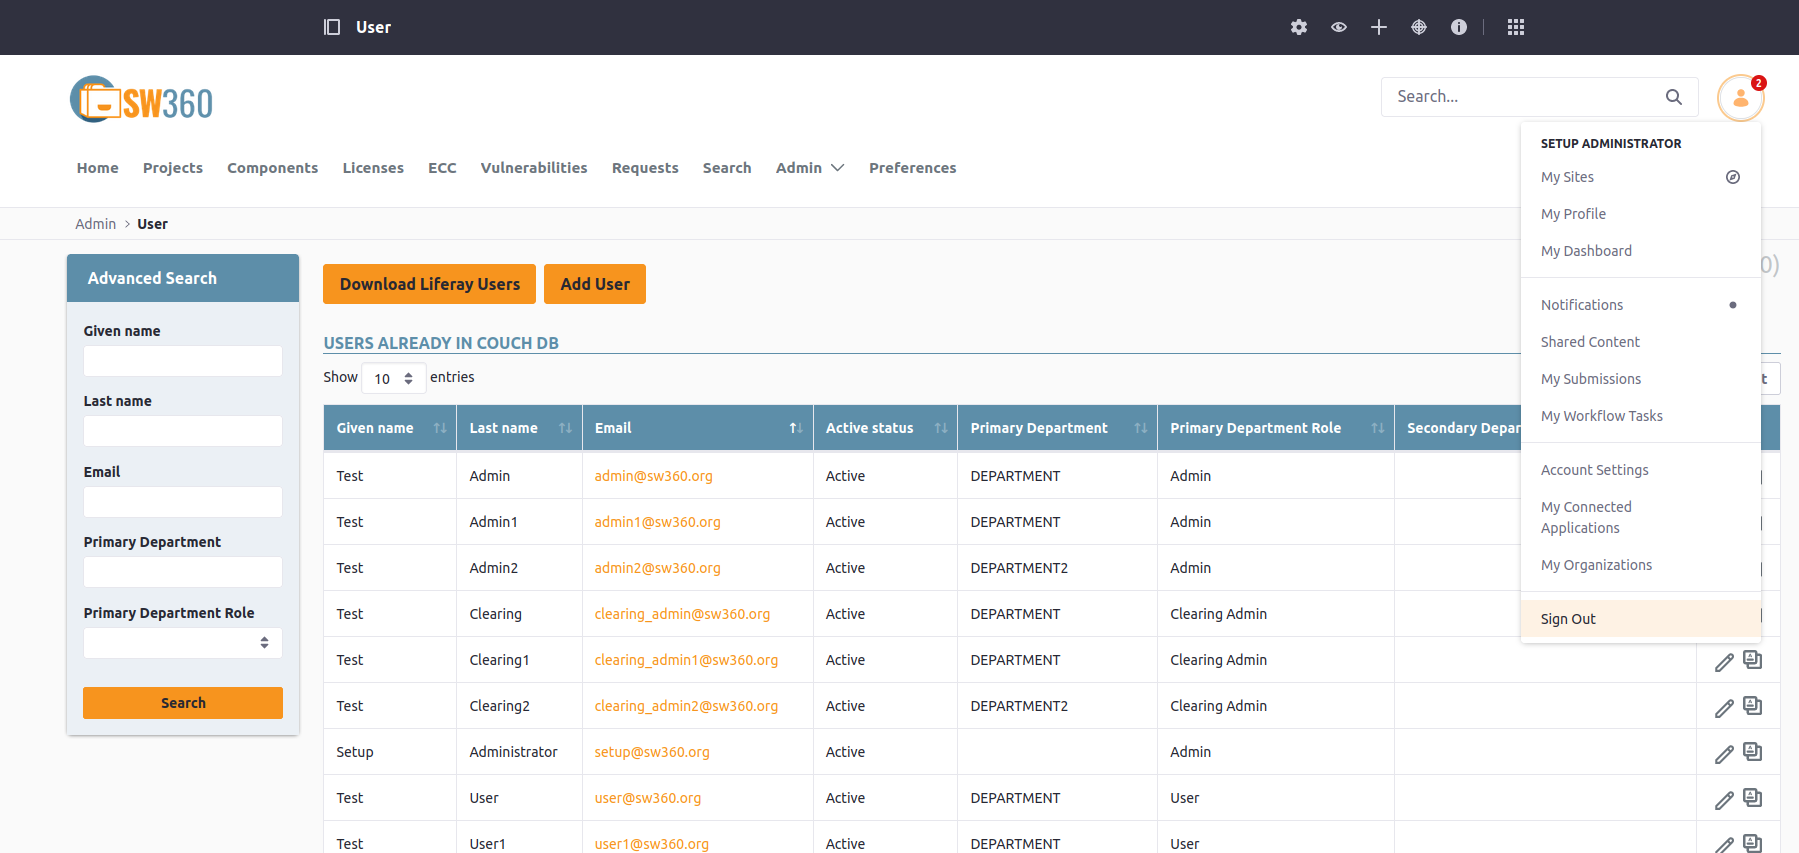
Click the SW360 Admin menu which is_the right and selection the User item.
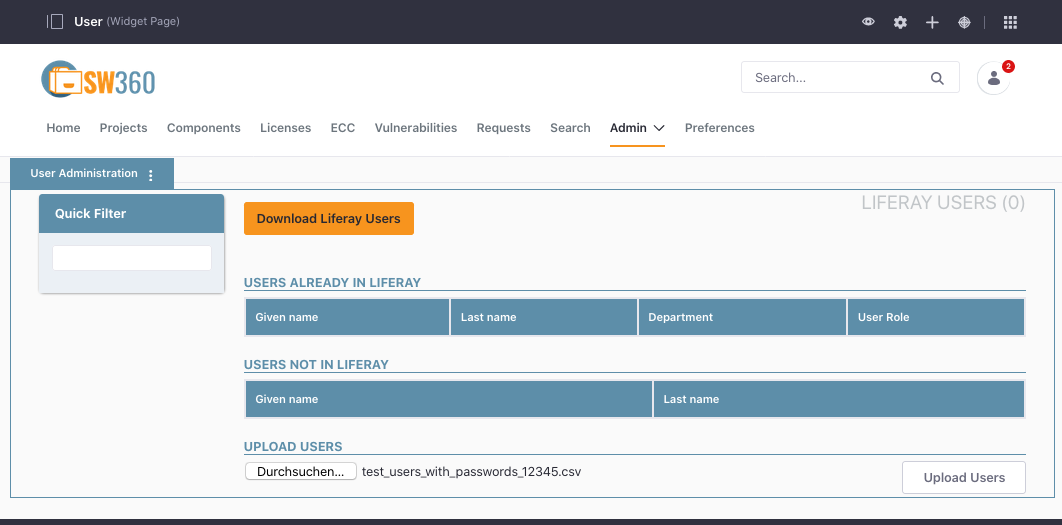
At the bottom of that view, select a User file to import for testing. Skip it if you will create users differently. You can find a user account import file to import in the sw360vagrant project in the folder shared. After the user have been imported successfully, they should appear in the table view.
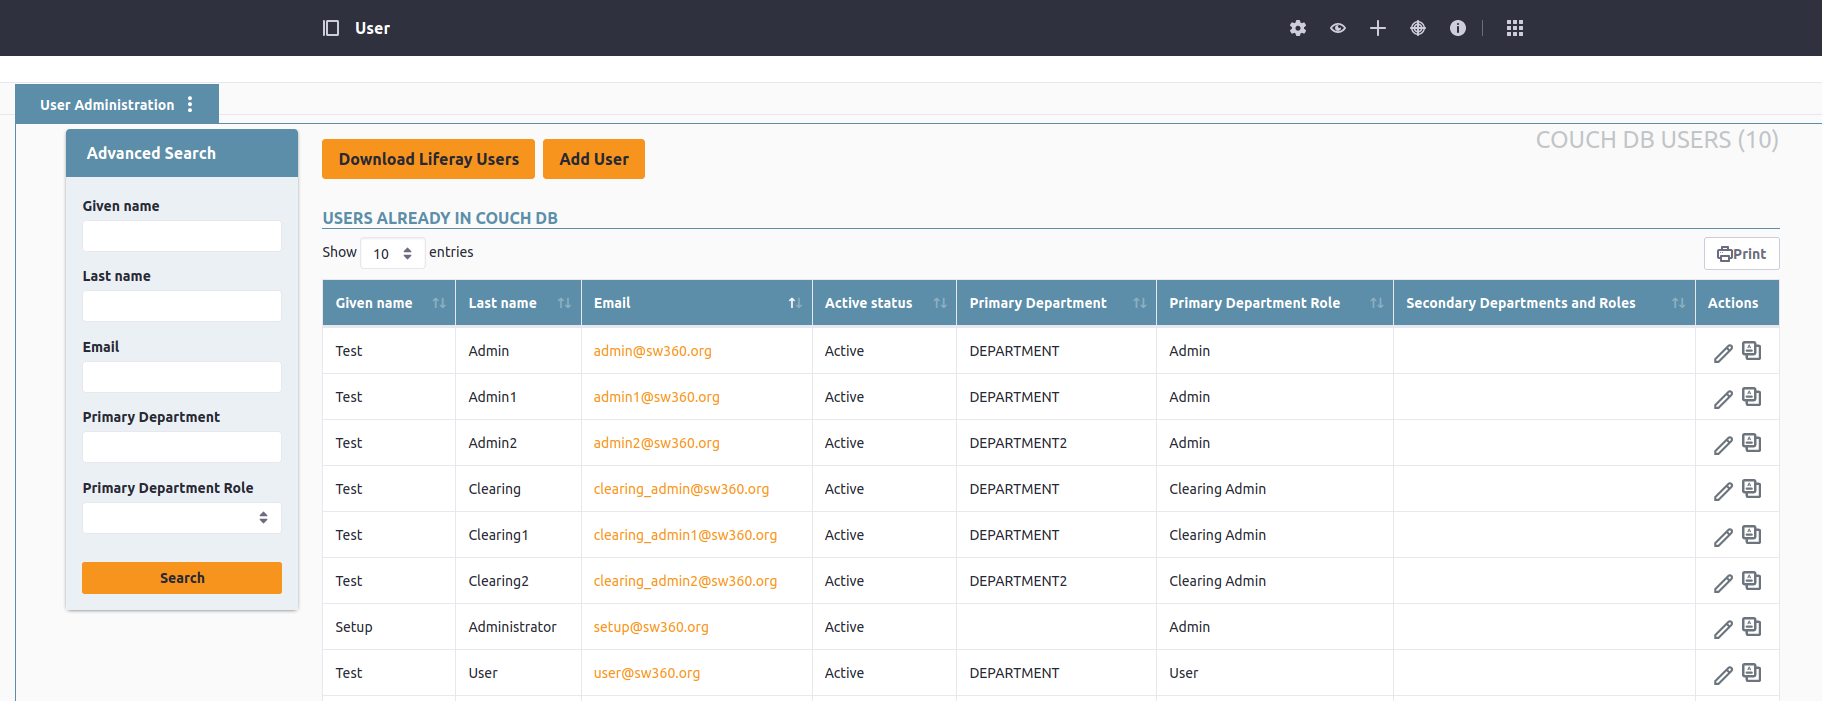
After the user have been imported successfully, they should appear in the table view. You can logout for now and use one of the just added accounts (see below):
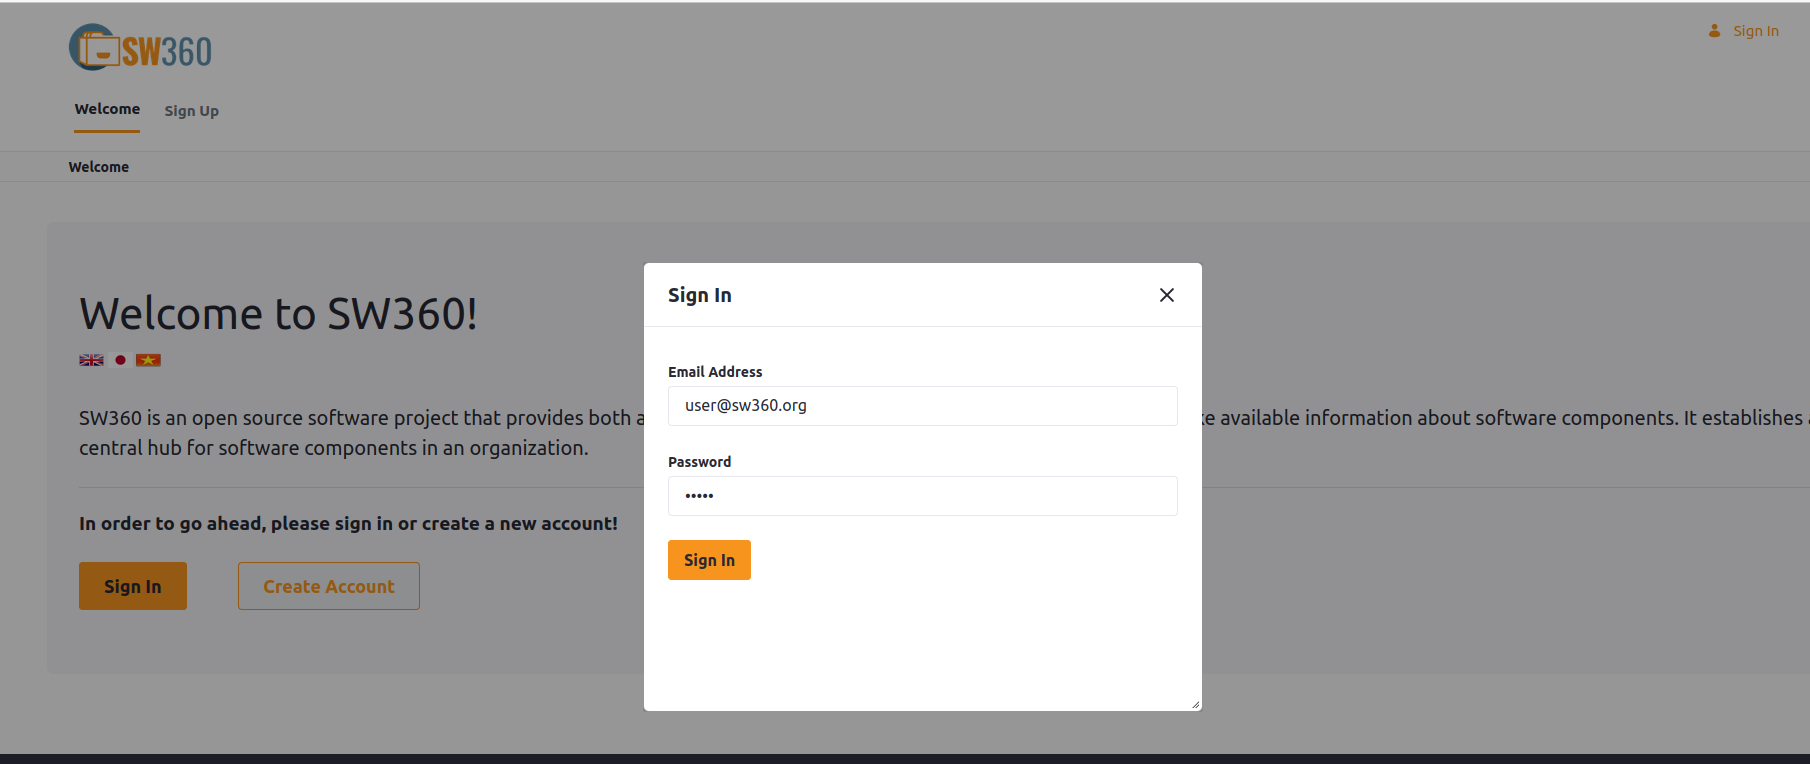
Real Login
One example user is user@sw360.org with the password 12345. Note that in the import file with the example accounts, the password is provided with a hash. If you would like to generate new (salted) hashes, you can change your password and export the user list using the same portlet where you have imported the users. This functionality can be also used to migrate accounts between servers.
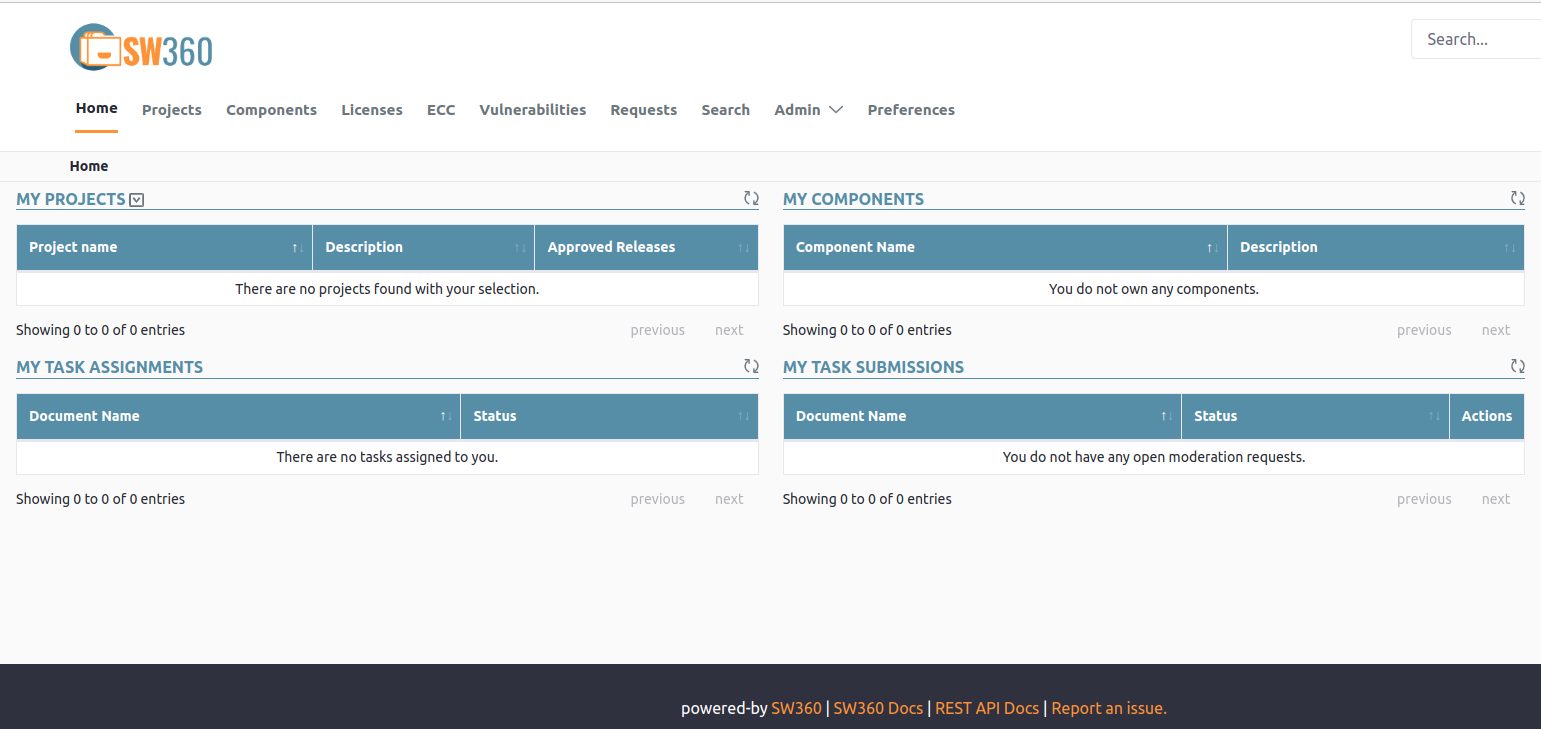
After the successful login, SW360 will look as follows.
3.8 Version Management Table (sw360 17.0.0)
| Package Name | Version |
|---|---|
| Liferay | 7.4.3.18 |
| Tomcat | 9.0.56 |
| Couchdb | 3.2.2 |
| Open JDK | 11.0.15 |
| Thrift | 0.16.0 |
| SW360 | 17.0.0 |
References for more information
License
[SPDX-License-Identifier: EPL-2.0]