Components
2.0 Components
2.01 Introduction
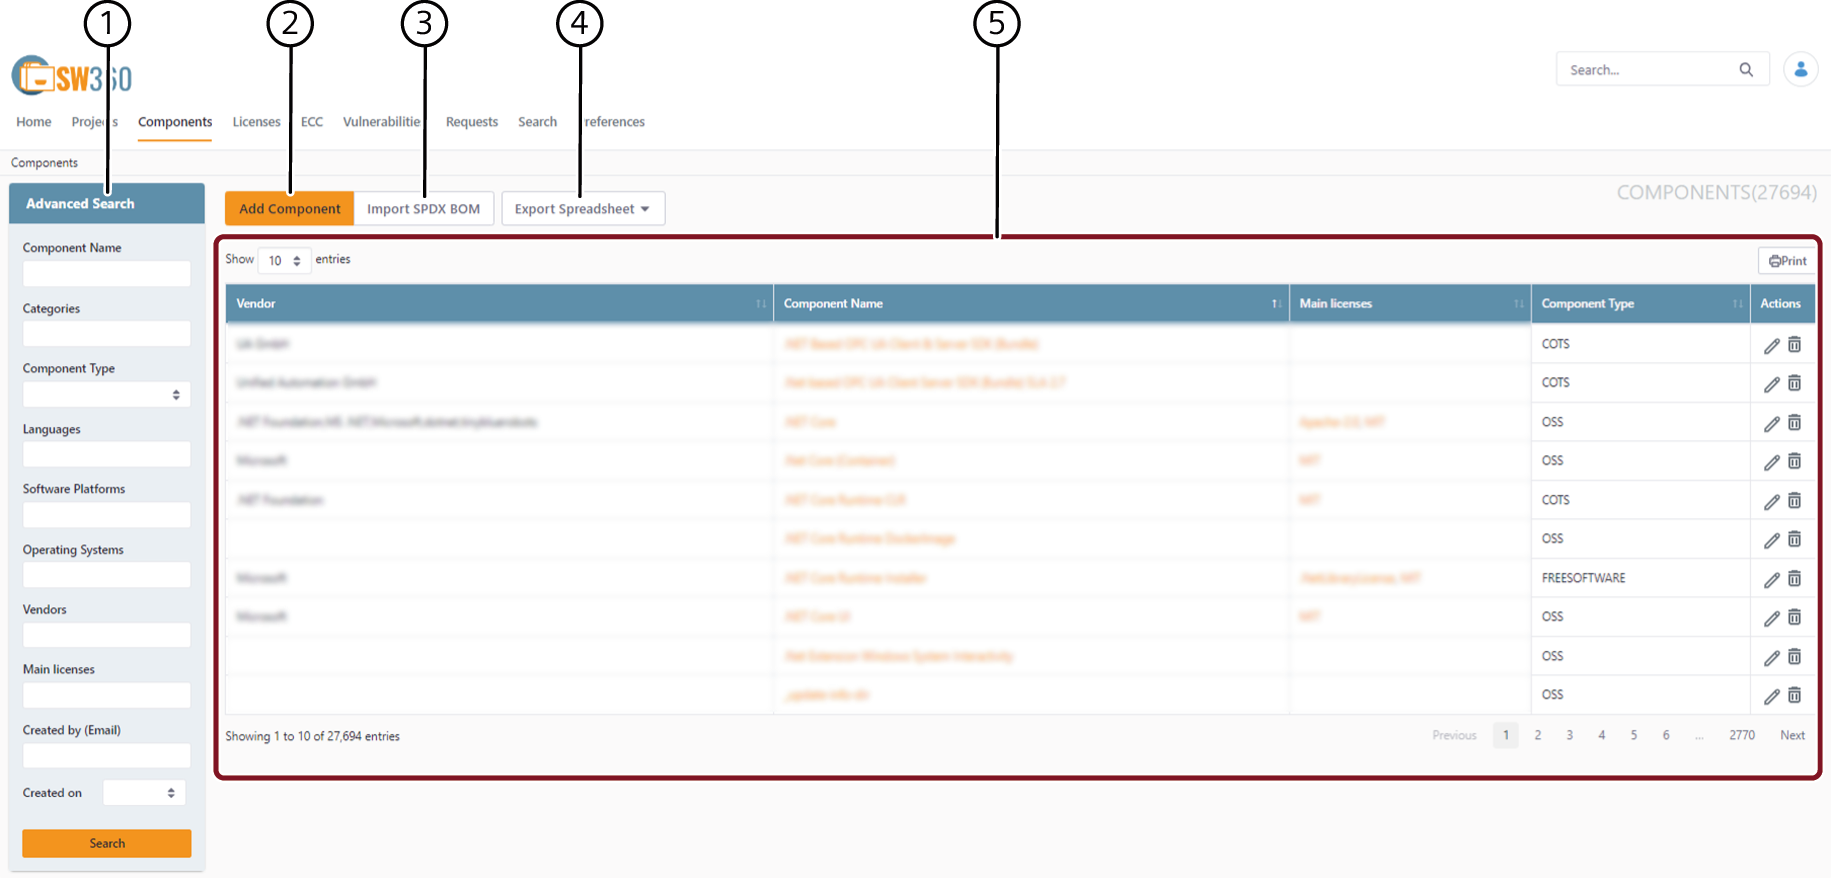
The components page displays the list of components and releases that are available in SW360. A component is a list of releases with metadata. A release is a specific version of a component.
To open a component page, click Components tab from the main menu. You can find a particular component with Advanced Search, you can also add and edit components in this page.
| Sl.No. | Description |
|---|---|
| 1 | Advanced Search |
| 2 | Add Component |
| 3 | Import SPDX BOM |
| 4 | Export Spreadsheet |
| 5 | Component List |
2.02 Component List
On the component page, you can view all the components that are relevant to you. The components are listed with the following information:
- Vendor: Vendor is organization which is selling the component or the community which is hosting the component.
- Component Name: All components are listed by their names.
- Main Licenses: The list of main licenses available for a component are displayed.
- Component Type: Lists all the components by their type. For more information on component types, refer to A. General Info.
- Actions: You can perform the following actions for a component:
Action Description 
To edit a component 
To delete the component from SW360.
NOTE: CLICK ON
2.03 Component Search
Advanced Search dialogue box is used to search for a particular component.
- Search the component with Component Name and Categories.
- Search the component with Component Type. Select the component type from the drop-down list. For more information on the component types, refer to A. General Information.
- Search components with their coding Languages, Software Platforms, Operating Systems, Vendors and Main Licenses.
- Search components with Created by (Email).
- You can use Created on field to search for the components created on specific dates or specific time frames.
2.04 Add Component
To add a new component, click Add Component from the component page, this will redirect you to another page where you can add component summary information.
1. Summary
A. General Information
NOTE: FIELDS MARKED "*" ARE MANDATORY.
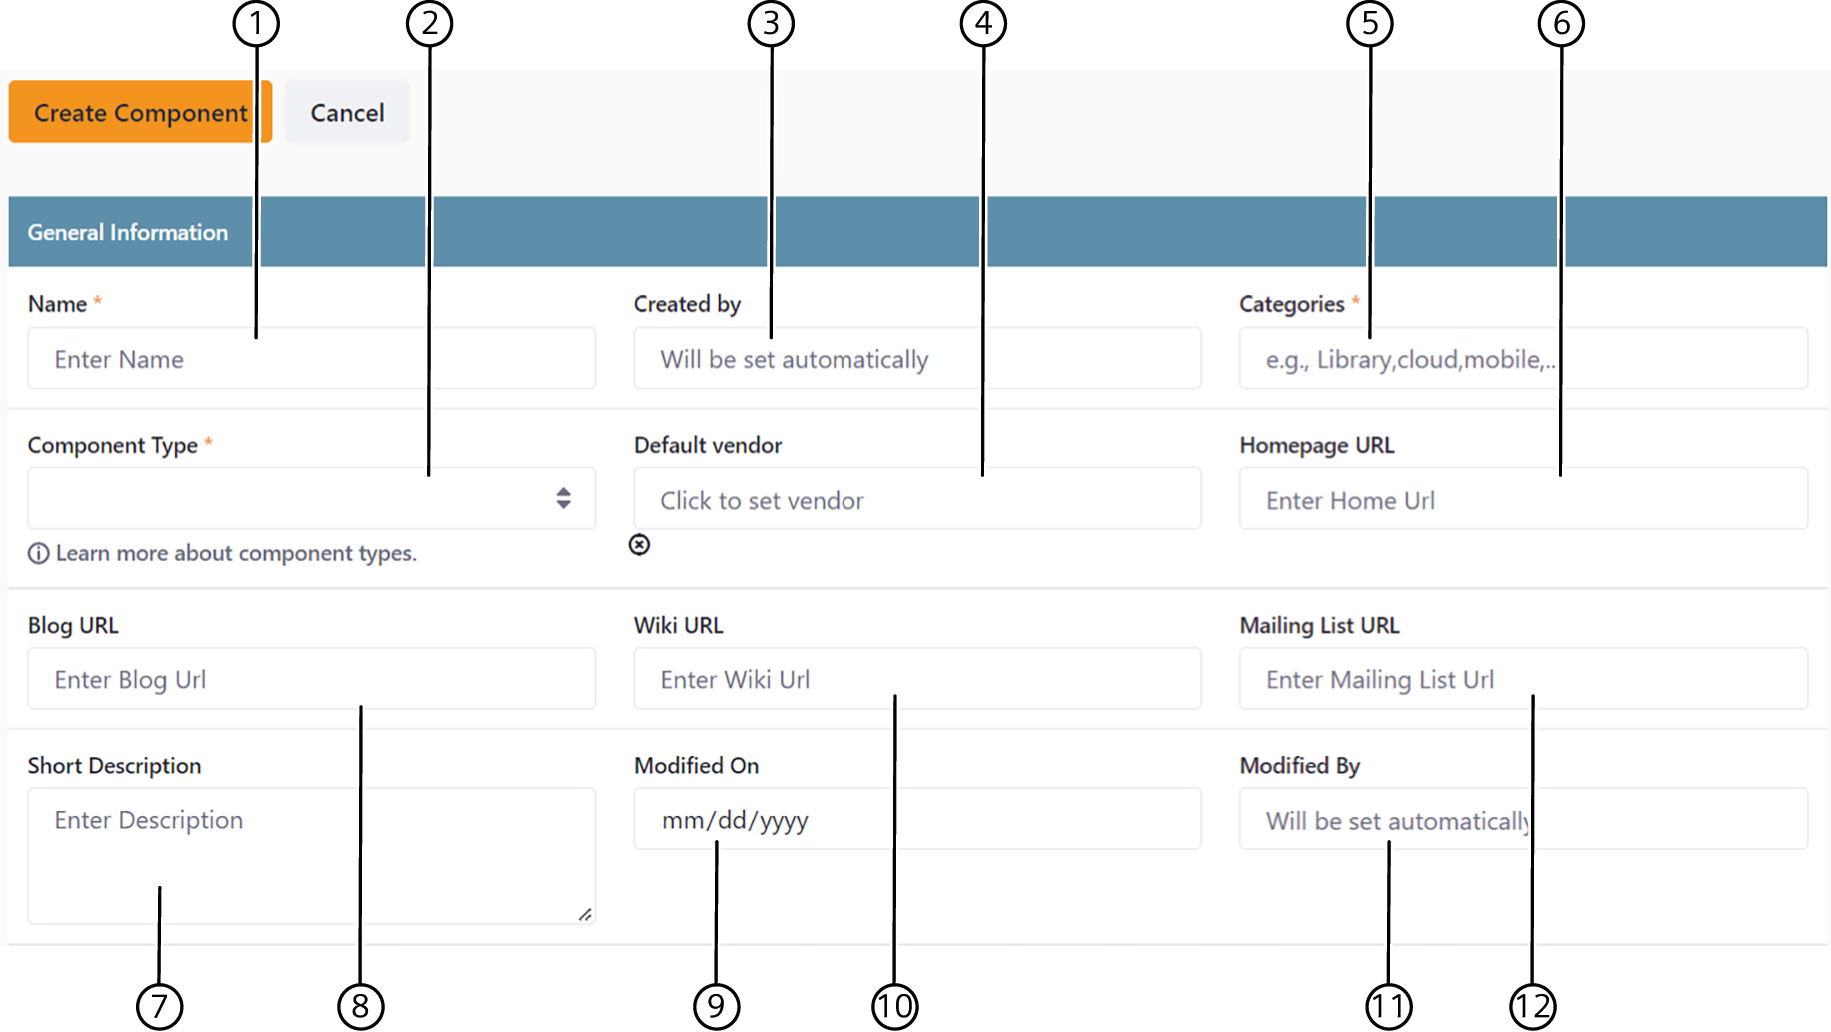
- Enter the Name of the component you want to create.
NOTE: MAKE SURE THAT THERE ARE NO DUPLICATES. - Select the Component Type from the drop-down list.
- OSS: Open-Source Software
- COTS: Commercial off-the-shelf
- Internal: Internally used
- Inner Source: OSS within a particular organization
- Services: Developed as a service
- Freeware: Software that is available free of cost
- Code snippet: A small code which shows how to accomplish a specific task
- The field Created by is set automatically to the creator/owner of the component.
- Click on Default Vendor field.
- This opens a dialogue box, use the type field to search for the vendors.
- Select the vendors
- Click on Select Vendor.
- When you start typing in the Categories field, a list of categories that match are displayed to choose from.
- Enter the Homepage URL, this is the web address for your component.
- Enter a Short Description for your component.
- Enter the Blog URL, this is the web address for the blog of your component.
- Modified on date will be set automatically.
- Enter the Wiki URL, this is web address for the wiki page of your component.
- Modified by will be set automatically.
- Enter the Mailing List URL, this is the web address of the mailing list of your component.
B. Roles
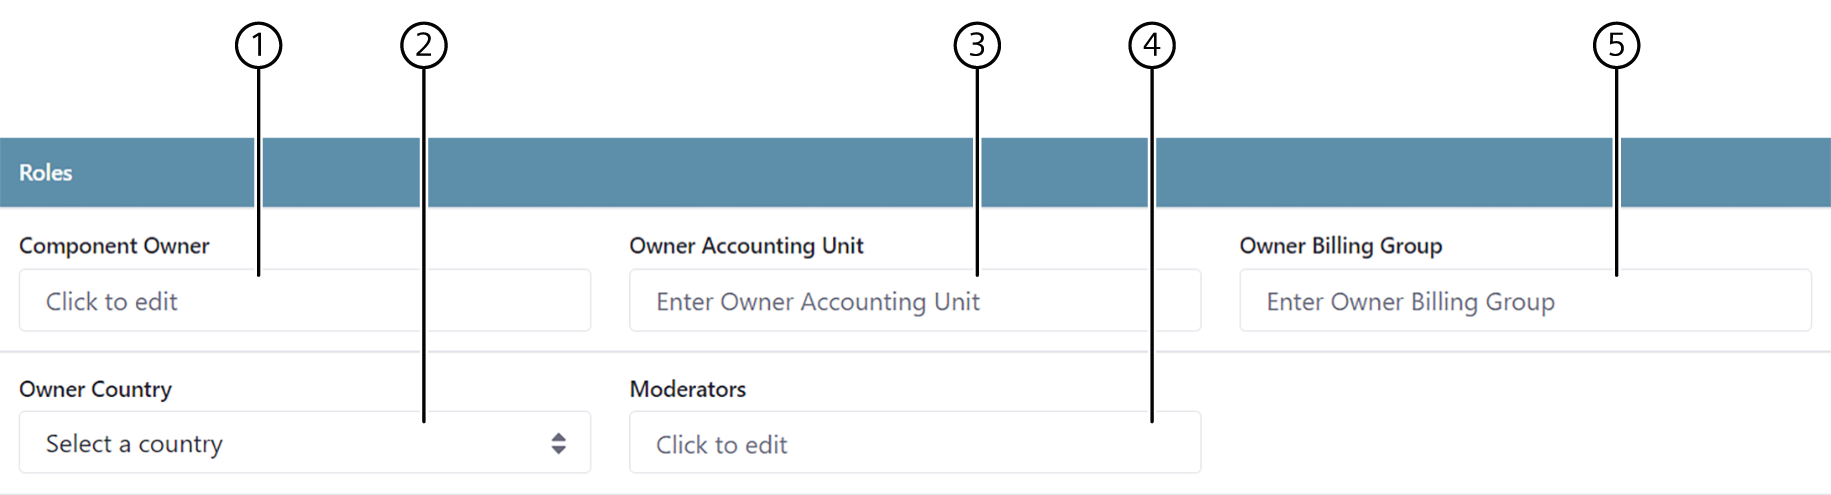
Component owner holds the component. Click on the field to select Component Owner.
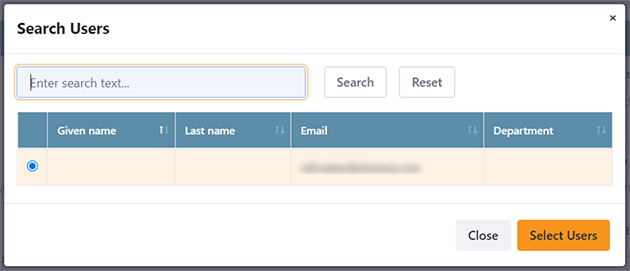
- This opens a dialogue box, use the type field to search for the Component Owner.
- Select the users
- Click on Select Users.
Select a country from the list to assign as Owner Country.
Enter the Owner Accounting Unit.
Moderator is the user responsible for the component. Click on the field to select moderators.
- This opens a dialogue box, use the type field to search for the moderator.
- Select the users
- Click on Select Users.
NOTE: ALL CLEARING EXPERTS, CLEARING ADMINS AND SW360 ADMINS ARE MODERATORS BY DEFAULT.
- Enter the Owner Billing Group.
C. Additional Roles
To assign more roles to your project, use Click to Add Additional Roles.

Select the type of role from the drop-down list.
- Committer
- Contributor
- Expert
Enter Email address of the responsible personnel. To add multiple additional roles, repeat the same procedure.

To delete an additional role, click on
.
D. External Ids
For more information on how to add an External ID for your component, refer to E. External Ids.
E. Additional Data
For more information on how to add an Additional Data for your component, refer to F. Additional Data.
After all the summary information is filled click on Create Component, which redirects you to another page where you can add more component information. Following are the two new sections to be filled:
- Releases
- Attachments
2. Releases
A release is a specific version of a component. To add Release information for your component:
Click on Releases.
Then click on Add Releases. You will be redirected to another page to add more information about the release you want to create. Following are the two sections where you must enter information
- Summary
- Linked Releases
A. Summary
NOTE: FIELDS MARKED "*" ARE MANDATORY.
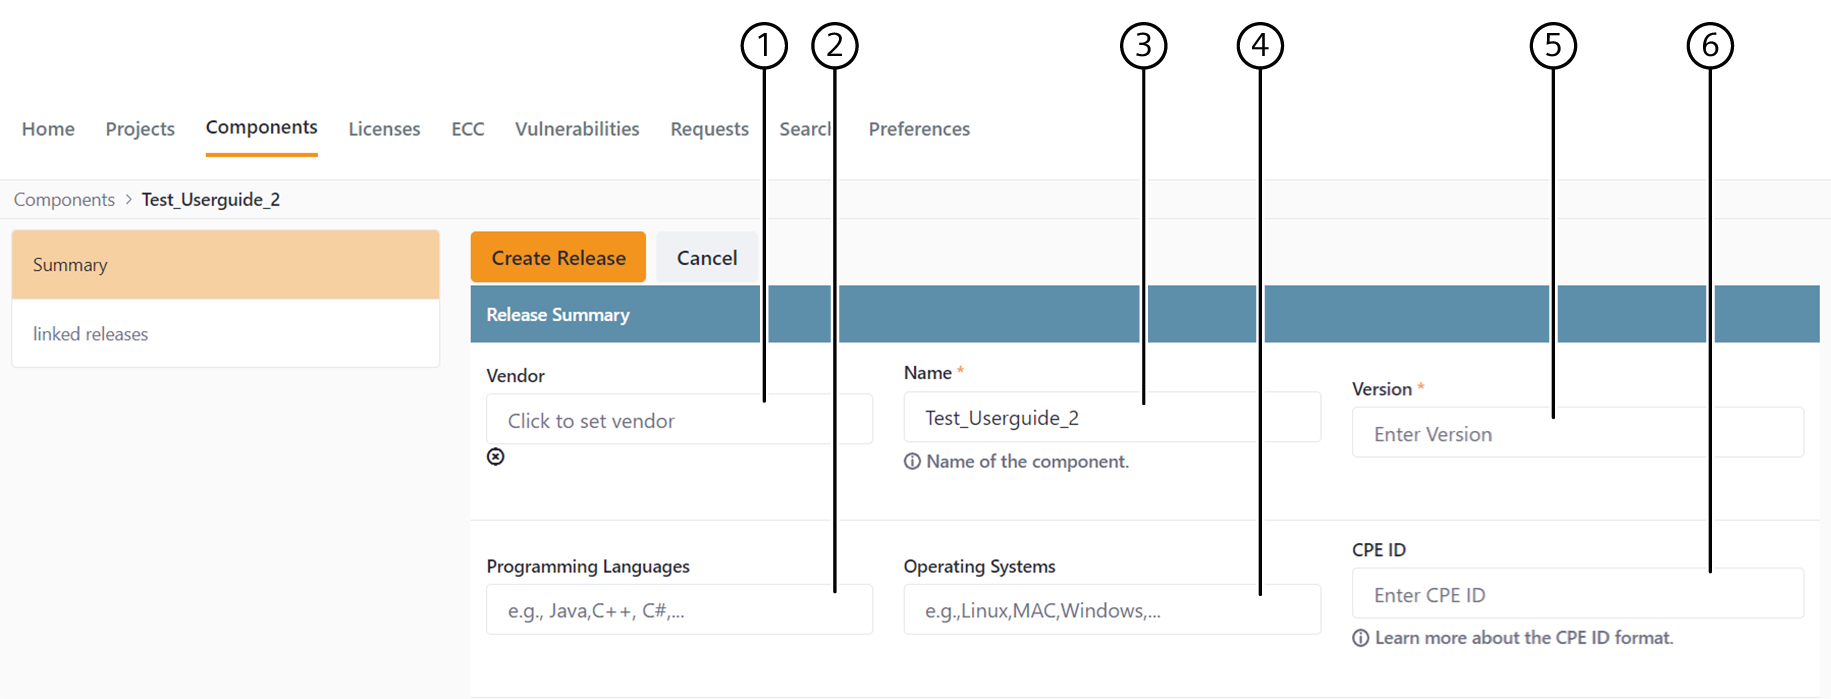
- Click on the field to select the Vendor for your component. This opens a dialogue box, search and select the vendor and click on Select Vendor.
- Enter the Programming Languages used for the release.
- Name for the release will be auto generated from the name given to the component.
- Enter the Operating Systems used for the release.
- Enter the Version for the release.
- Enter the CPE (Common Platform Enumeration) ID for the release.

Enter the Software Platforms for the release.
Click on the field Other License to set other license information for the release. This opens a dialogue box, search and select the licenses and click on Select Licenses.
Set Release Date.
Enter the Source Code Download URL. This is the web address from where source code of the release can be downloaded.
Click on the field Main License to set other license information for the release. This opens a dialogue box, search and select the licenses and click on Select Licenses.
Enter Binary Download URL. This is the web address from where binary of the release can be downloaded.
Clearing state will be set to “new” by default.
Select the value for the Release Mainline State from the drop-down list.
- Open: No license clearing
- Mainline: Permissive license with no specific obligations
- Specific: Permissive license with additional obligations with standard obligations
- Phaseout: Not used anymore
- Denied: Not to be used because of a specific reason
Created on is set automatically.
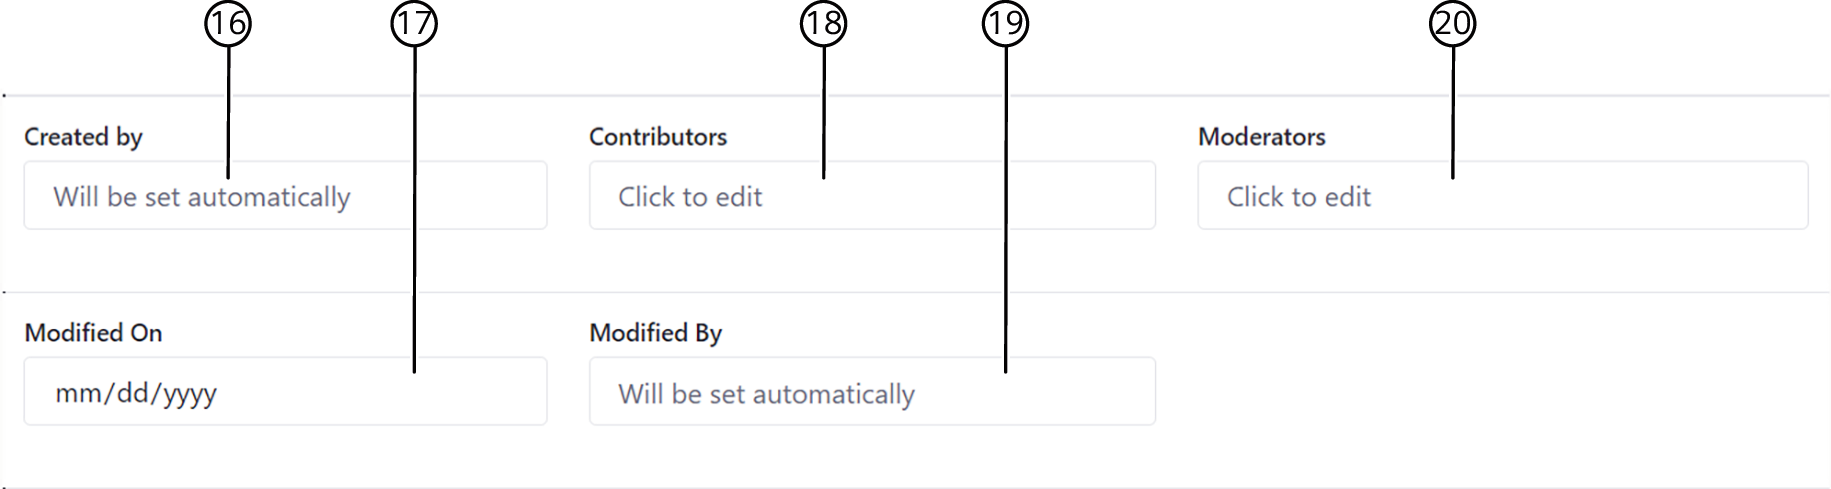
Created by is set automatically.
Modified on is set automatically.
Click on the field to select Contributors. This opens a dialogue box, search and select the contributors and click on Select Users.
Modified by is set automatically.
Moderator is the user responsible for the release. Click on the field to select moderators.
- This opens a dialogue box, use the type field to search for the moderator.
- Select the users
- Click on Select Users.
Additional Roles, refer to 3. Additional Roles.
External Ids, refer to 4. External Ids.
Additional Data, refer to 5. Additional Data.
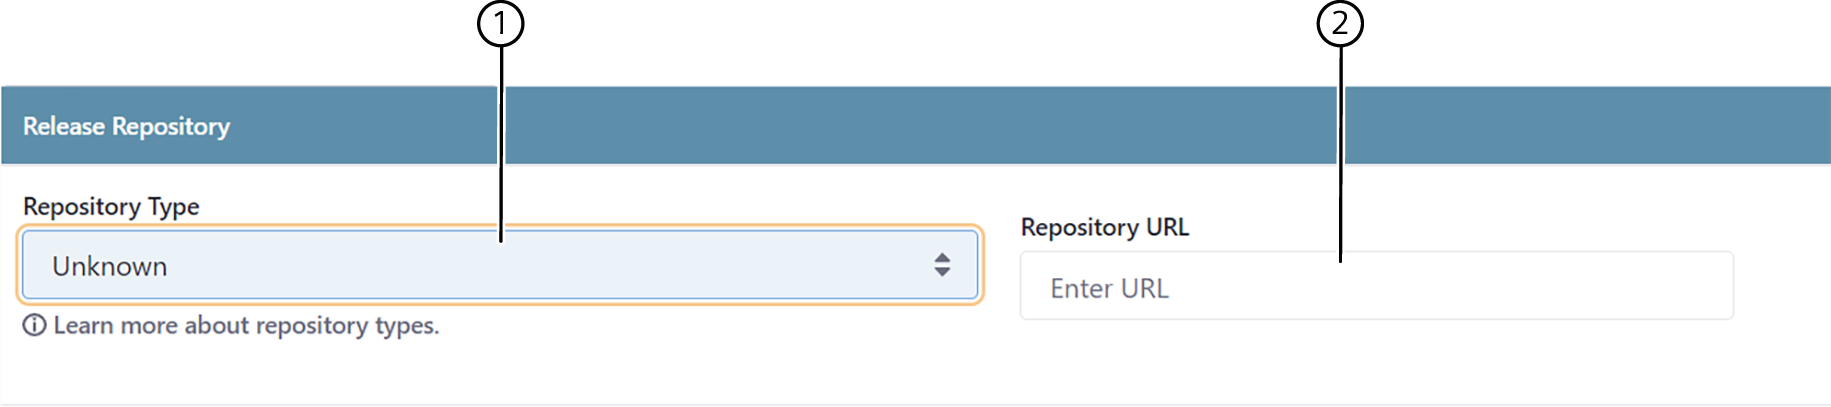
Release Repository
You can add a release repository URL for your release. To add a release repository:
Select the Repository Type from the drop-down list.
Enter the Repository URL.
B. Linked Releases
To add linked releases to your release, click on linked releases. For more information, refer to B. Linking Releases.
Click on Create Release to add more information for this release.
C. Clearing Details
Clearing details contains important information that are required for the license clearing activities. This information is useful for the reuse of license clearing results. To add clearing information to your release, click on Clearing Details.
![]()
- Check the boxes for all applicable clearing details.
- Enter the applicable data for Scanned and Clearing Standard. For e.g., date or specific version of your License Scanner.
- Enter External URL for the release.
- Add Comments.
Request Information
![]()
To request more information regarding the release, follow the procedure:
- Enter Request ID and Additional request Info.
- Set Evaluation Start and Evaluation End date.
Supplemental Information
![]()
You can enter internal supplier ID and number of security vulnerabilities for your release. To add this information.
- Enter External Supplier Id and the count of Vulnerabilities.
D. ECC Details
NOTE: ECC DETAILS ARE SET AUTOMATICALLY FOR OSS RELEASES.
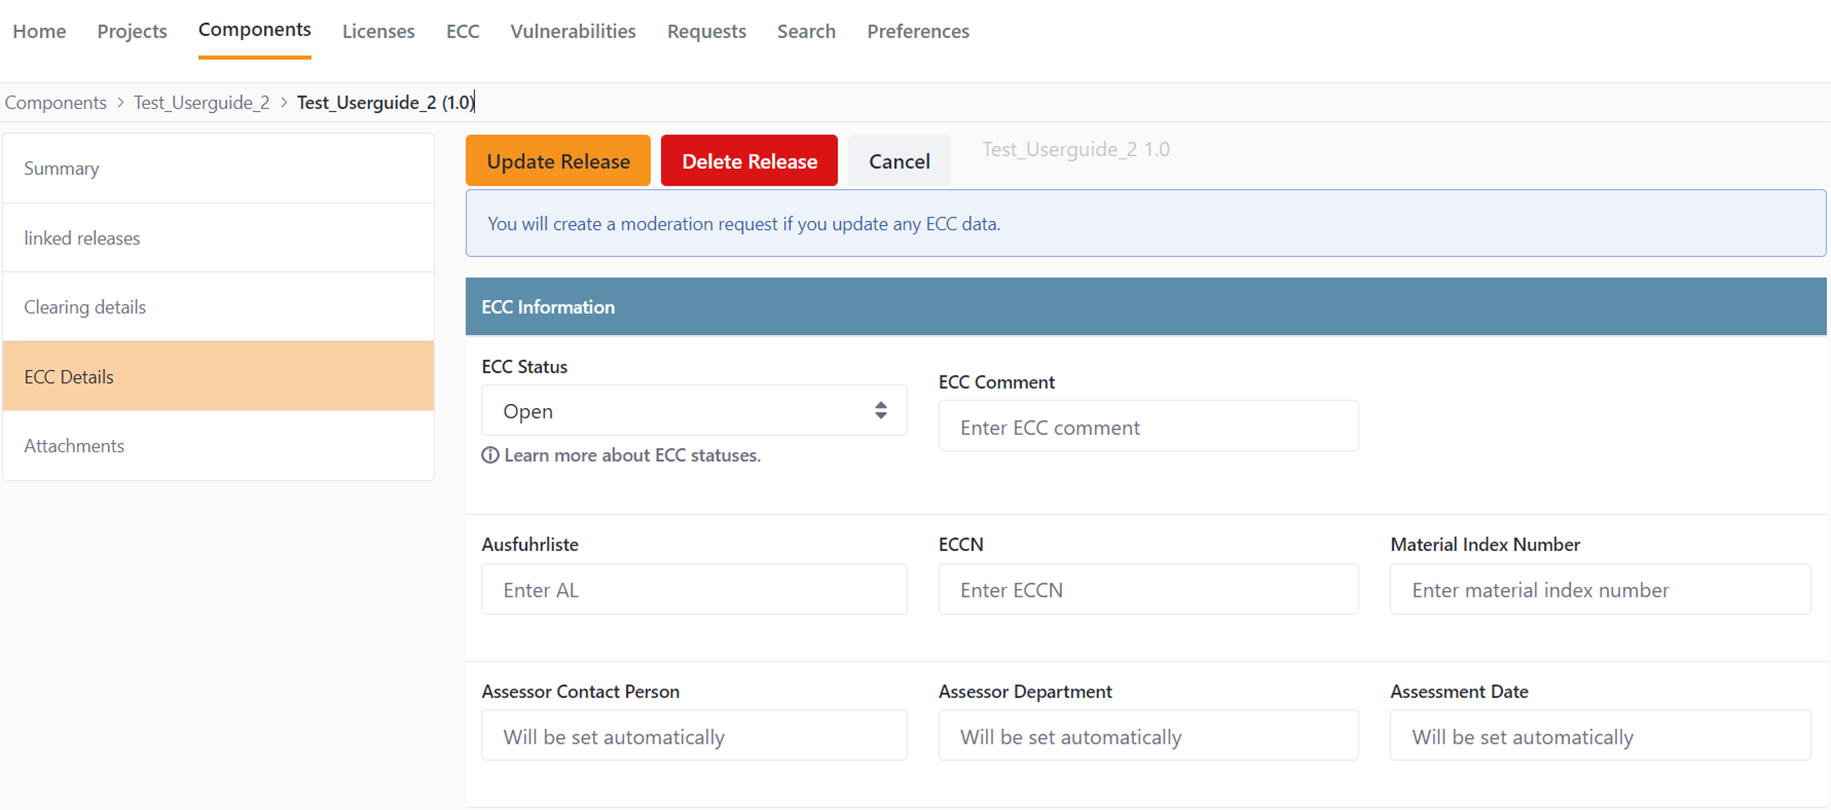
To enter ECC details for a release click on ECC Details.
- Select the ECC Status from the drop-down list.
- Open
- In progress
- Approved
- Rejected
- Add ECC Comment, if required.
- Enter Ausfuhrliste, this is a German ECC number.
- Enter ECCN and Material Index Number.
- Assessor Contact Person, Assessor Department and Assessment date will be set automatically.
E. Attachments
You can add or modify the attachments to your release. To add attachments, click on Attachments on the left. For more information on how to add attachments to the release, refer to 1.06 Edit project.
After entering all the release information, click on Update Release.
To delete the release, click on Delete Release.
If you do not want to create a release, click on Cancel.
2.05 Edit Component
- Search for the components you want to edit or navigate from the component list.
- Click on from the actions column. You can also edit a component by clicking on the component and then clicking on Edit Component.
- You can view summary, releases, and attachment information of the component.
- Click on Summary to edit component summary information. For more information on the fields to edit, refer to 1. Summary.
- Click on Releases to view all the releases that are linked to the component. If you want to add more releases to the component click on Add Releases at the bottom of the list. For more information on how to add a release, refer to 2. Releases.
- Click on Attachments to view all the attachments that are linked to the component. If you want to add more attachments to the components, refer to paragraph 4 of 1.06 Edit project.
- To update the new component information, click on Update Component.
- To delete the component, click on Delete Component.
- If you do not want to edit the component, click on Cancel.
2.06 View Component
To open a view mode for a component:
- Search for the components you want to edit or navigate from the component list.
- Click on the component name.
- You are now in view mode of the component, and you can view all the details of the components like summary, release overview, attachments, vulnerabilities and change logs.
- You can edit a component, Merge a component, Split a component, Subscribe to a component in this mode.
A. Merge
This functionality is used when there is a duplication of components, and this functionality helps us to combine all the duplicates into one single component. To merge a component with another, click on Merge. This action will redirect you to another page where you can:
- Choose the from the list of components that should be merged into the current one.
- Merge the data from the source into the target component.
- Check the merged component and confirm the merge.
B. Split
This functionality is used when we want to copy the information from a component. This is a shortcut to create a component and change aspects like version or release instead of creating a new one entirely.
To Split a component, click on Split. This action will redirect you to another page where you can:
- Choose a target component into which the current component needs to split.
- Split the data from current component to the target component.
- Check the split version of the component and confirm the split.
C. Subscribe
You can Subscribe to a component to get notified with emails when any changes are made to the component.
To not get notified for a particular component, click Unsubscribe.
D. View Component Information
You can view component information by navigating the navigation tree.
- To view component summary, click on Summary. To edit summary information for the component, refer to 2.05 Edit Component.
- Click on Release Overview to view all the releases for the component. To edit details for any of the linked releases click on
from the actions column, this will redirect you to a release view page where you can view the following:
- Release Summary
- Linked Releases
- Clearing Details
- ECC details
- Attachments
- Vulnerabilities
- Change Log
For more information on these sections, refer to 2. Releases.
Clearing Details
You can view the following clearing information for the release in view mode:
- SPDX Attachments
- Assessment Summary info
SPDX Attachments
SPDX attachments are the clearing reports which are in XML formats. You will need an approved clearing report to use this release.

- Click on Show license info to view main license Ids and Other license ids.
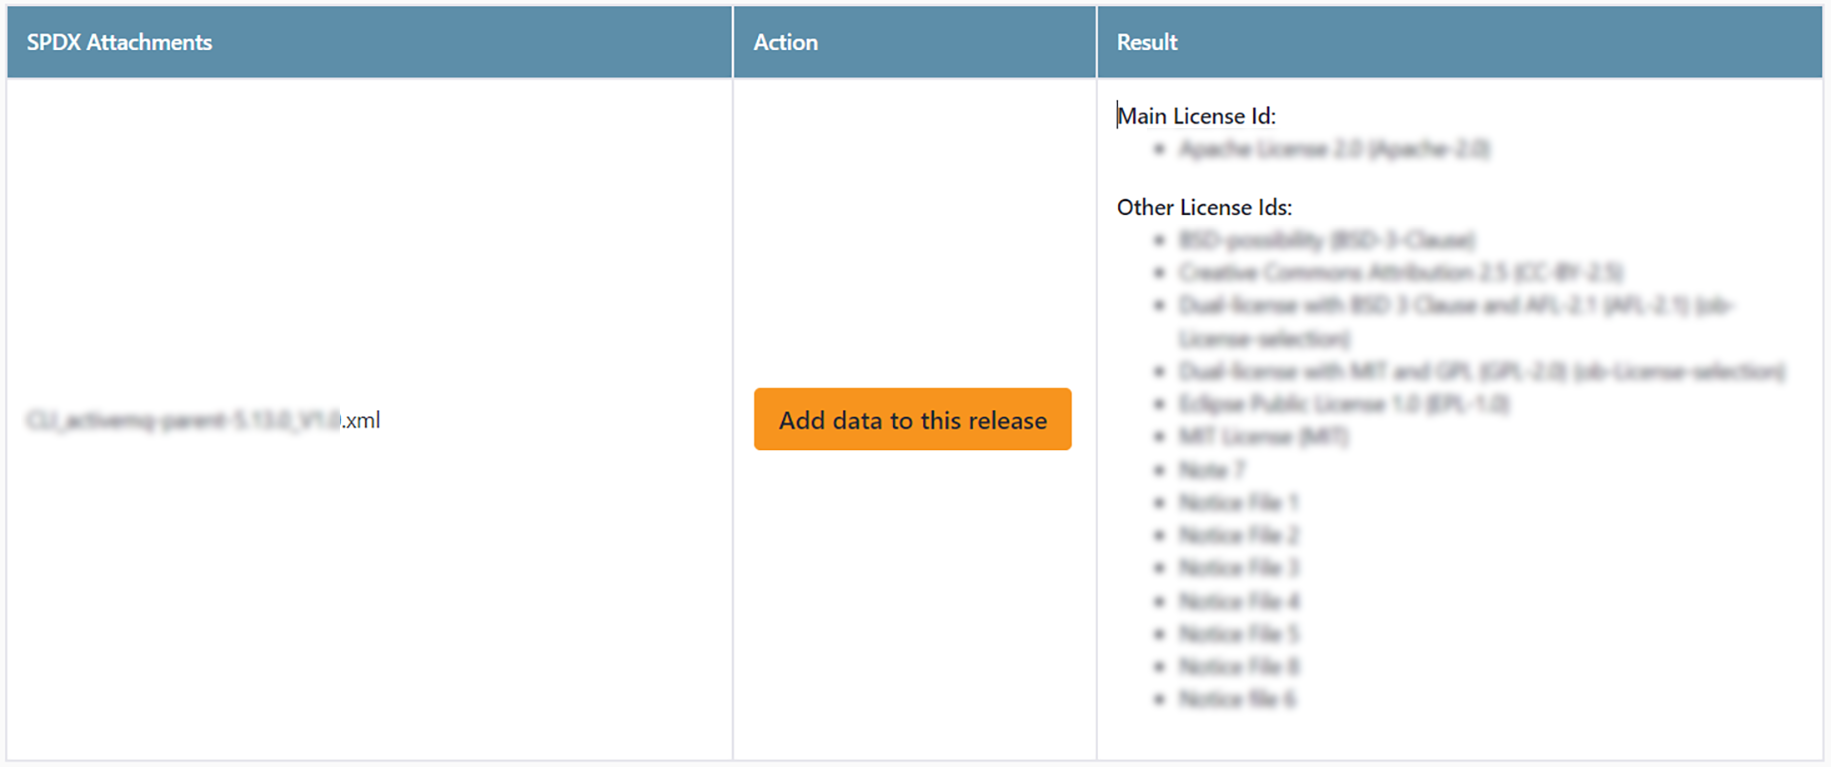
- If you want to add this data to the current release, click on Add data to this release.
Assessment Summary Info
You can view if the clearing expert has added any summary in the clearing report.
- To view the summary, click on Show Assessment Summary info.
- If there are multiple approved releases, this section will display text “multiple approved CLI found in release”.
Vulnerabilities
All the vulnerabilities that are linked to the release/component are listed in the vulnerability section.
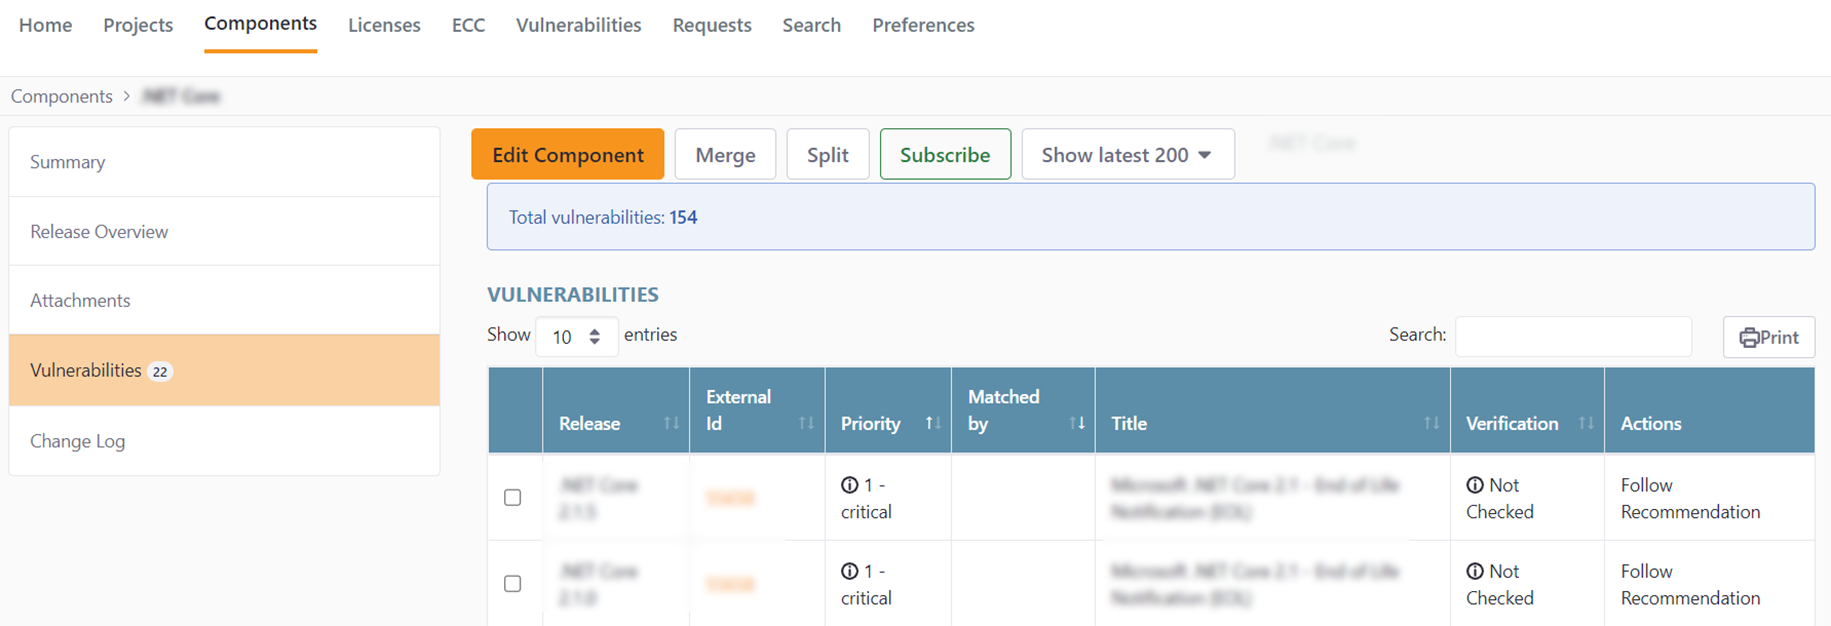
- Click on Vulnerability on the left to view all the linked vulnerabilities for this release/component.
- You can sort the vulnerabilities by their external ids, priority, matched by, title, verification and actions.
- To view more information on the vulnerability, click on the external id of the vulnerability. You will be redirected to another page with all the information about the selected vulnerability.
Change Log
You can see all the changes that are done for the release/component in change log section.
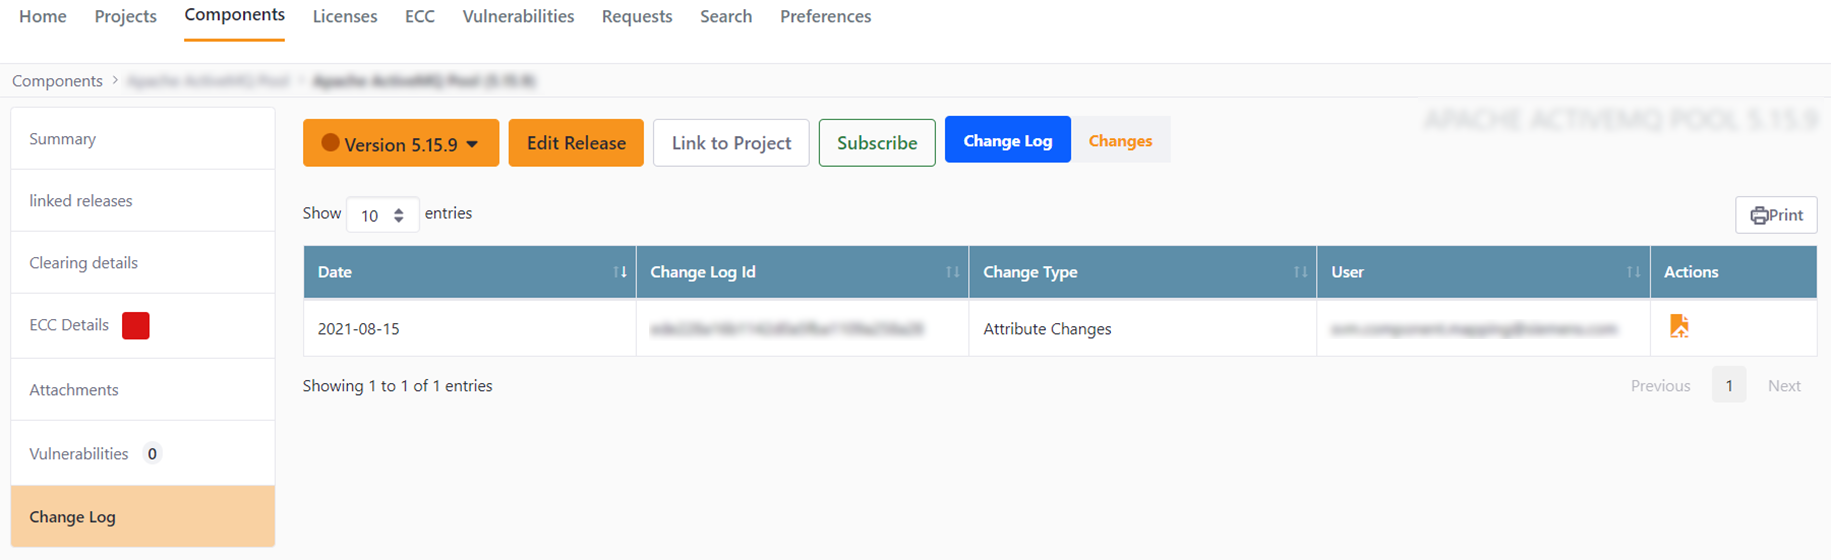
- To view all the changes done for the release click on Change Log.
- You can now view change date, change log id, change type and user.
- Click on
 to view all the changes done for a change log id.
 - Click on
 to view the moderation request details for a change log id.
2.07 Import SPDX BOM
For more information on importing SBOM, refer to 1.05 Import SBOM.
2.08 Export Spreadsheet
For more information on exporting spreadsheet, refer to 1.13 Export Spreadsheet.