|
|
-
Flexible Web Project Creation
-
This test case consists of two WTP flexible
projects, which must be created.
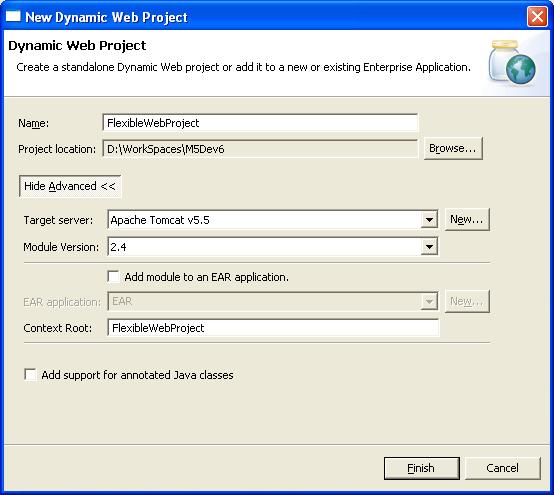
Create a flexible web project by selecting
File->New->Project->Web->Dynamic Web
Project. Name the web Project
"FlexibleWebProject" and select finish.
-
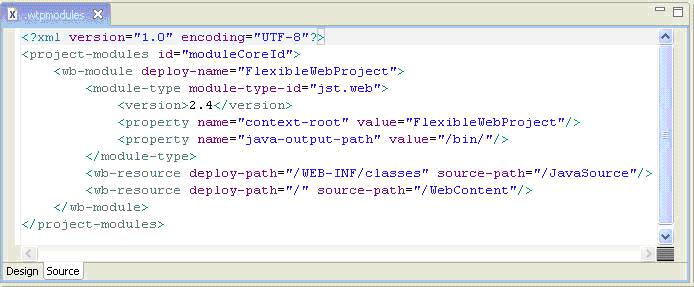
Open the web project and notice the
.wtpmodules files in the root of the
project. As indicated in the flexible
project documentation, this file holds
information which maps the individuals
modules (and their dependent modules)
to a deployable output location. In
subsequent steps we will be modifying this
file to add dependent modules.
-
Java Utility Project Creation
-
Create a Java Project by simply selecting
File->New->Project->JavaProject. Name this
Java Project "Remote". When this remote
project is created select the project, right
click and select New->Other->Java Source Folder.
Name this folder "remote". Finally right click
on the new source folder and select add
New->Class.
Name the class Util.java and change the
package name to "code". In the java class
add the following method:
public static String displayGreeting(){
return
"HelloWorld From Remote";
}
-
Setting up the Flexible Web Project
-
Open the Java Jar Dependencies page of the FlexibleWebProject,
and select Remote.
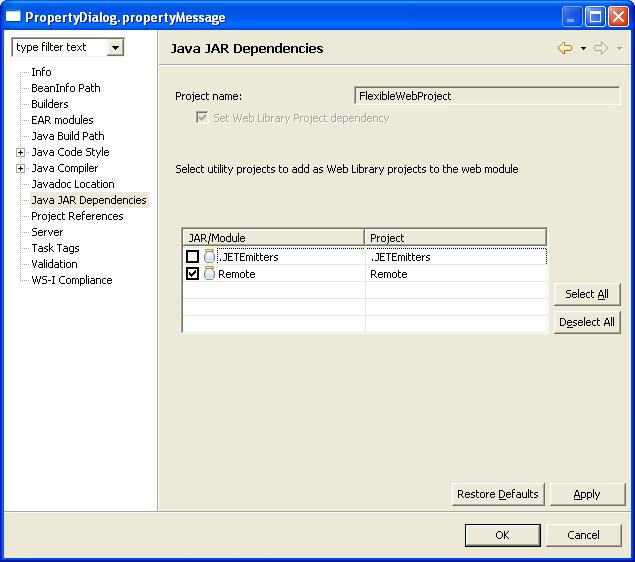
This will make the Java project a flexible project, add the project dependency to the Remote project in the Web project
and modify the .wtpmodules file of the Web project.
-
The final .wtpmodules file will look like as
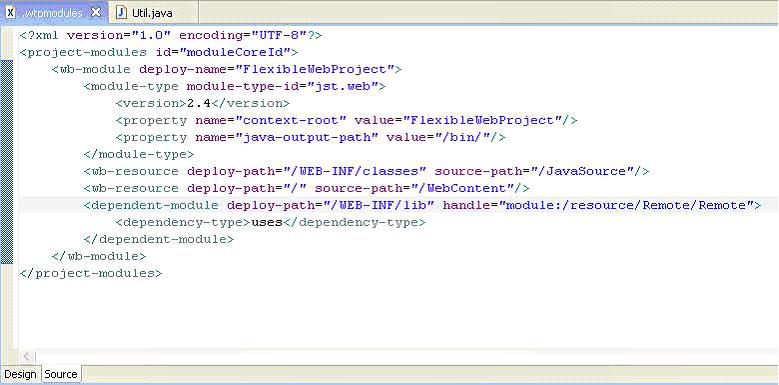
-
Next we must create a Servlet which will be
used to ensure the flexible builder's output
runs on a server. To do this select
File->New->Other->Web->Servlet.
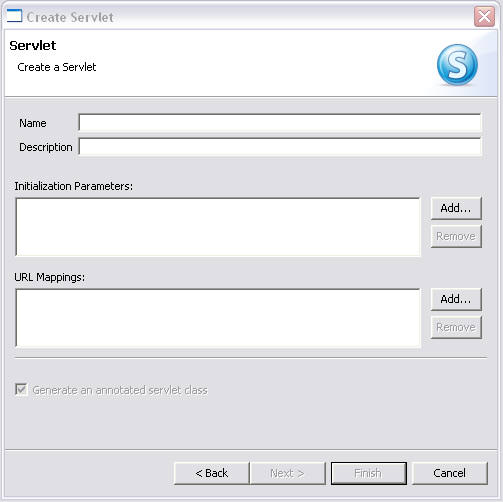
Name this new Servlet HelloWorldServlet and
target it to the "src" package. Add the
following java code:
public HelloWorldServlet() {
super();
}
protected void doGet(HttpServletRequest
req, HttpServletResponse resp) throws
ServletException, IOException {
resp.setContentType("text/html");
PrintWriter out
= resp.getWriter();
out.println("Hello
World");
String msgRemote
= Util.displayGreeting();
out.println(
msgRemote );
}
protected void doPost(HttpServletRequest
req, HttpServletResponse resp) throws
ServletException, IOException {
resp.setContentType("text/html");
PrintWriter out
= resp.getWriter();
out.println("Hello
World");
}
-
Building and Running on Server
-
The Projects/Modules for this test are now
correctly setup. The next step is to build
the workspace to create the desired output
structure. To do this simply select
Project->Clean, this will clean the project
and run a build. You will now notice a
.deployables folder in both projects. This
represents the output data created via the
flexible project builder.
-
Finally select the FlexibleWebProject, right
click and select "Run on Server". Once the
server starts, manually invoke the servlet
via browsing to:
http://localhost:8080/FlexibleWebProject/HelloWorldServlet
-
The following output should be displayed
Hello World
HelloWorld From Remote
|