PCM Simulation
The deprecated “Qt GUI” for simulation configuration based on Qt mainly aimed to edit PCM-based openPASS experiments was part of minor releases v0.5 – v0.11.
The latest version of this deprecated GUI can be found here: https://ci.eclipse.org/openpass/job/openPASS_simulator_build/view/tags/job/openPASS_0.11/
This plugin is used to configure and start a simulation based pcm data or simulation configuration sets of previous simulations.
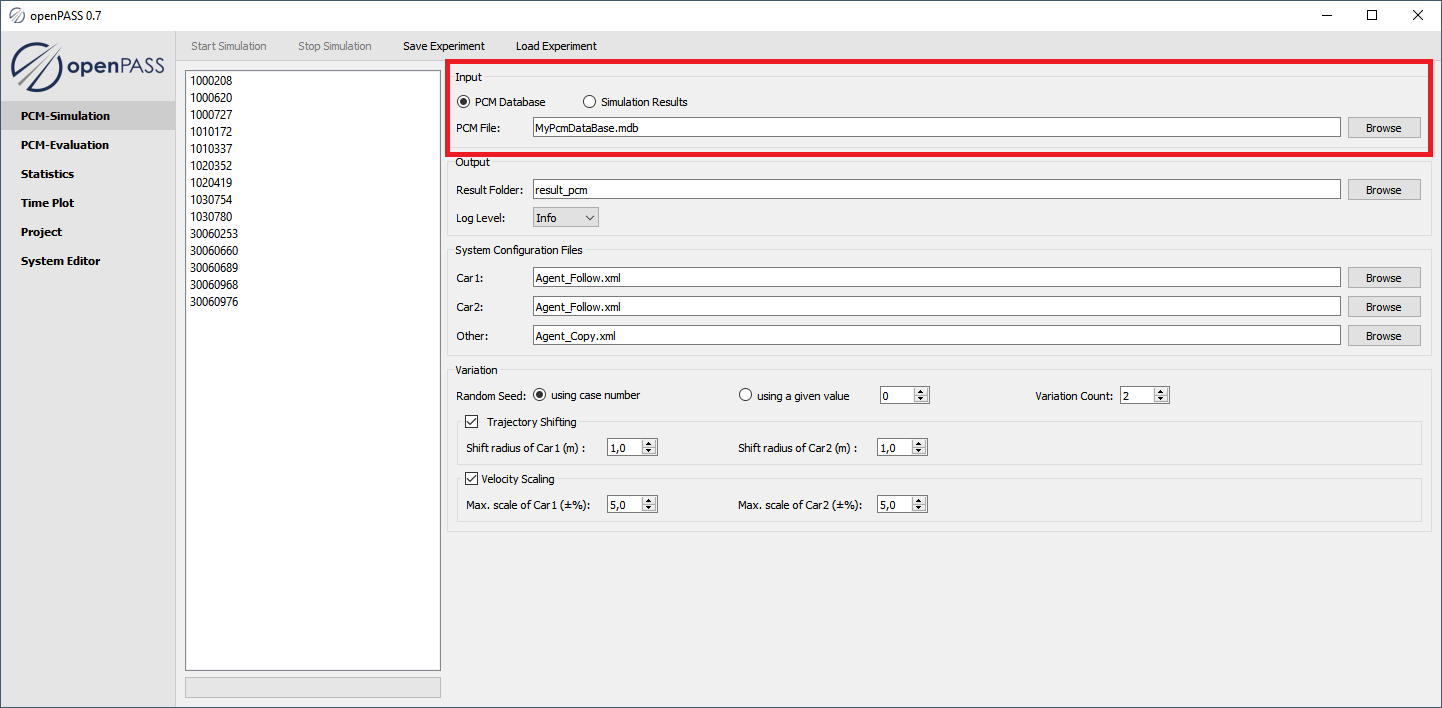
Simulation Input
UseCase: Database
Select the radio button
PCM DatabaseSelect a PCM database file
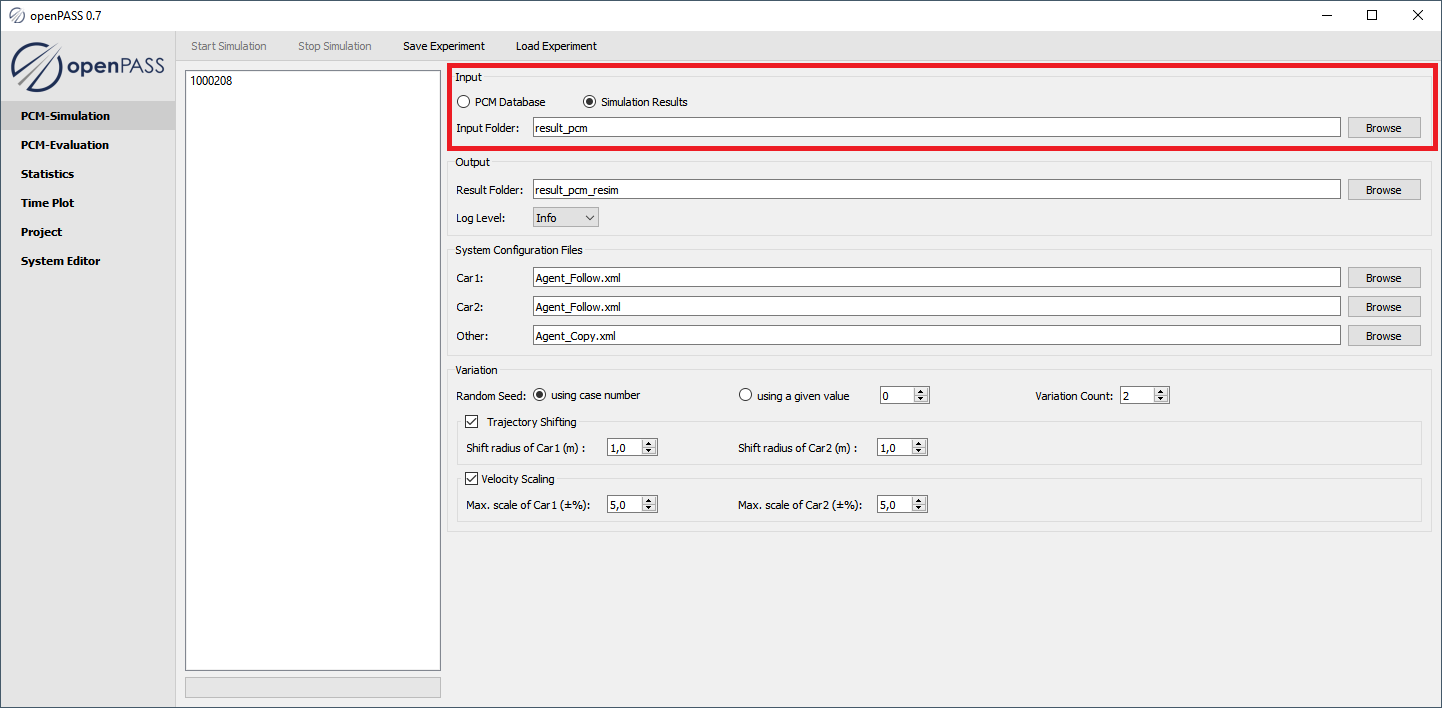
UseCase: Resimulation
Select the radio button
Simulation ResultsSelect a folder with previous Results
Note
The selected output folder must be different to the input folder
Warning
To ensure that the previous results are correctly read, the folder structure of the results has to follow the structure the GUI itself generates when the simulation is started from a database. Only the configuration files of the default folders are loaded. No variation is loaded and taken into account at this place.
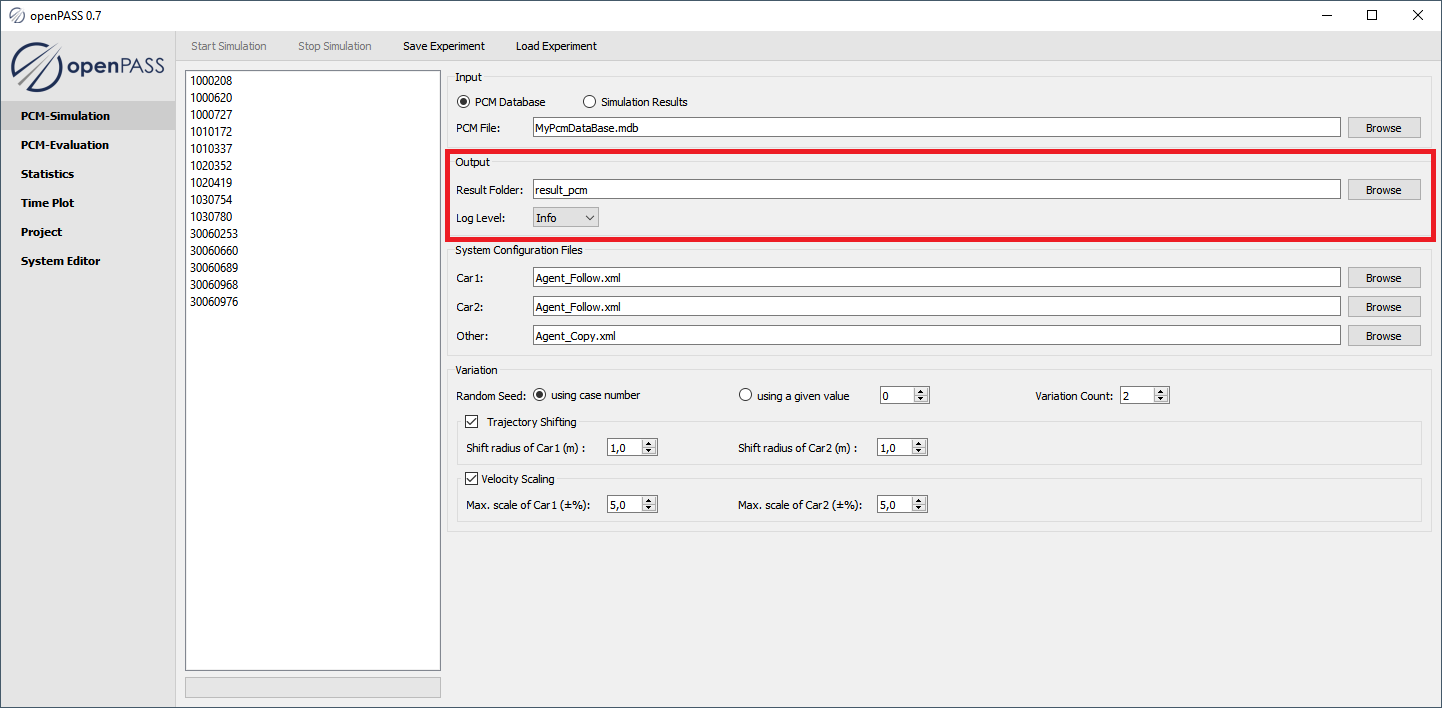
Simulation Output
In
Result Folderyou can select a folder where the output shall be writtenIn
Log Levelyou can define at what level a logging output shall be produced
Error- Log only Errors
Warning- Log additionally warnings
Info- Log additionally information
Debug- Log additionally debug information
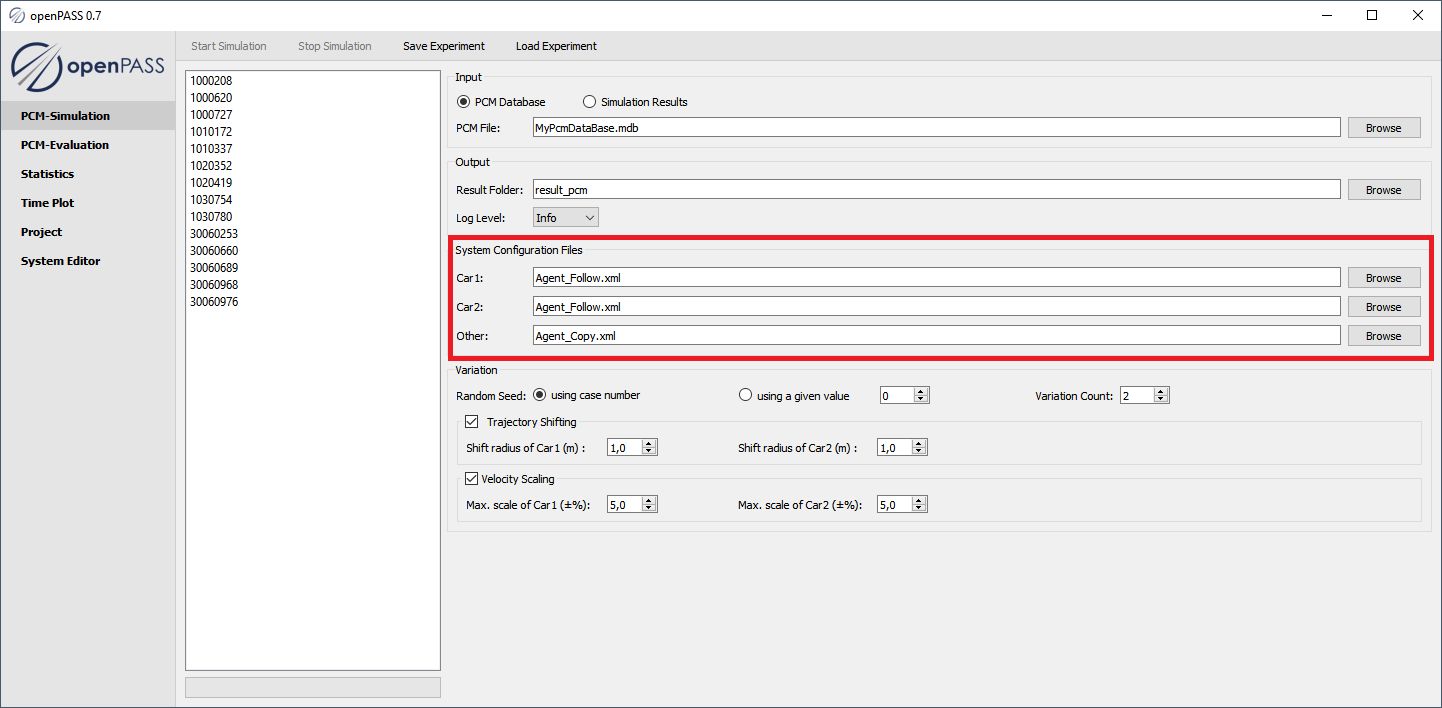
Simulation Configuration
At this point, the User is able to choose what system configuration shall be used for each agent.
The User can either select one or multiple system configuration files (comma separated).
In the case of multiple files are configured, there will be unique sets of simulation configuration files generated for each possible combination, which are placed in folders named / coded like <Car1_Index>-<Car2_Index>-<Other_Index> e.g. 1-0-2
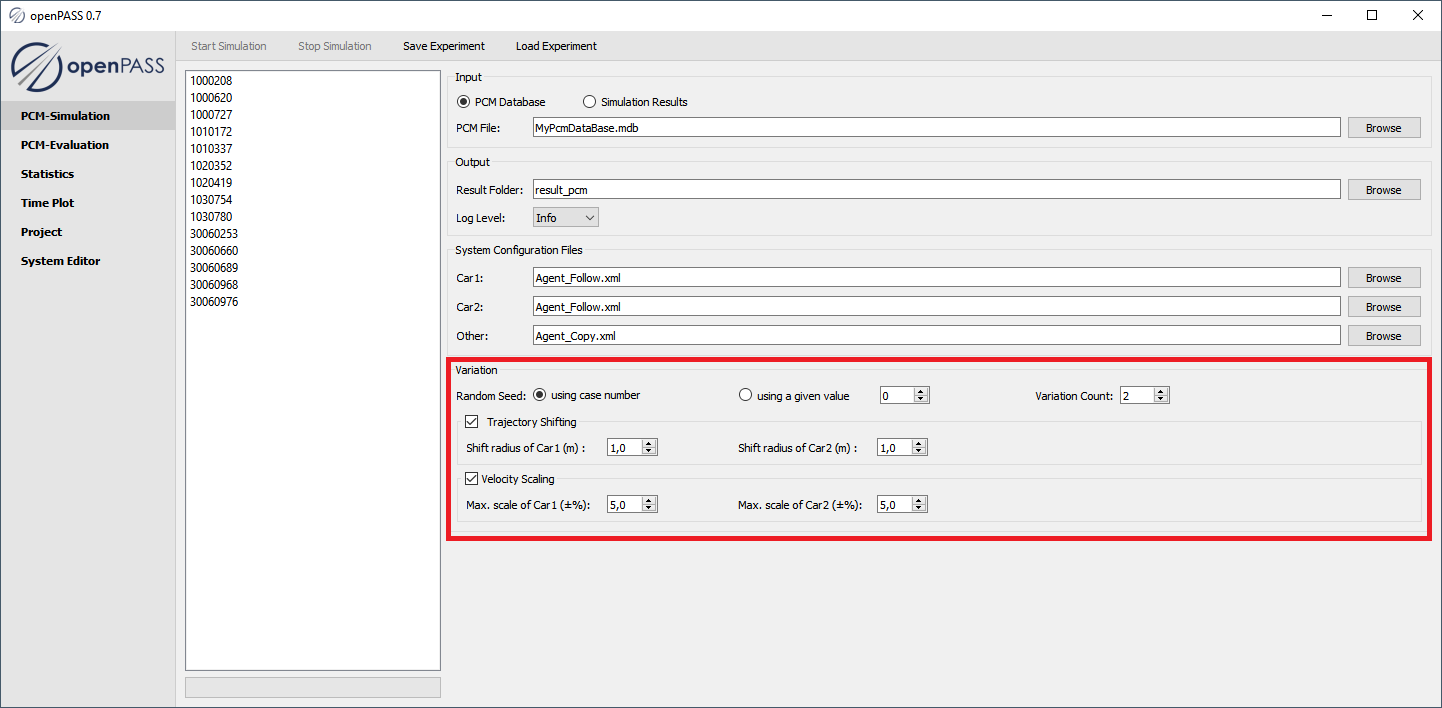
Variation
The random seed can be set to a specific initial random seed by
using a given valueor just byusing the case numberThe number runs can with different random seed can be set by changing
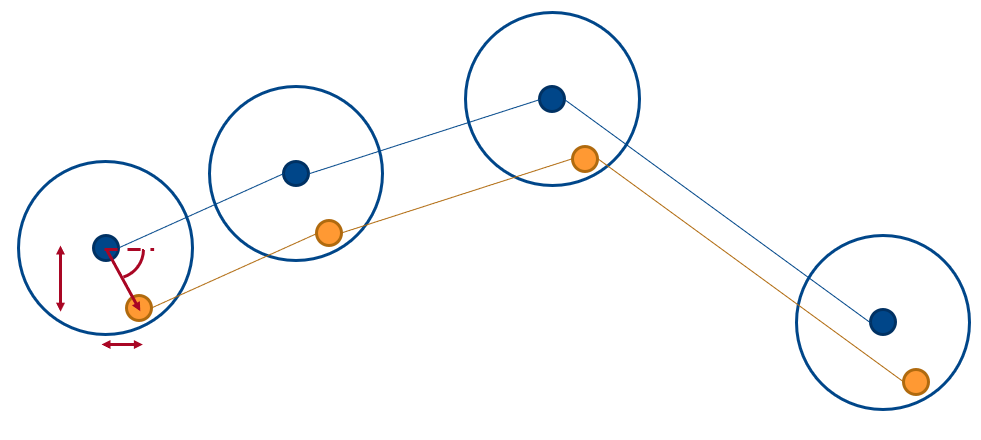
Variation CountThe original trajectory can be shifted randomly by setting the
Shift radiusfor Car1 and Car2Given a shift radius R for a vehicle
For each position P in trajectory, it shifted position P’ is calculated by randomly generating a distance D (D<= R) and a relative angle in polar coordinate

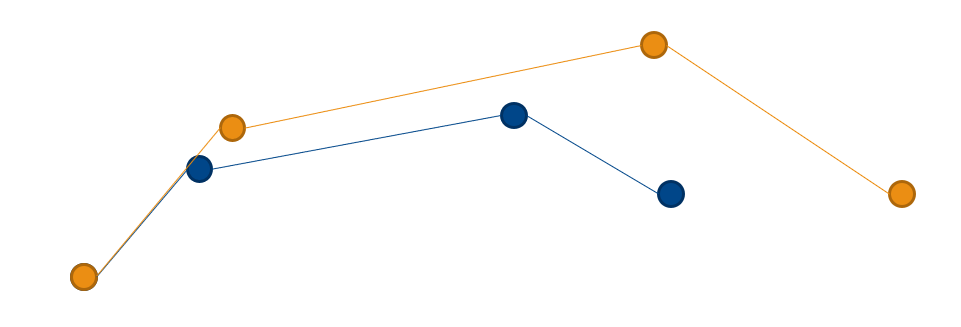
The original velocity can be scaled randomly by setting the
Max scalefor Car1 and Car2Given a velocity deviation :math delta V for a vehicle
In a trajectory, a position P_{i} is represented as

The new position P_{i} can be represented as

with a scaling factor k
Note
The additional random seeds which are used by the variation are chosen randomly depending on the initial random seed. Therefore they´re reproducible
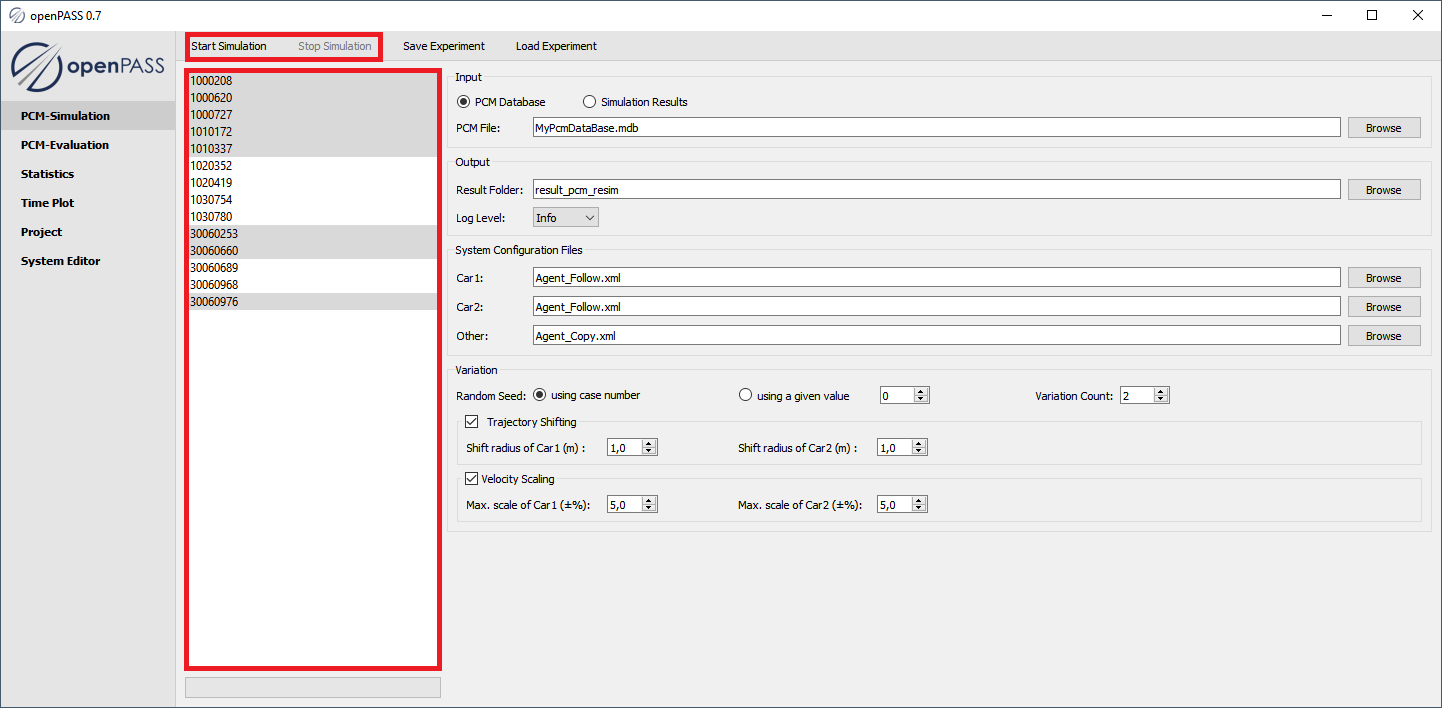
Simulation Start
Select one or multiple simulation cases (by pressing the CTRL / SHIFT key)
Press the button
Start Simulation
Note
The User can interrupt the simulation process by pressing Stop Simulation.
The simulation will stop after the current simulation is finished.
Therefore it won´t start the remaining simulations anymore.
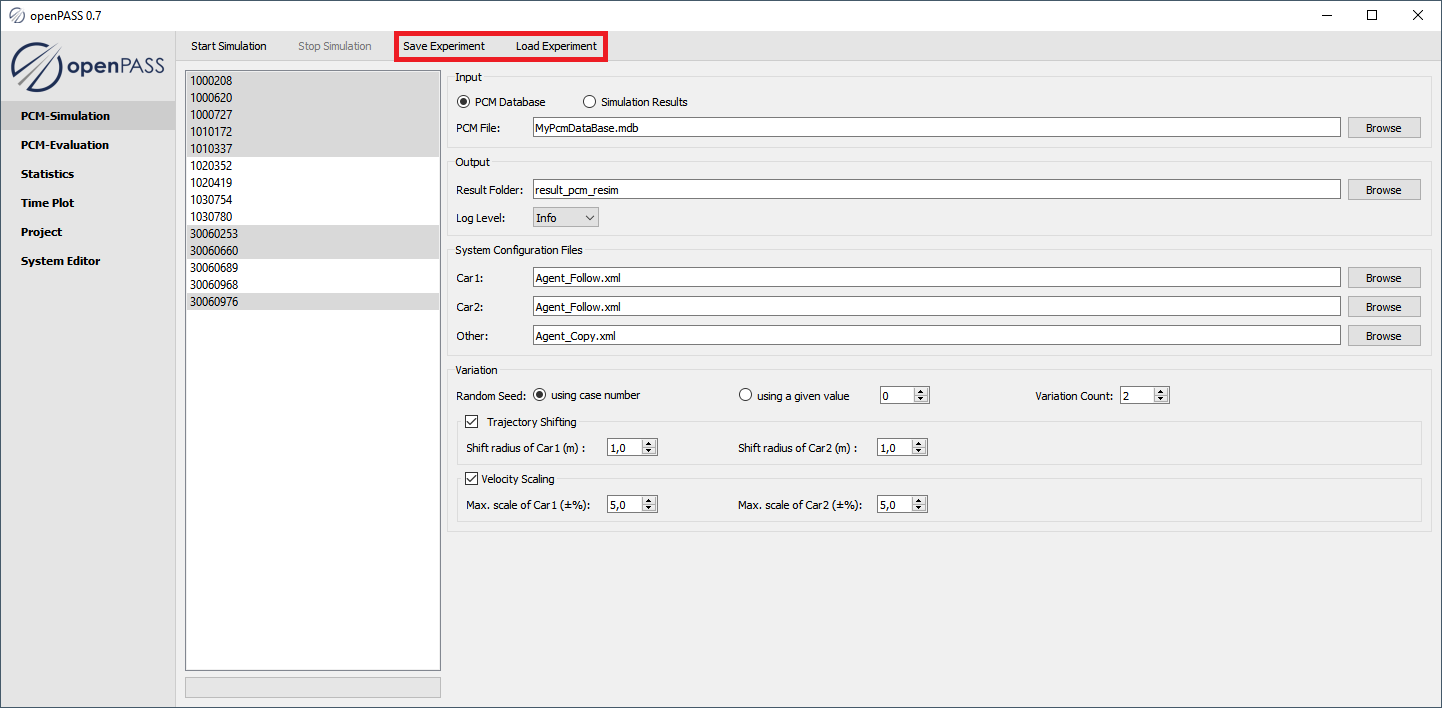
Save / Load Experiment
Every change in the gui can be saved as in “Experiment” in an text file. This file can later be loaded to retrieve the previous used configuration of the “Experiment”.
Result Folder Structure
<Result Folder Name> (e.g. result_pcm)
<Case Name> (e.g. 1000208)
<System Configuration combination code> (e.g. 1-0-2)
<Variation Name> (e.g. default or Var_00001)