|
|
By Joan Haggarty
November 23, 2005
|
| Introduction |
|
|
|
|
|
This document is one of a series of tutorials to
demonstrate the use of the Web Services tools in the Web
Tools Platform Project with the WTP 1.0 M9 drivers.
|
|
|
This tutorial shows how to run Web services scenarios (top down web service, bottom up web service
and client generation) without the web service wizard by way of an Ant task. For M9, the
tasks are only supported on Windows but will be available on Linux in M10.
|
|
|
The Ant task can be invoked in one of two ways:
- From the command line on Windows from the wsant.bat file. This method runs
Eclipse headless. Customization of the batch file to reflect your environment is necessary.
- From within Eclipse, the Ant file wsgen.xml can be invoked directly as an
Ant build file.
The objective of this tutorial is to show how to configure the batch file, Ant file and properties
files in addition to invoking the Ant task. The scenario will use the top down service generation
scenario to invoke the task inside the Eclipse workbench and then inovke the task from the command
line to generate the client for the generated web service.
|
| Set up |
|
|
|
|
| Before creating the Web service, there are two
prerequisites: |
|
|
-
Install Apache Tomcat
-
Create a dynamic Web project called
testProject
.
|
| Service Generation - Using the Ant Task inside Eclipse |
|
|
First, import the Ant files into the Eclipse workbench.
- Within, WTP, create a simple project called AntTest.
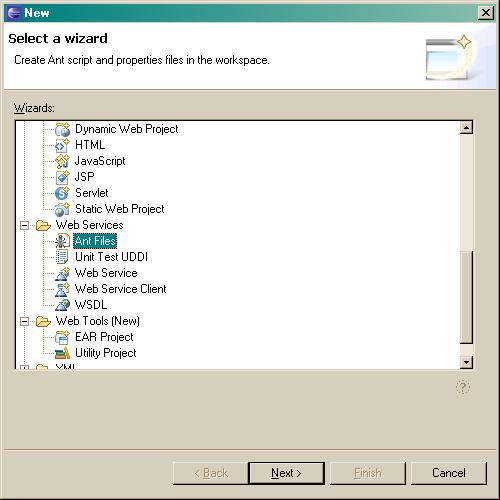
- Once you have created the simple project, use the main menu and
select: File > New > Other > Web Services > Ant Files. Click Next.

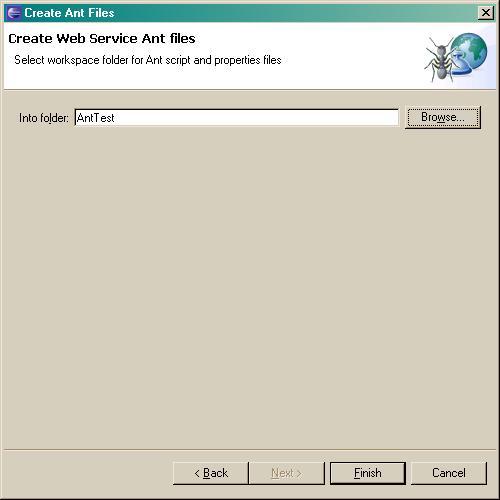
- Browse to the AntTest project.

- Click Finish.
- Under the Other Projects in the Project Explorer view, three files have been imported into the
AntTest project folder:
- wsgen.xml - the Ant file
- axisservice.properties - a sample Ant properties file for generating web services for the Axis runtime
- axisclient.properties - a sample Ant properties file for generating a web service client for the Axis runtime
|
|
|
Next, import the sample WSDL file AreaService.wsdl file into
the WebContent folder of the dynamic web project testProject.
|
|
|
No matter where the task is invoked, required input needs to be provided to the Ant task by way
of properties and a reference to the properties file updated from the Ant file.
The properties file must specify the resource that will be used to generate the service.
In this example, we will point to the AreaService.wsdl file in the testProject
web project. The type of scenario needs to be specified as well.
In this case, the scenario will be service.
|
|
|
- Go to the AntTest project under Other Projects in the Project Explorer view.
Open and edit the wsgen.xml Ant script so that
property file="axisservice.properties".
This indicates to the Ant task that you want to generate a service as opposed to a client. Remove any other property
file settings from the wsgen.xml file
- Save the wsgen.xml file.
- Edit the axisservice.properties file. Check that
scenarioType=service
and set InitialSelection to a workspace relative path that points to the AreaService.wsdl: InitialSelection=/testProject/WebContent/AreaService.wsdl. You can delete all
of the other properties in the properties file. The Ant task will default the properties based on the dynamic
project settings and the scenarioType setting.
- Save the axisservice.properties file.
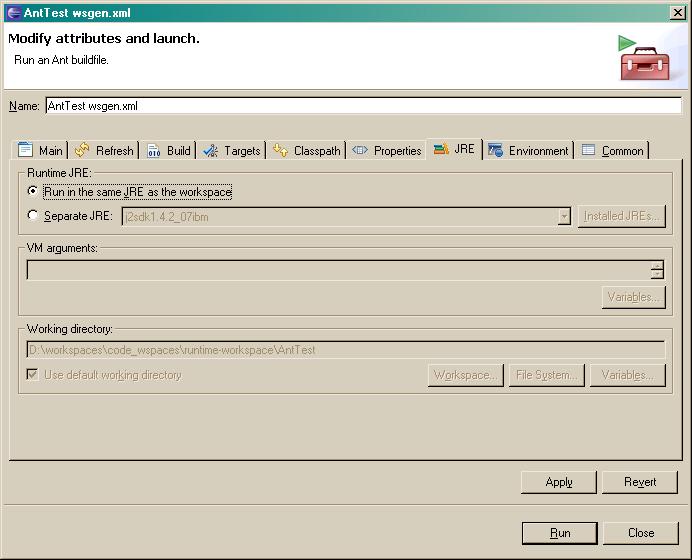
- Right click on the wsgen.xml file and select Run As > Ant Build...
- In the Ant dialog, click on the JRE tab and choose the radio button Run in the same
JRE as the workspace. Click Apply and then Run

- Once the generation is complete, you will get a Build Successful message in the console.
AreaServiceSOAP.wsdl should have been generated into the project's WebContent\wsdl folder
as well as the Java code in the src folder for the testProject web project in the org.tempuri.AreaService package -
- AreaService_PortType.java
- AreaService_Service.java
- AreaService_ServiceLocator.java
- AreaServiceSOAPImpl.java
- AreaServiceSOAPSkeleton.java
- AreaServiceSOAPStub.java
- Dimensions.java
You will also see deployment descriptors were generated in the WebContent\WEB-INF folder:
- undeploy.wsdd
- deploy.wsdd
|
|
| Note: |
|
| InitialSelection |
|
|
|
| Client Generation - Using the Ant Task at the Command Line |
|
|
Typically, you would use
either the Eclipse or the command line mechanism to invoke the Ant task, not both.
However, for the purposes of showing how
the Ant tasks can be invoked, we'll switch out to the command line to demonstrate generating the client code.
The next task is to generate a client for the AreaService web service using the same project and the
WSDL file generated using the wsgen Ant task within Eclipse earlier.
|
|
|
- Navigate to the plugins directory of your WTP installation. Change to the
org.eclipse.wst.command.env_1.0.0 plugin directory and then go to the
ant folder. For example: D:\wtp1110\eclipse\plugins\org.eclipse.wst.command.env_1.0.0\ant
- The following files should exist there:
- wsant.bat
- wsgen.xml
- axisservice.properties
- axisclient.properties
- Make backup copies of the files if you wish.
- Open the wsgen.xml Ant file and edit so that
property file="axisclient.properties". Remove any other property file references in the
file such as axisservice.properties.
- Save the wsgen.xml
- Edit the axisclient.properties file. Check that
scenarioType=client and set the InitialSelection
property to a workspace relative path pointing to the AreaServiceSOAP.wsdl that was generated in the previous section of this tutorial.
InitialSelection=/testProject/WebContent/wsdl/AreaServiceSOAP.wsdl.
- Save the axisclient.properties file.
- Next, edit the wsant.bat file. Set the local environment variables to reflect your system configuration
inluding the location of your JRE, the Eclipse startup.jar and the workspace containing the
web project and AreaServiceSOAP.wsdl file.
- Save the wsant.bat file.
- Run wsant.bat by typing wsant at the command line.
- When the generation is complete, look at the wsgen.txt file for output.
- At the command line or back in WTP, navigate to the testProject src folder to find the client AreaServiceProxy.java code that was generated.
|

