Ping Pong Tutorial
Scope
This tutorial describes how to create a simple hierarchical actor system of actors communicating via ports and bindings. Additionally you will use the Timing Service from the eTrice model library. This tutorial works for all target languages. Refer to the "Getting Started" pages for more information about creating an initial eTrice project for a specific target language.
For the Ping Pong scenario we want to create a model with a sender and a receiver of a message. The receiver has to wait for the ping message from the sender, wait for a second and respond with a pong message.
The resulting Message Sequence Chart (MSC) at the end of this tutorial should look like this:
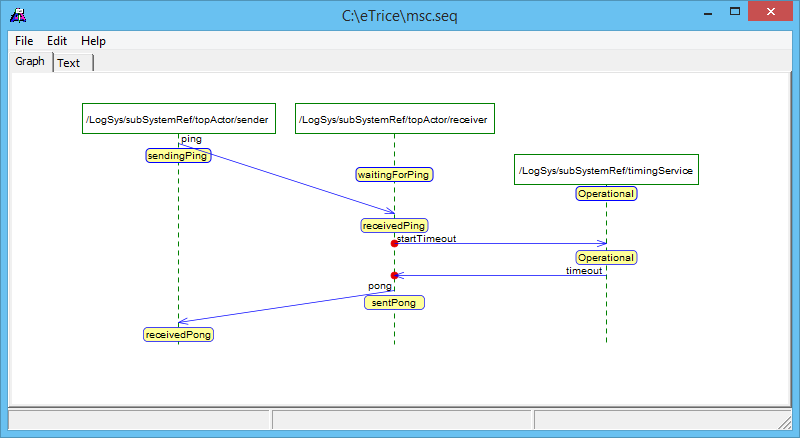
We will take this MSC as specification for the desired behavior.
Create the structure
We start by opening the TemplateModel.room from the template project as presented in Getting Started. As described previously topActor is currently the only active actor. Furthermore the model provides a building kit for this tutorial, consisting of
-
ProtocolClass PingPongProtocol: Defining the incoming message ping and outgoing pong according the specification
-
ActorClass Receiver: Defining a (regular) Port of type PingPongProtocol, which receives the incoming messages and sends the outgoing message. Additionally it has a reference to the TimingService.
-
ActorClass Sender: Defining the conjugated Port of type PingPongProtocol, which handles the messages vice-versa
ProtocolClass PingPongProtocol {
	incoming {
		Message ping()
	}
	outgoing {
		Message pong()
	}
}
ActorClass Receiver {
	Interface {
		Port recvPort: PingPongProtocol
	}
	Structure {
		external Port recvPort
		SAP timingService: PTimer
	}
	// ...
}
ActorClass Sender {
	Interface {
		conjugated Port sendPort:
			PingPongProtocol
	}
	Structure {
		external Port sendPort
	}
	// ...
}
The naming Sender Receiver is based on the first message exchange. Sender is the first actor that sends a message (ping) and Receiver is the first actor to receive this message.
Remaining tasks:
-
creating the hierarchical actor structure by using classes the Sender and Receiver
-
establish port binding
-
define the behavior of both actors
-
use the TimingService
-
generate and run application, then verify resulting MSC
We are going to create the hierarchical actor structure and TopActor will serve as a pure container actor. Thus its current state machine is obsolete, we can ignore or delete it.
We will continue by adding the actors in the text editor. To get a visual representation of the Actor we open the structure diagram of TopActor by using the CodeLens Action Open Structure Diagram.
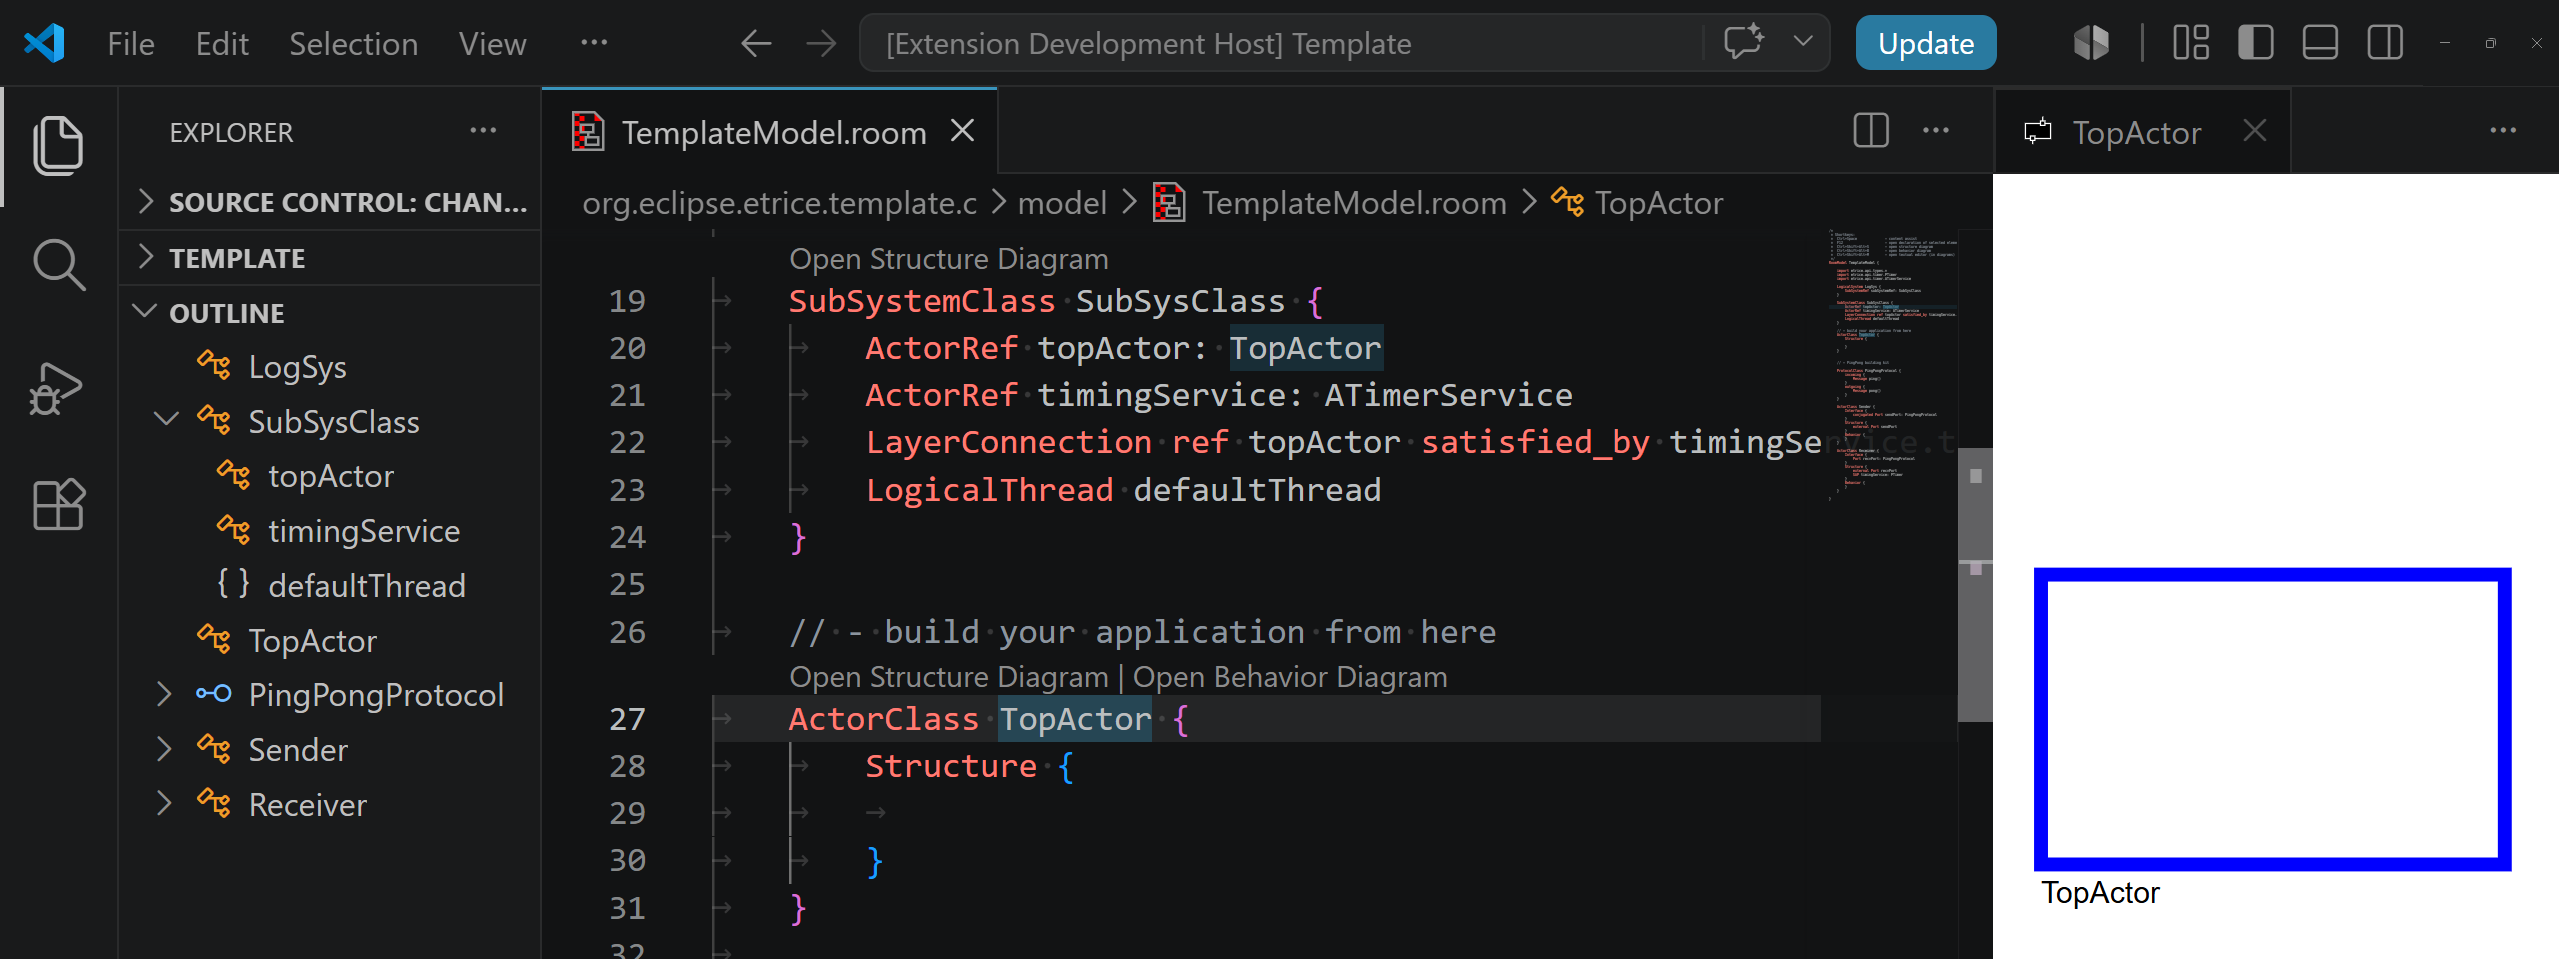
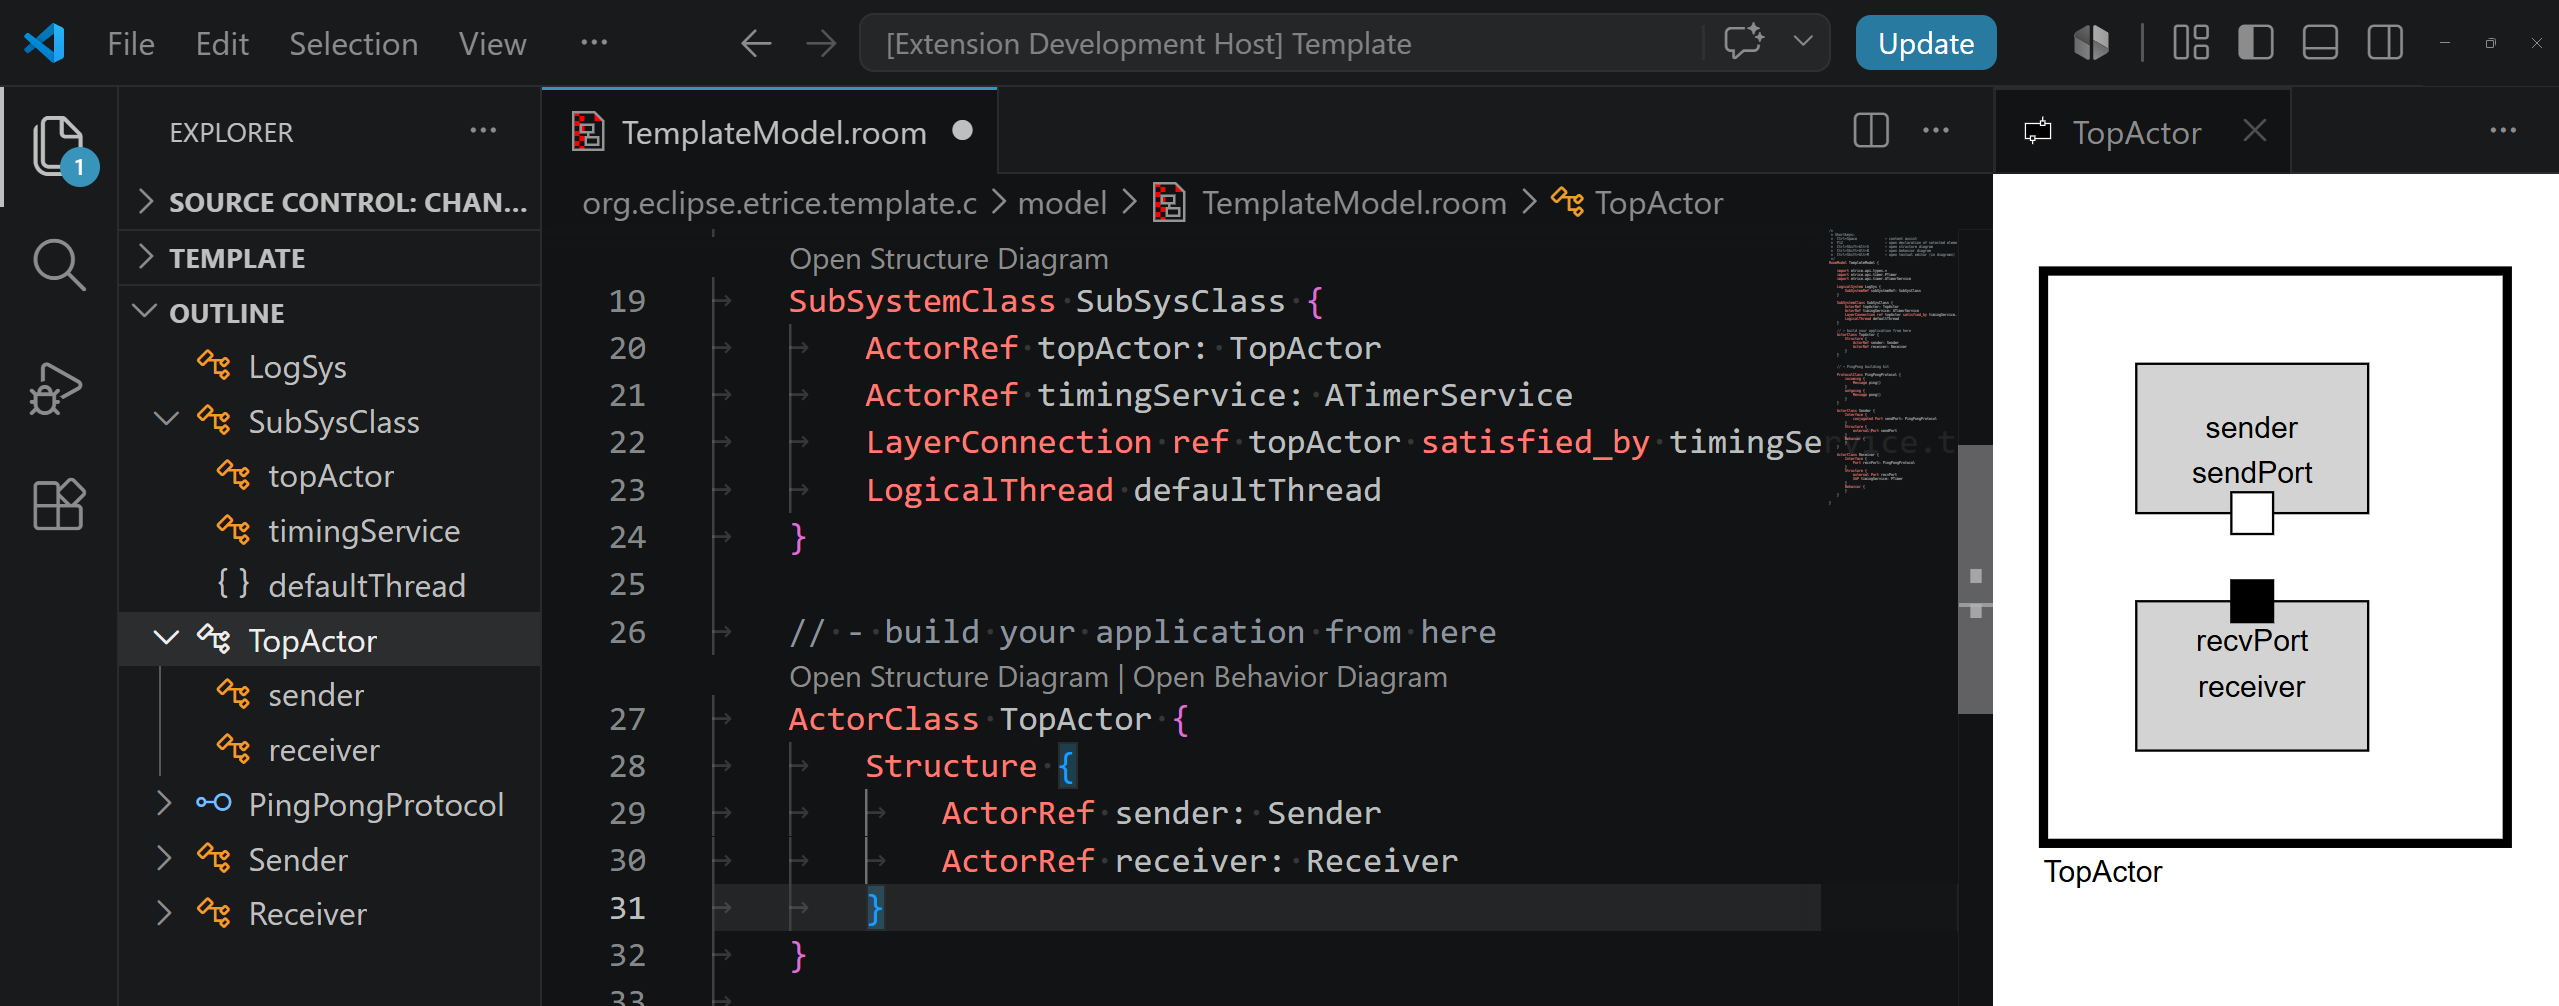
In the Structure section of the TopActor add a new Actor by writing ActorRef sender: Sender where sender is the name of the ActorReference and Sender is the ActorClass. Repeat the step for the receiver of ActorClass type Receiver.
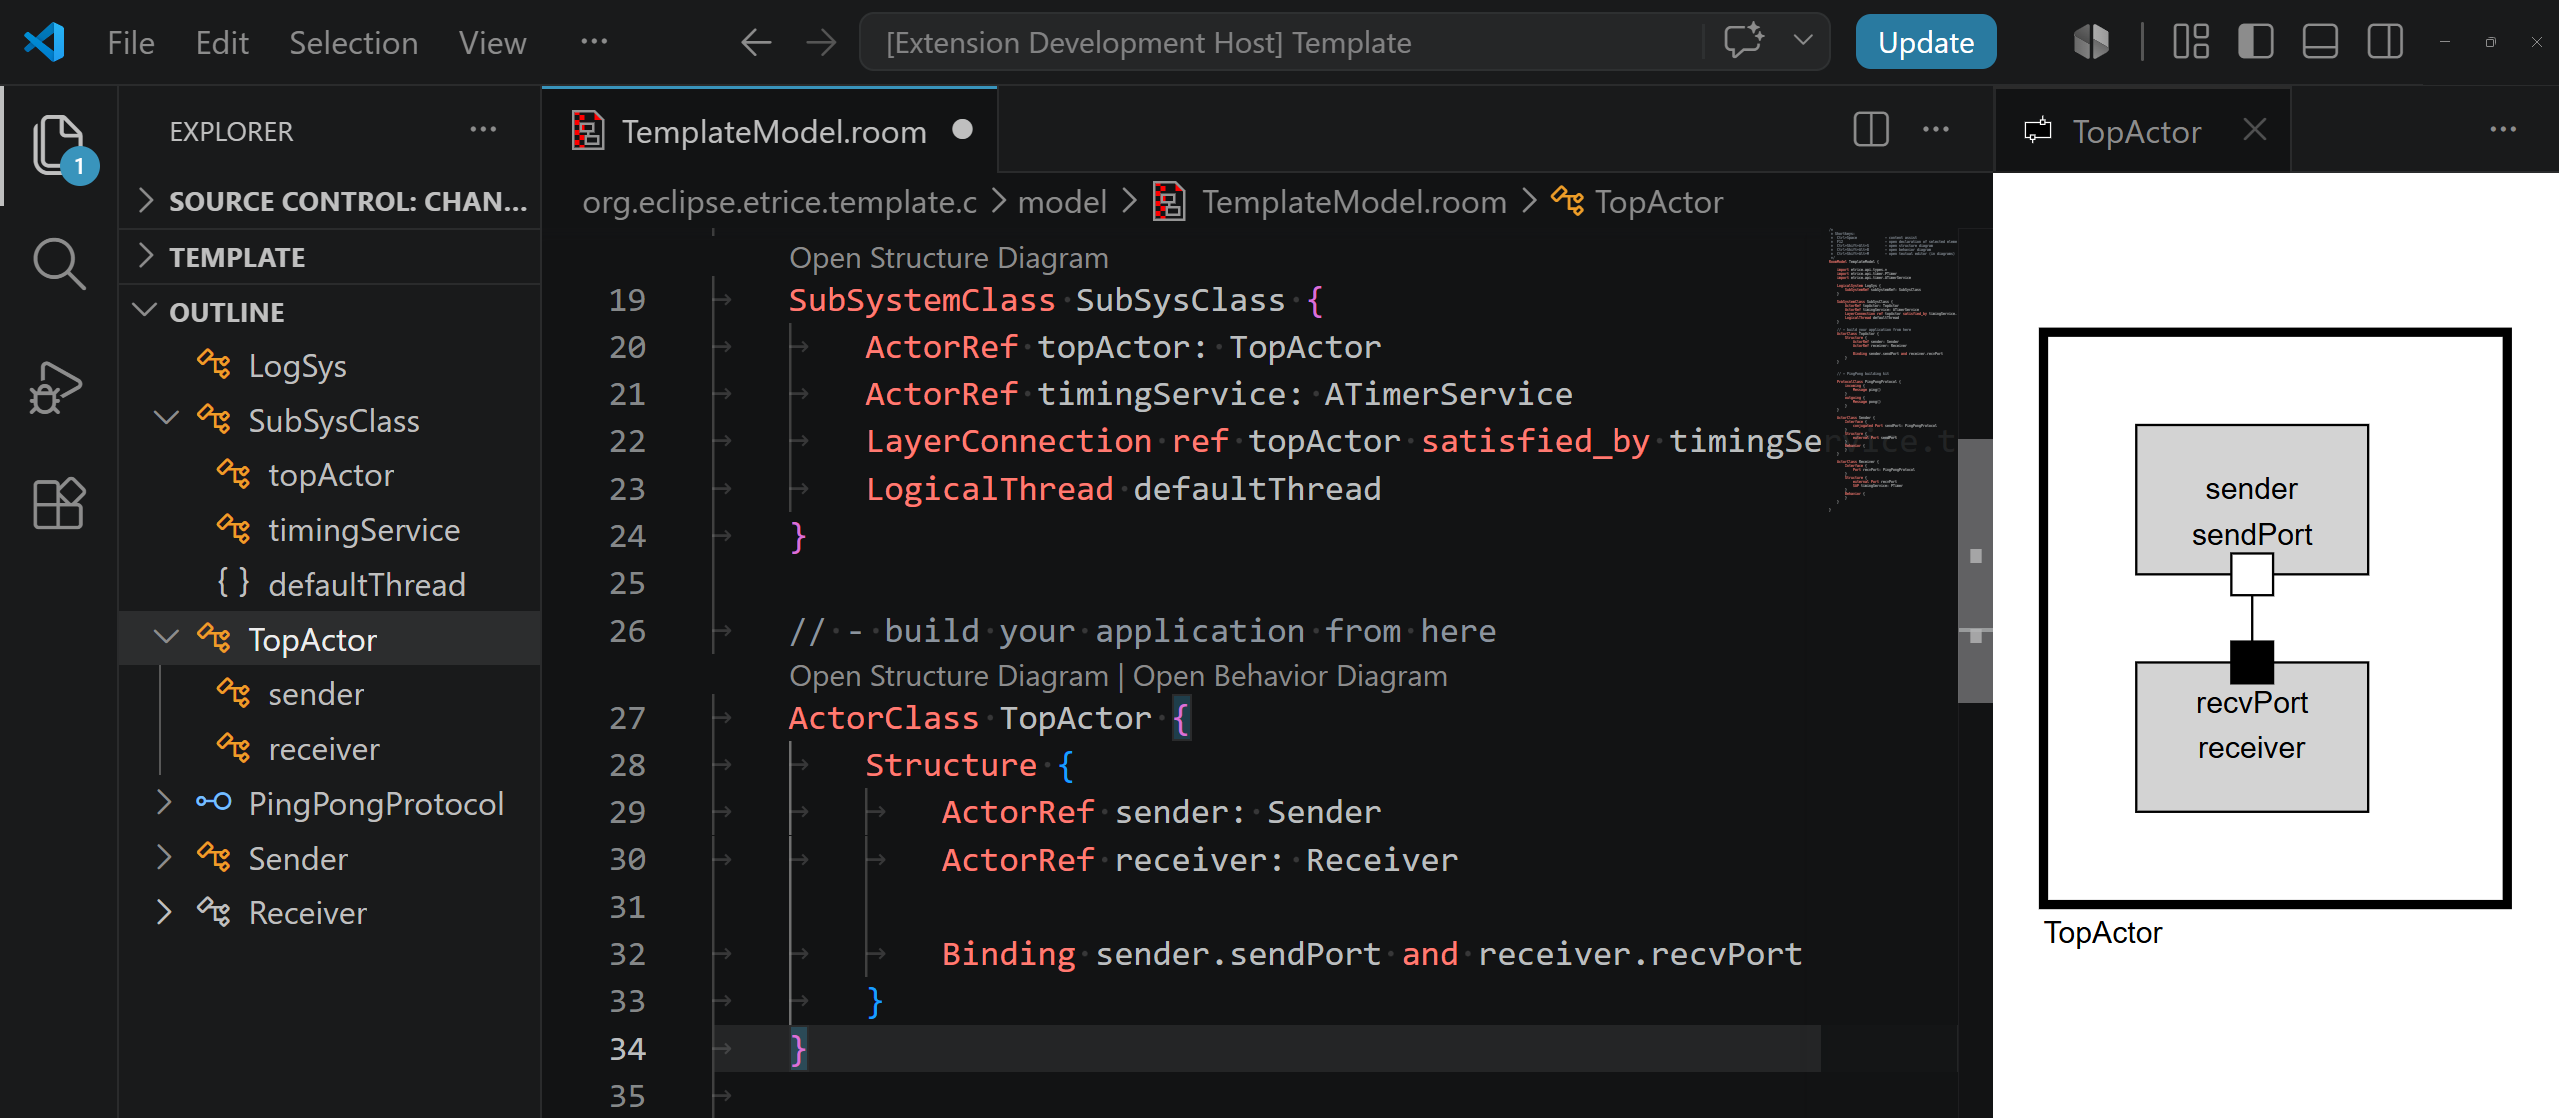
Finally we connect the ports of both actors using a Binding. The syntax to add a new binding is Binding actorRef.port and actorRef.port
Implement the Behavior
We will implement two finite state machines (FSMs) to define the event driven behavior of the actor classes Sender and Receiver.
Before you start with the implementation, have a look at the MSC with the specification of the behavior at the beginning of this page.
Lets start with the Sender. In the structure diagram of TopActor double click on sender to navigate to the structure diagram of the Sender. From there we can use the eTrice: Highlight selected Element in text Editor command to jump to the implementation of the Sender in the text Editor.
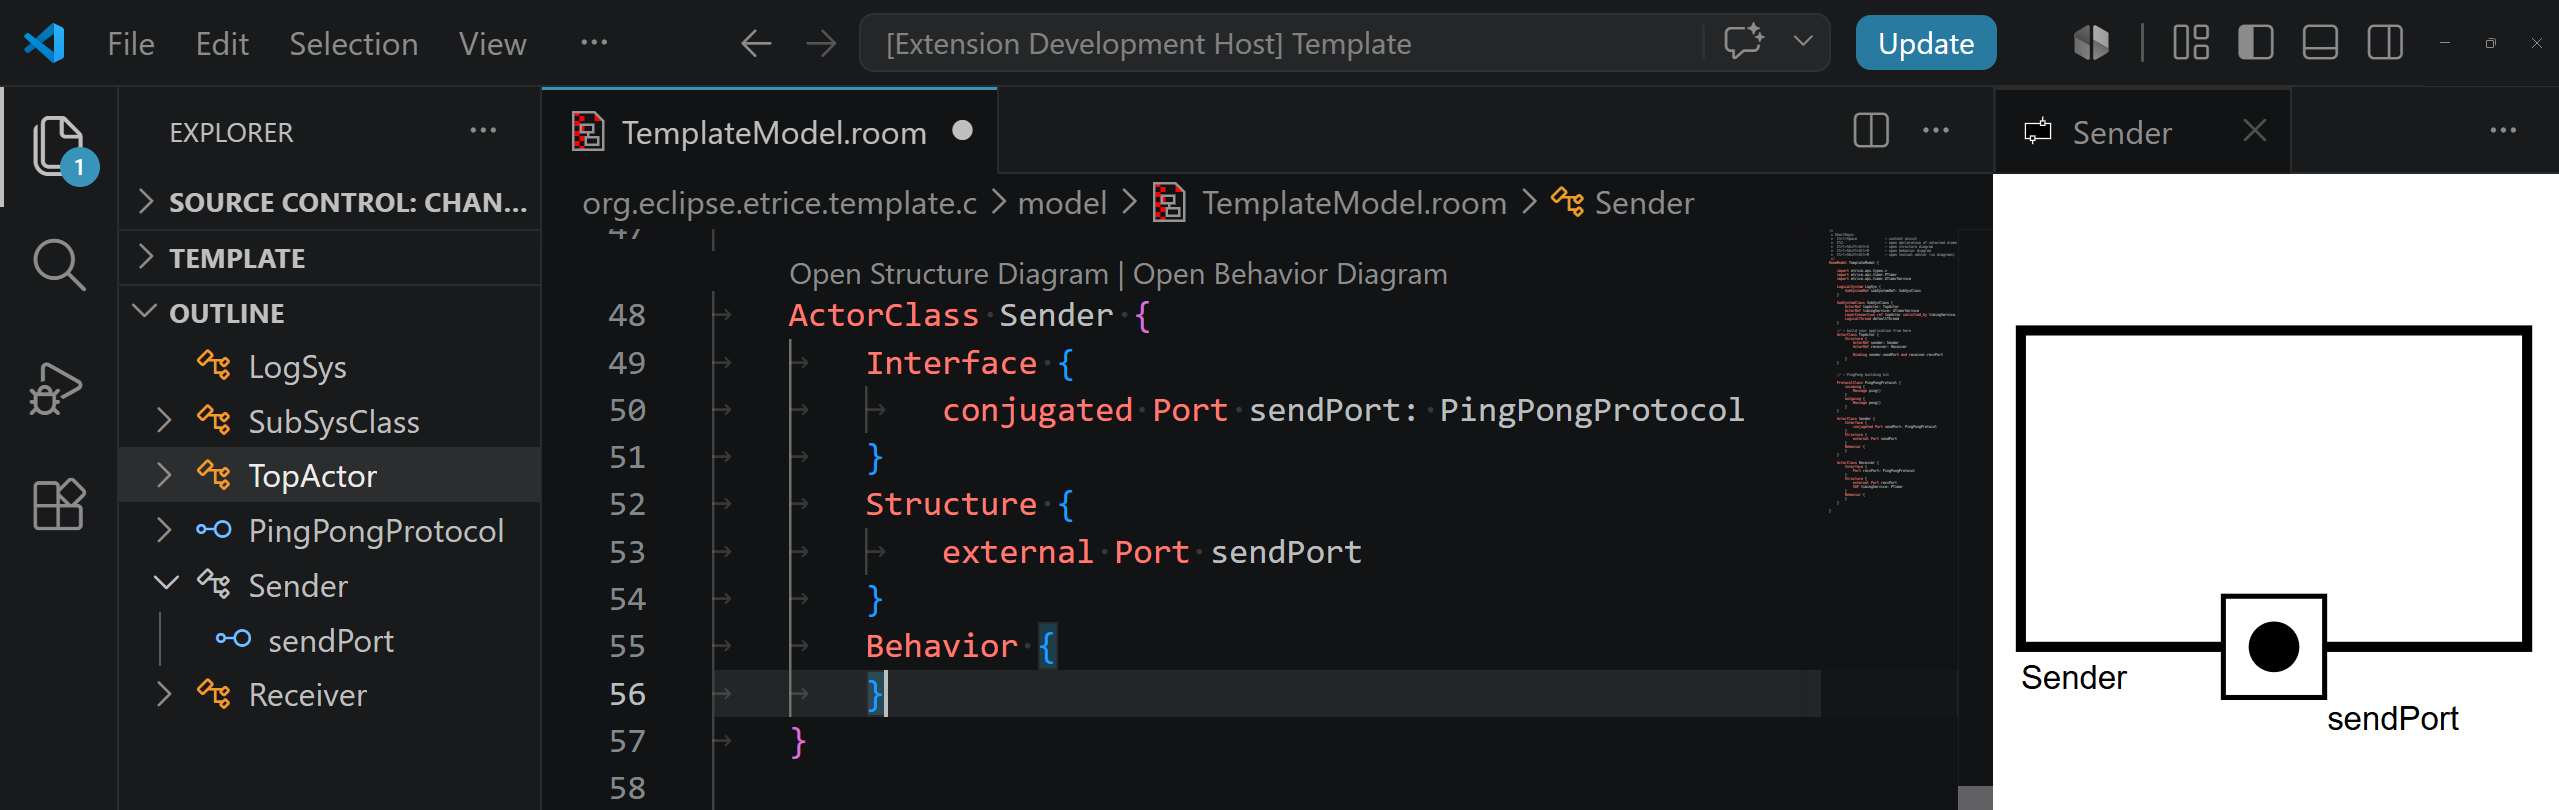
According to our specification:
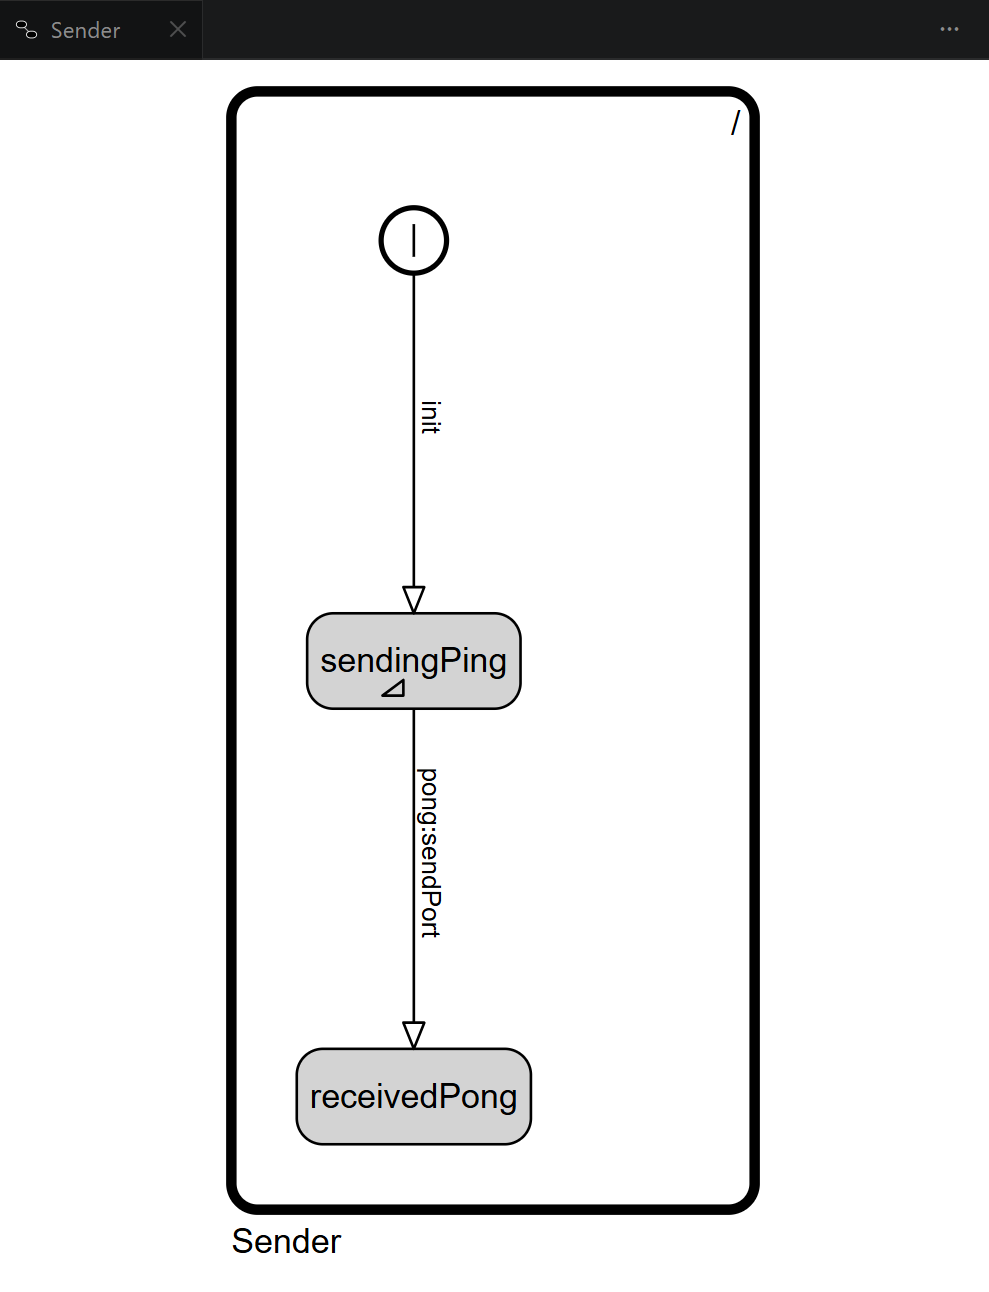
Sender initially should send the message ping and then assume a state named sendingPing. After receiving the message pong it should switch to a state named receivedPong.
There are multiple ways to create a StateMachine. The easiest one is to use the Add State Machine Element code lens that appears above the StateMachine definition. Other options are to use Code Snippets via the content assist (CTRL + Space) or to write the state machine manually in the text editor.
Once the state machine skeleton is inserted, we edit it in the text editor. We add the state sendingPing with entry code sendPort.ping(); and a second state receivedPong.
Note that the content assist (CTRL+Space) is available for completing port names, message names, and other elements.
The complete Sender behavior in the textual notation:
Behavior {
    StateMachine {
        State sendingPing {
            entry '''sendPort.ping();'''
        }
        State receivedPong
        Transition init0: initial -> sendingPing
        Transition tr0: sendingPing -> receivedPong {
            triggers {
                <pong: sendPort>
            }
        }
    }
}
We can verify the result by opening the behavior diagram using the Open Behavior Diagram code lens. At this point the behavior of Sender is complete and should look like this:
We turn our attention to actor Receiver and open the textual model.
According to the specification:
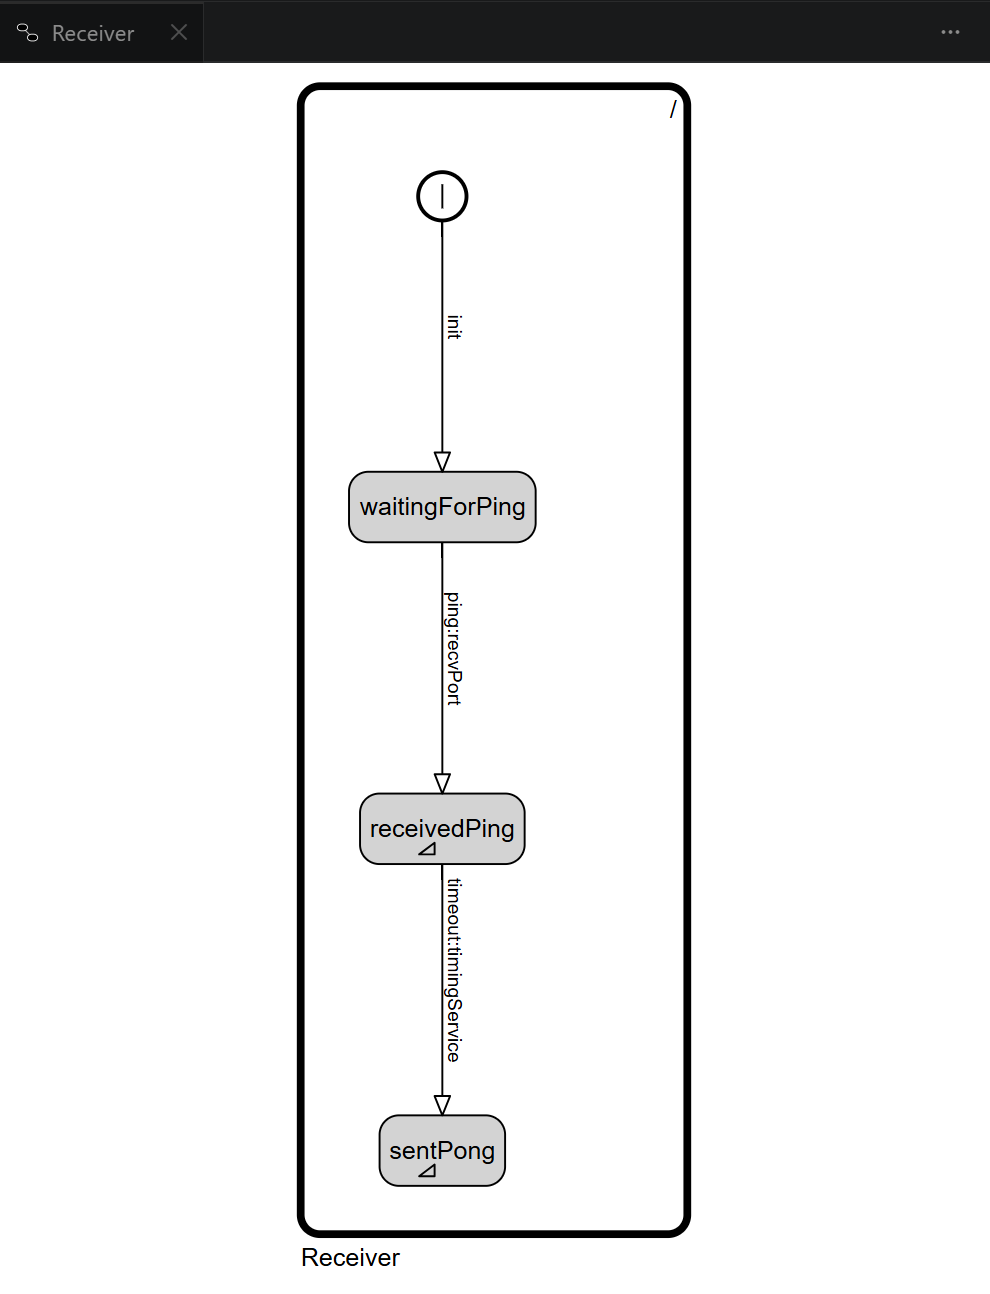
Receiver initially should wait for the message ping. After a short time the message pong should be sent back.
We add the states waitingForPing, receivedPing and sentPong. The transition from waitingForPing to receivedPing is triggered by the ping message on port recvPort.
In the entry code of receivedPing we start the timeout by sending startTimeout(500) (time unit is ms) to the timingService port:
timingService.startTimeout(500);
The transition from receivedPing to sentPong is triggered by the timeout message of the timing service.
In the entry code of sentPong we send the pong message back: recvPort.pong();
The complete Receiver behavior in the textual notation:
Behavior {
    StateMachine {
        State waitingForPing
        State receivedPing {
            entry '''timingService.startTimeout(500);'''
        }
        State sentPong {
            entry '''recvPort.pong();'''
        }
        Transition init0: initial -> waitingForPing
        Transition tr0: waitingForPing -> receivedPing {
            triggers {
                <ping: recvPort>
            }
        }
        Transition tr1: receivedPing -> sentPong {
            triggers {
                <timeout: timingService>
            }
        }
    }
}
Now the behavior of Receiver is complete. It should look like this:
The PingPong model is now done. You can generate, compile and run it as described in the Getting Started page. The generated MSC in folder log should show the same MSC we used to specify the behavior at the beginning of this tutorial.
Summary
Within this tutorial you have learned how to create a FSM with transitions triggered by incoming messages. You have used entry code to send messages and have used the timing service from the model library. You are now familiar with the basic features of eTrice. Further tutorials and examples will assume that the reader is already familiar with this basic knowledge.