
Aidge demonstration#
Aidge is a collaborative open source deep learning library optimized for export and processing on embedded devices. With Aidge, you can create or import a Computational Graph from common Frameworks, apply editing on its structure, train it and export its architecture on many embedded devices. Aidge provides optimized functions for inference as well as training and many custom functionalities for the target device.
This notebook put in perspective the tool chain to import a Deep Neural Network from ONNX model and support its Inference in Aidge. The tool chain demonstrated is :

In order to demonstrate this toolchain, the MNIST digit recognition task is used.
Setting up the notebook#
(if needed) Download the model#
If you don’t have git-lfs, you can download the model and data using this piece of code
[1]:
import os
import requests

def download_material(path: str) -> None:
    if not os.path.isfile(path):
        response = requests.get("https://gitlab.eclipse.org/eclipse/aidge/aidge/-/raw/dev/examples/tutorials/101_first_step/"+path+"?ref_type=heads")
        if response.status_code == 200:
            with open(path, 'wb') as f:
                f.write(response.content)
            print("File downloaded successfully.")
        else:
            print("Failed to download file. Status code:", response.status_code)

# Download onnx model file
download_material("MLP_MNIST.onnx")
# Download input data
download_material("input_digit.npy")
# Download output data for later comparison
download_material("output_digit.npy")
File downloaded successfully.
File downloaded successfully.
Define mermaid visualizer function#
Aidge save graph using the mermaid format, in order to visualize the graph live in the notebook, we will setup the following function:
[2]:
import base64
from IPython.display import Image, display
import matplotlib.pyplot as plt

def visualize_mmd(path_to_mmd):
  with open(path_to_mmd, "r") as file_mmd:
    graph_mmd = file_mmd.read()

  graphbytes = graph_mmd.encode("utf-8")
  base64_bytes = base64.b64encode(graphbytes)
  base64_string = base64_bytes.decode("utf-8")
  display(Image(url=f"https://mermaid.ink/img/{base64_string}"))
Import Aidge#
In order to provide a colaborative environnement in the plateform, the structure of Aidge is built on a core library that interfaces with multiple modules binded to python libraries. - aidge_core is the core library and offers all the basic functionnalities to create and manipulate the internal graph representation - aidge_backend_cpu is a C++ module providing a generic C++ implementations for each component of the graph - aidge_onnx is a module allowing to import ONNX to the Aidge
framework - aidge_export_cpp is a module dedicated to the generation of optimized C++ code
This way, aidge_core is free of any dependencies and the user can install what he wants depending on his use case.
[3]:
import aidge_core

# Conv2D Operator is available but no implementation has been loaded
print(f"Available backends:\n{aidge_core.get_keys_ConvOp2D()}")

# note: Tensor is a special case as 'cpu' backend is provided in the core
# module to guarantee basic functionalities such as data accesss
print(f"Available backends for Tensor:\n{aidge_core.Tensor.get_available_backends()}")
Available backends:
[]
Available backends for Tensor:
{'cpu'}
As you can see, no backends are availables for the class Conv2D.
We need to import the aidge_backend_cpu module which will register itself automatically to aidge_core.
[4]:
import aidge_backend_cpu

print(f"Available backends:\n{aidge_core.get_keys_ConvOp2D()}")
Available backends:
['cpu']
For this tutorial, we will need to import aidge_onnx in order to load ONNX files, numpy in order to load data and matplotlib to display images.
[5]:
import aidge_onnx
import numpy as np
import matplotlib.pyplot as plt
ONNX Import#
Import an ONNX model into Aidge internal graph representation.

[6]:
model = aidge_onnx.load_onnx("MLP_MNIST.onnx")
- Flatten (Flatten | GenericOperator)
        - axis : 1
- fc1_Gemm_output_0 (Gemm)
- Relu (Relu)
- fc2_Gemm_output_0 (Gemm)
- Relu_1 (Relu)
- output (Gemm)
As you can see in the logs, aidge imported a Node as a GenericOperator:
- /Flatten_output_0 (Flatten | GenericOperator)
This is a fallback mechanism which allow aidge to load ONNX graph without failing even when encountering a node which is not available. The GenericOperator act as a stub retrieving node type and attributes from ONNX. This allow to provide an implementation in a user script or as we will see to remove/replace them using aidge recipes.
You can visualize the graph using the save method and the mermaid visualizer we have setup.
[7]:
model.save("myModel")
visualize_mmd("myModel.mmd")

Graph transformation#

In order to support the graph for inference we need to support all operators. The imported model contains Flatten before the Gemm operator. The aidge.FC operator already supports the flatten operation. Graph transformation is required to support the graph for inference, i.e. remove the Flatten operator.
Aidge graph transformation toolchain is the following process :
1. Describe the graph pattern
In order to find specific patterns inside a graph, there is first a need to describe those patterns. Aidge introduces an innovative way to describe graph patterns, Graph Regular Expression, inspired by regular expression from the formal language theory.
In this example the GraphRegEx used would be simple:
"Flatten->FC;"
[8]:
graph_regex = aidge_core.GraphRegex()
graph_regex.set_node_key("Flatten", "getType($) =='Flatten'")
graph_regex.set_node_key("FC", "getType($) =='FC'")
graph_regex.add_query("Flatten -> FC")
2. Match the described pattern
Once the graph pattern is described with a graph regular expression, we apply an innovative graph matching algorithm to find patterns corresponding to the description.
This alogrithm will return all the matched patterns described with a graph regular expression in a match class. One matched pattern is the combinaison of the graph pattern start nodes and all the nodes in the matched pattern (including the start nodes).
[9]:
all_match = graph_regex.match(model)
print('Number of match : ', len(all_match))
Number of match : 1
In this case, we have one match : - List of one list containing the start node : [[Flatten node]] - List of one set containing all the matched nodes : [{Flatten node, FC node}]
Let’s visualize the match :
[10]:
print('The start node : ')
for match in all_match:
    print('\t', match.get_start_node()[0].type())
    print('All the matched nodes for', match.get_query() , ':')
    for n in match.get_all():
        print('\t', n.type())
The start node :
         Flatten
All the matched nodes for Flatten -> FC :
         Flatten
         FC
3. Apply graph transformations on the matched patterns
Now that we have matched the desired patterns we can apply graph transformation on it. The main graph transformation functions (currently under dev) are : - Replace the current GraphView with a set of given Nodes if possible : replace - Insert a node (newParentNode) as a parent of the passed node (childNode) : insert_parent - Remove a node : remove()
In this example we remove the Flatten operator from the graph using replace.
[11]:
g = aidge_core.GraphView()
g.add(next(iter(all_match)).get_start_node()[0])
aidge_core.GraphView.replace(g.get_nodes(), set())
[11]:
True
The flatten is removed, let’s visualize the model :
[12]:
model.save("mySupportedModel")
visualize_mmd("mySupportedModel.mmd")

All of these steps are embedded inside recipes functions. These recipes are available in aidge_core, some recipes are: - fuse_batchnorm: Fuse BatchNorm inside Conv or FC operator; - fuse_mul_add: Fuse MatMul and Add operator into a FC operator; - remove_flatten: Remove Flatten if it is before an FC operator.
Let’s do it again with the remove_flatten recipie :
[13]:
# Import model again
model = aidge_onnx.load_onnx("MLP_MNIST.onnx")
# Use remove_flatten recipie
aidge_core.remove_flatten(model)
- Flatten (Flatten | GenericOperator)
        - axis : 1
- fc1_Gemm_output_0 (Gemm)
- Relu (Relu)
- fc2_Gemm_output_0 (Gemm)
- Relu_1 (Relu)
- output (Gemm)
This time the flatten is removed with the recipie, let’s visualize the model :
[14]:
model.save("mySupportedModel")
visualize_mmd("mySupportedModel.mmd")

Inference#
We now have a graph fully supported by aidge, we are ready to do some inference !

Create an input tensor & its node in the graph#
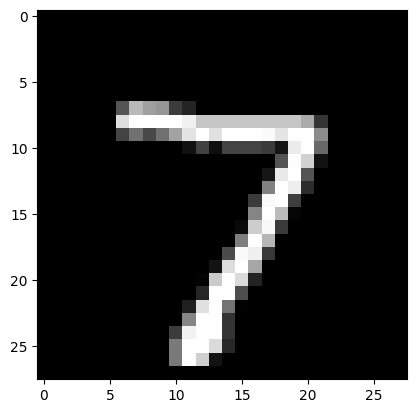
In order to perform an inferencewe will load an image from the MNIST dataset using Numpy.
[15]:
## Load input data & its output from the MNIST_model
digit = np.load("input_digit.npy")
plt.imshow(digit[0][0], cmap='gray')
[15]:
<matplotlib.image.AxesImage at 0x7fa0b851f790>
And in order to validate the result our model will provide, we will also load the output the PyTorch model povided for this image
[16]:
output_model = np.load("output_digit.npy")
print(output_model)
[[[ -1.3114135  -1.3960878   5.118178    5.338807   -8.182431
    -0.612254  -11.45598    13.0557165  -3.0393667   2.6212344]]]
Thanks to the Numpy interoperability we can create an Aidge Tensor using directly the numpy array storing the image.
[17]:
input_tensor = aidge_core.Tensor(digit)
print(f"Aidge Input Tensor dimensions: \n{input_tensor.dims()}")
Aidge Input Tensor dimensions:
[1, 1, 28, 28]
To add an input to the graph we can create a Producer node, insert it in the GraphView and set its output with the Tensor we have just created, or data can simply be fed to the GraphView via the scheduler forward() call.
Configure the model for inference#
At the moment the model has no implementation, it is only a datastructure. To set an implementation we will set a dataype and a backend.
[18]:
# Configure the model
model.compile("cpu", aidge_core.dtype.float32, dims=[[1,1,28,28]])
# equivalent to set_datatype(), set_backend() and forward_dims()
Create a scheduler and run inference#
The graph is ready to run ! We just need to schedule the execution, to do this we will create a Scheduler object, which will take the graph and generate an optimized scheduling using a consummer producer heuristic.
[19]:
# Create SCHEDULER
scheduler = aidge_core.SequentialScheduler(model)

# Run inference !
scheduler.forward(data=[input_tensor])
[20]:
# Assert results
for outNode in model.get_output_nodes():
    output_aidge = np.array(outNode.get_operator().get_output(0))
    print(output_aidge)
    print('Aidge prediction = ', np.argmax(output_aidge[0]))
    assert(np.allclose(output_aidge, output_model,rtol=1e-04))
[[ -1.3114134  -1.3960874   5.1181774   5.3388066  -8.182431   -0.6122534
  -11.455979   13.055716   -3.0393662   2.6212344]]
Aidge prediction =  7
It is possible to save the scheduling in a mermaid format using:
[21]:
scheduler.save_scheduling_diagram("schedulingSequential")
visualize_mmd("schedulingSequential.mmd")

Export#
Now that we have tested the imported graph we can look at one of the main feature of Aidge, the export of computationnal graph to an hardware target using code generation.

Generate an export in C++#
In this example we will generate a generic C++ export. This export is not based on the cpu backend we have set before.
In this example we will create a standalone export which is abstracted from the Aidge platform.
[22]:
! rm -r myexport
rm: cannot remove 'myexport': No such file or directory
[23]:
!ls myexport
ls: cannot access 'myexport': No such file or directory
Generating a cpu export recquires the aidge_export_cpp module.
Once the module is imported you just need one line to generate an export of the graph.
[24]:
import aidge_export_cpp
# Freeze the model by setting constant to parameters producers
for node in model.get_nodes():
    if node.type() == "Producer":
        node.get_operator().attr.constant = True

# Create Producer Node for the Graph
input_node = aidge_core.Producer([1, 1, 28, 28], "input")
input_node.add_child(model)
model.add(input_node)

# Configuration for the model + forward dimensions
model.compile("cpu", aidge_core.dtype.float32)
# Export the model in C++ standalone
aidge_export_cpp.export("myexport", model, scheduler)
The export function will generate : - dnn/layers layers configuration; - dnn/parameters folder with parameters; - dnn/include/dnn.h API to use the export; - dnn/include/network_functions.h header file for kernels; - dnn/memory memory management information; - dnn/src kernel source code + forward function; - main.cpp This file is an export of the scheduler, it allows - Makefile To compile the main.cpp
[25]:
!tree myexport
/usr/bin/sh: 1: tree: not found
Generate an input file for tests#
To test the export we need to provide data, to do so we will export the numpy array using:
[26]:
aidge_export_cpp.generate_input_file(array_name="inputs", array=digit.reshape(-1), export_folder="myexport")
Compile the export#
[27]:
!cd myexport && make
make[1]: Entering directory '/builds/eclipse/aidge/aidge/docs/source/Tutorial/myexport'
g++  -O2 -Wall -Wextra -MMD -fopenmp -I. -I./dnn -I./dnn/include -I./dnn/layers -I./dnn/parameters -c dnn/src/forward.cpp -o build/./dnn/src/forward.o
g++  -O2 -Wall -Wextra -MMD -fopenmp -I. -I./dnn -I./dnn/include -I./dnn/layers -I./dnn/parameters -c main.cpp -o build/./main.o
g++  build/./dnn/src/forward.o  build/./main.o  -fopenmp -o bin/run_export
make[1]: Leaving directory '/builds/eclipse/aidge/aidge/docs/source/Tutorial/myexport'
Run the export#
[28]:
!./myexport/bin/run_export
0: -1.31141
1: -1.39609
2: 5.11818
3: 5.33881
4: -8.18243
5: -0.612253
6: -11.456
7: 13.0557
8: -3.03937
9: 2.62123