Simulation / Testing / FMU#
Building up multiple systems to test a component in various environments is crucial for high quality.
One additional test environment is OpenXilEnv which allows to load so called FMUs.
What is an FMU?#
A FMU stands for Functional Mock-up Unit. It’s a file format used in model-based systems engineering and simulation, especially within the FMI (Functional Mock-up Interface) standard.
A FMU is essentially a packaged simulation model that can be shared and executed across different tools. It contains:
Model description (in our case auto generated by the
sdv_dbc_util)Compiled binaries
Optional source code
Resources (in our case the configuration files to load the VAPI components)
FMU created by sdv_dbc_util#
The cmake project for a FMU is created out of a dbc file. The dbc file includes all variable definitions. Beside of a data link component also the project for a FMU is created.
Example:

sdv_dbc_util datalink_2doors_example.dbc -Ogenerated\\ --nodesdoors --version1.0.0.1 --moduleDoors2ExampleFMU --dl_lib_namecan_dl_example

-O              output folder 'generated'
--nodes         node in the dbc file to be used 'doors'
--version       optional version information '1.0.0.1'
--module        name of the FMU 'Doors4ExampleFMU'
--dl_lib_name   datalink library name 'can_dl_example'

Afterwards the following has to be done:
- required configuration files have to be put into the subfolder
e.g.  ...\fmu_Doors2ExampleFMU\Doors2ExampleFMU\resources

- function OpenAPILoad() needs to be updated in the model.cpp file
e.g.  ...\fmu_Doors2ExampleFMU\Doors2ExampleFMU\model.cpp

- the cmake project will the create the FMU, the output is for example
      ---\<outpufolder>\examples\system_demo_example\generated\fmu_DemoExampleFMU\fmus
Adaptions of the FMU#
The output of the created FMU project needs 2 addaptions:
Add code for loading the VAPI components in function OpenAPILoad():

bool OpenAPILoad(const std::string& resources)
{
    bool success = CreateCoreServiceTomlFile(resources);
    ...

    success &= g_appcontrol->LoadConfig(...) == sdv::core::EConfigProcessResult::successful;
    success &= g_appcontrol->LoadConfig(...) == sdv::core::EConfigProcessResult::successful;
    ...

    g_appcontrol->SetRunningMode();
    return success;
}
Required toml files (resource files) need to be put in the folder ‘resources’ below the FMU project:
<FMU_CMAKE_PROJECT>\resources
Run a simulation#
Link to OpenXilEnv:
All major examples include a FMU which can be loaded in the Open Source Software OpenXilEnv. In this document we do not describe how to get and run the software but how our FMU is created and how it can be used.
‘’OpenXilEnv’’ allows to start an external process, in our case the FMU. When successfully loaded its easy to visualize all variables and to change the input variables. The variables also can be changed by a script.
The simulation in OpenXilEnV can be enhanced by adding another FMU which represents the vehicle. We made demonstrations including another FMU. The second FMU contained either IPG CarMaker (a sophisticated simulation software developed by IPG Automotive) or Carla (Car Learning to Act, a powerful, open-source simulator designed specifically for autonomous driving research and development).
How to use a FMU#
The following uses the FMU form the system demo example. The FMU can be found <outpufolder>/examples/system_demo_example/generated/fmu_DemoExampleFMU/fmus
The script (*.src file)
.../examples/system_demo_example/fmu/vapi_system_demo.scr
Open XilEnvGui.exe
Generate new INI file
Recommended: in upper menu click on RT-Factor Icon to switch from fast to slow: Instead of a high (cycling) number the number should be around 1.

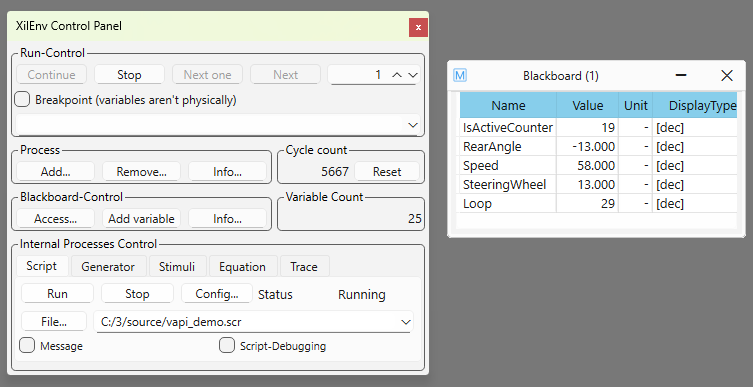
in XiLEnv Control Panel: Click on ‘Add…’ in ‘Process’
../vapi_media/openxilenv/control_panel.png
‘Start process’ window opens, click on ‘start an external process’
Select file ‘DemoExampleFMU.fmu’
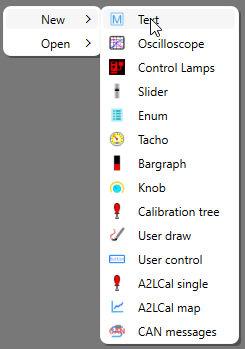
Right-Click somewhere ‘New > Text’ and open ‘Blackboard’
Right-Click and open ‘config’
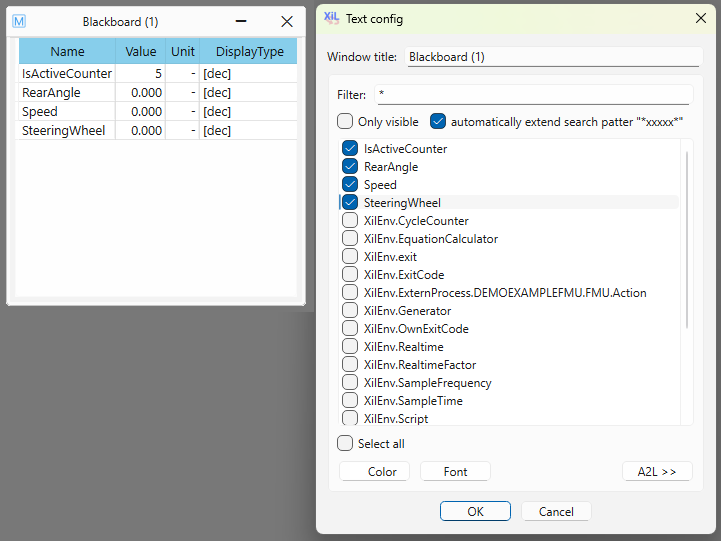
Add the 4 signals
in XiLEnv Control Panel: Click on ‘File…’ in ‘Internal Process Control’ and add script file ‘vapi_demo.scr’
in XiLEnv Control Panel: Click on ‘Run’ in ‘Internal Process Control’