Authentication and Authorization
With security being at the heart of xpanse project, all entry points to the application are completely protected.
OIDC
Authentication and Authorization are implemented using OIDC (OpenID Connect). This helps us to outsource the security
layer to an external Identity Provider and thereby not storing any user data within xpanse.
OIDC Providers and its Configuration
Similar to other integrations provided in xpanse, the runtime can be extended to be integrated with any Identity Provider that supports OIDC standards. It's not limited to any specific product.
Any OIDC provider can't be used directly out of the box. It needs a variety of configurations on the provider. From xpanse project, we aim to provide 'Infrastructure as Code' which will automate all required configuration on the Identity provider.
All Identity provider related configuration on consumers can only be obtained only after the OIDC provider is fully configured with the consumer detail
Zitadel
As a default implementation, xpanse runtime is integrated with Zitadel Identity Provider.
To enable Zitadel authentication layer, the runtime must be started with zitadel profile.
Zitadel Installation
Zitadel instance for local development can be setup using the steps mentioned here..
An example for setting up production like Zitadel instance can be found in our testbed installation steps here..
Zitadel Provider Configuration
After starting the vanilla Zitadel application, all required configurations can be applied using the Terraform scripts provided. All steps required for initial configuration are available here.
Zitadel Consumer Configuration
All generated configuration details can be obtained as documented here.
Runtime
Runtime application needs the following properties to be set for the authentication and authorization to work.
-   authorization.server.endpoint
-   authorization.api.client.id
-   authorization.api.client.secret
-   authorization.swagger.ui.client.id
UI
UI can be then started using the consumer details as documented here.
End Users Configuration
At the moment, it's only feasible to create user only via the Zitadel UI as we don't have SMTP available which is needed for self-registration of users.
Admin Users
By default, Zitadel provides a root user using which other users can be created and also made other administrators. Only these users can add other end-users on Zitadel.
Role Based Access Control - RBAC
We use OIDC providers to also implement RBAC on xpanse runtime API and also in UI.
Roles
To keep our initial role configuration simple, the following roles are considered
user- this is the role allocated to end user.
isv- this is the role allocated to ISV (Independent Software Vendor) users.
csp- this is the role allocated to CSP (Cloud Service Provider) users.
admin- this is the role allocated to administrators running xpanse.Default Role - When no roles are assigned to a user, then every registered is by default assumed to have the
userrole.
Role Assignment
After the end users are registered/created on Zitadel, the administrator must assign roles to the user.
This option can be found on the UI under - users -> click on user -> Authorizations -> + New
Role Validation
- Each API method is configured to be allowed only for specific roles.
Spring Securityfetches the user information fromIdentity Providerand based on the roles allocated to the user, we decide if the user is allowed to access an API or not. If the user isn't authorized to access, then API returns HTTP code403. - xpanse UI fetches the user information from
Identity Providerand based on the roles allocated to the user, menu options are displayed in the UI.
Attribute Based Access Control - ABAC
OIDC Metadata
Metadata for ISVs
In order to allow service vendors to manage only their own services, we use ABAC. This is achieved by using metadata feature of OIDC to assign isv users to a specific ISV value.

While registering a service, the service vendor must specify the same ISV value in the isv field.
With this, users of another ISV won't be allowed to view, update or delete these service templates.
Metadata for CSPs
Also for CSP users, the metadata must be used to define the CSP to which the user belongs to.
Execute authenticated APIs
When the application has activated authorization with oauth profile, all protected APIs must have an
Authorization header in the Bearer ${access token} format in the HTTP request.
Here are two ways to get access_token for executing authenticated APIs:
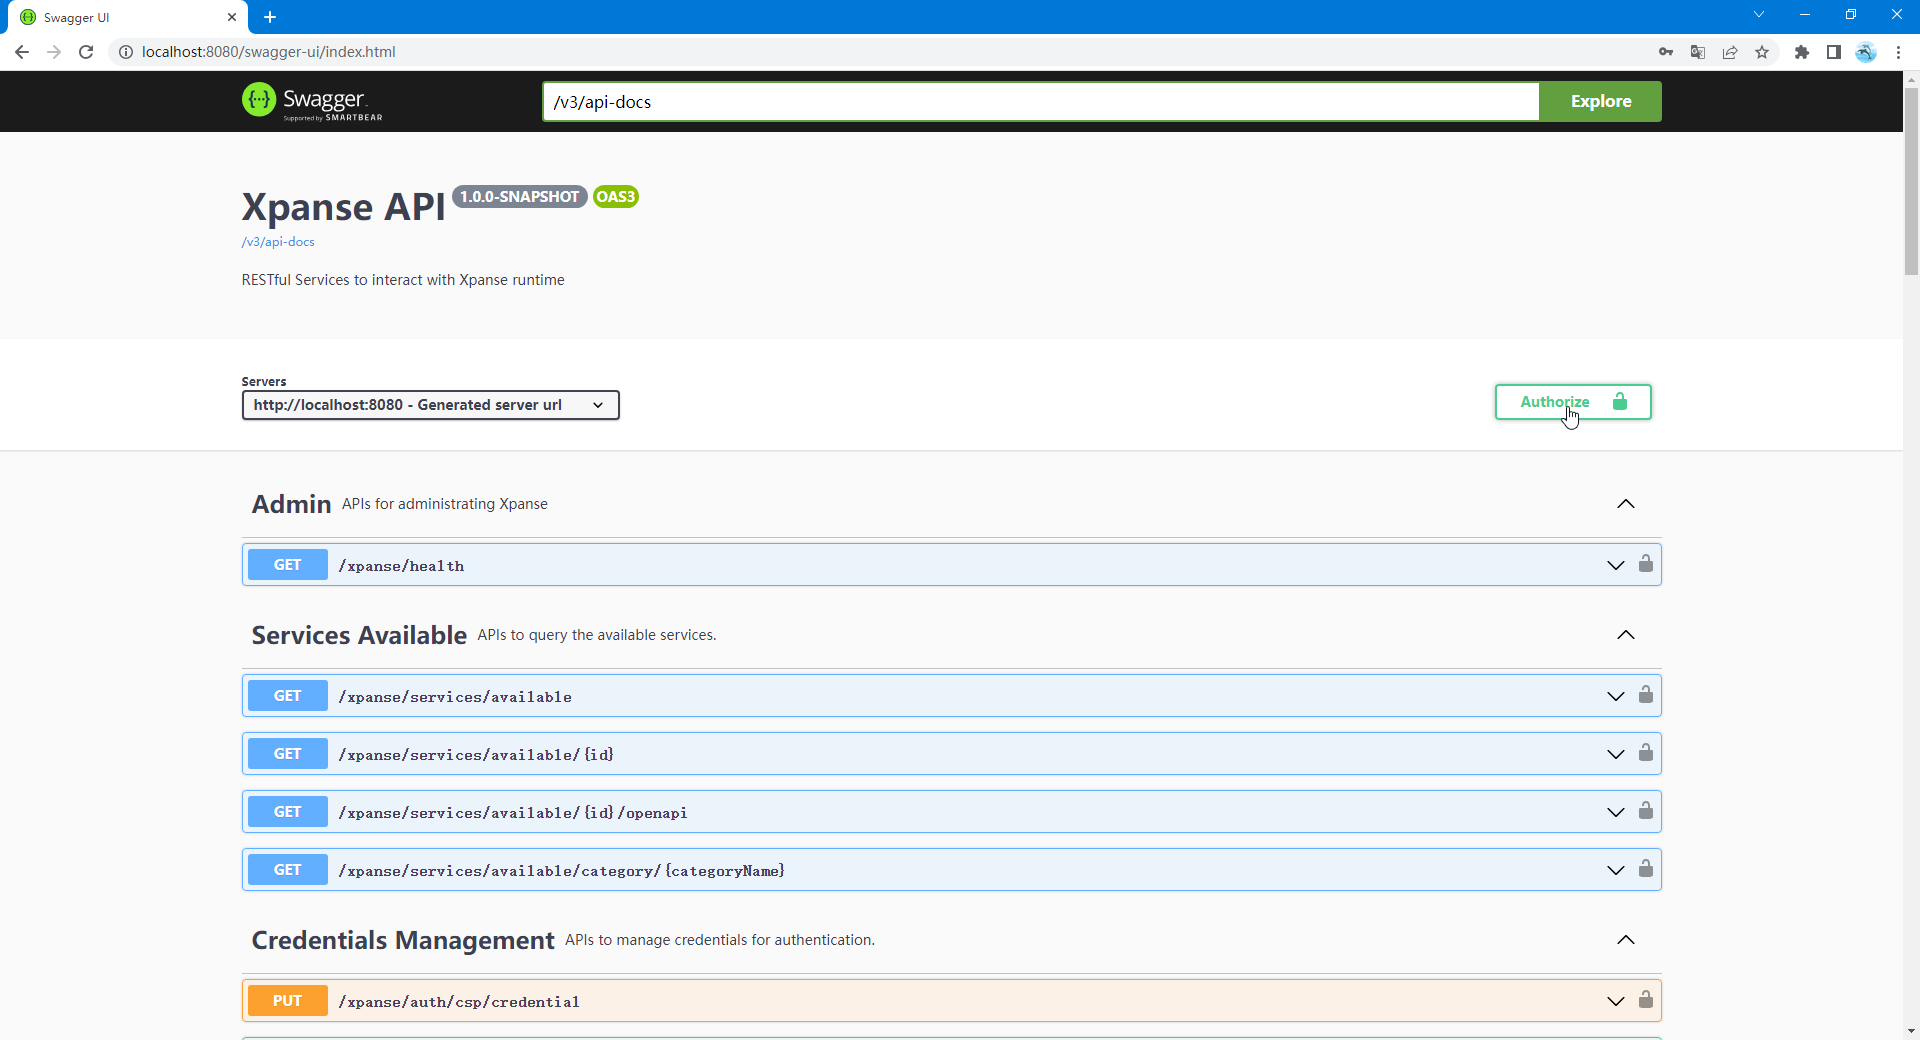
The first way is to open the Swagger-UI page of the xpanse server.
In case of local development server, the Swagger-UI is reachable on http://localhost:8080/swagger-ui/index.html.

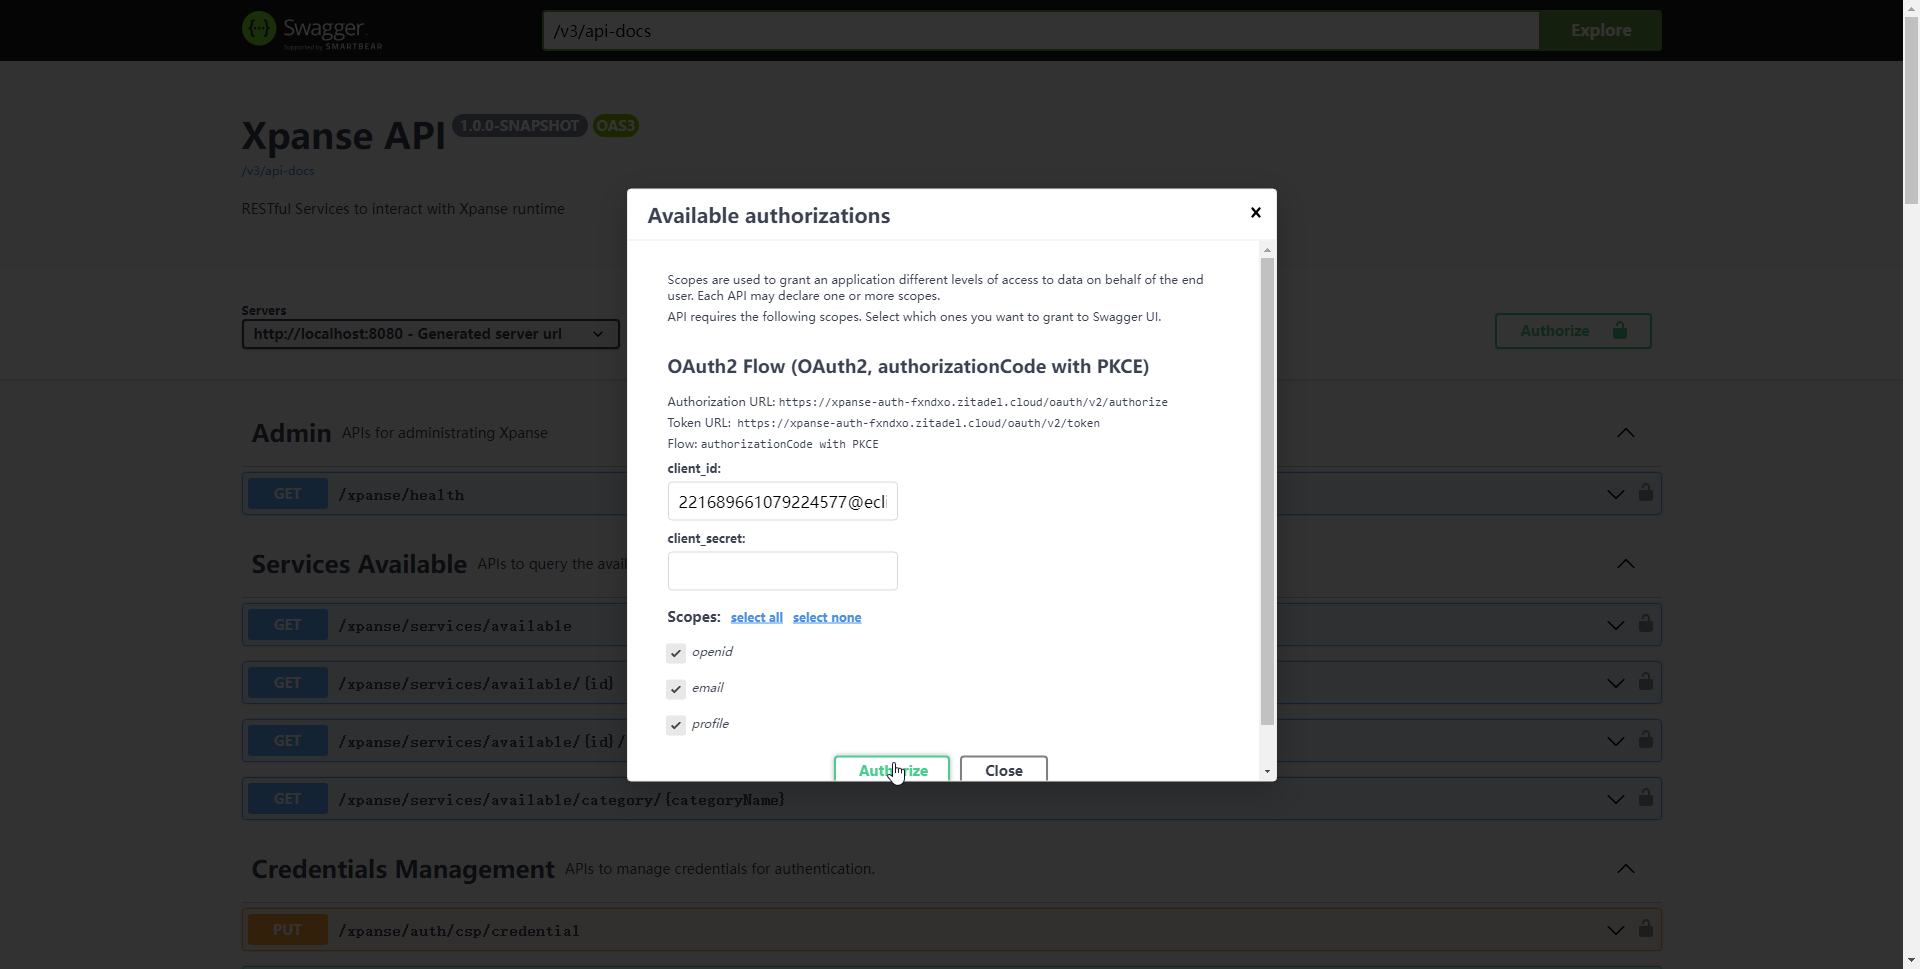
Click on the 'Authorize' button on the SwaggerUI page to open the authentication window.
Click on the 'select all' option to select all 'Scopes' and click on 'Authorize'

The browser will redirect to the login page of the IAM service.
Fill username and password to complete user login.
Once the login is successful, the control is automatically redirected to the Swagger-UI page.
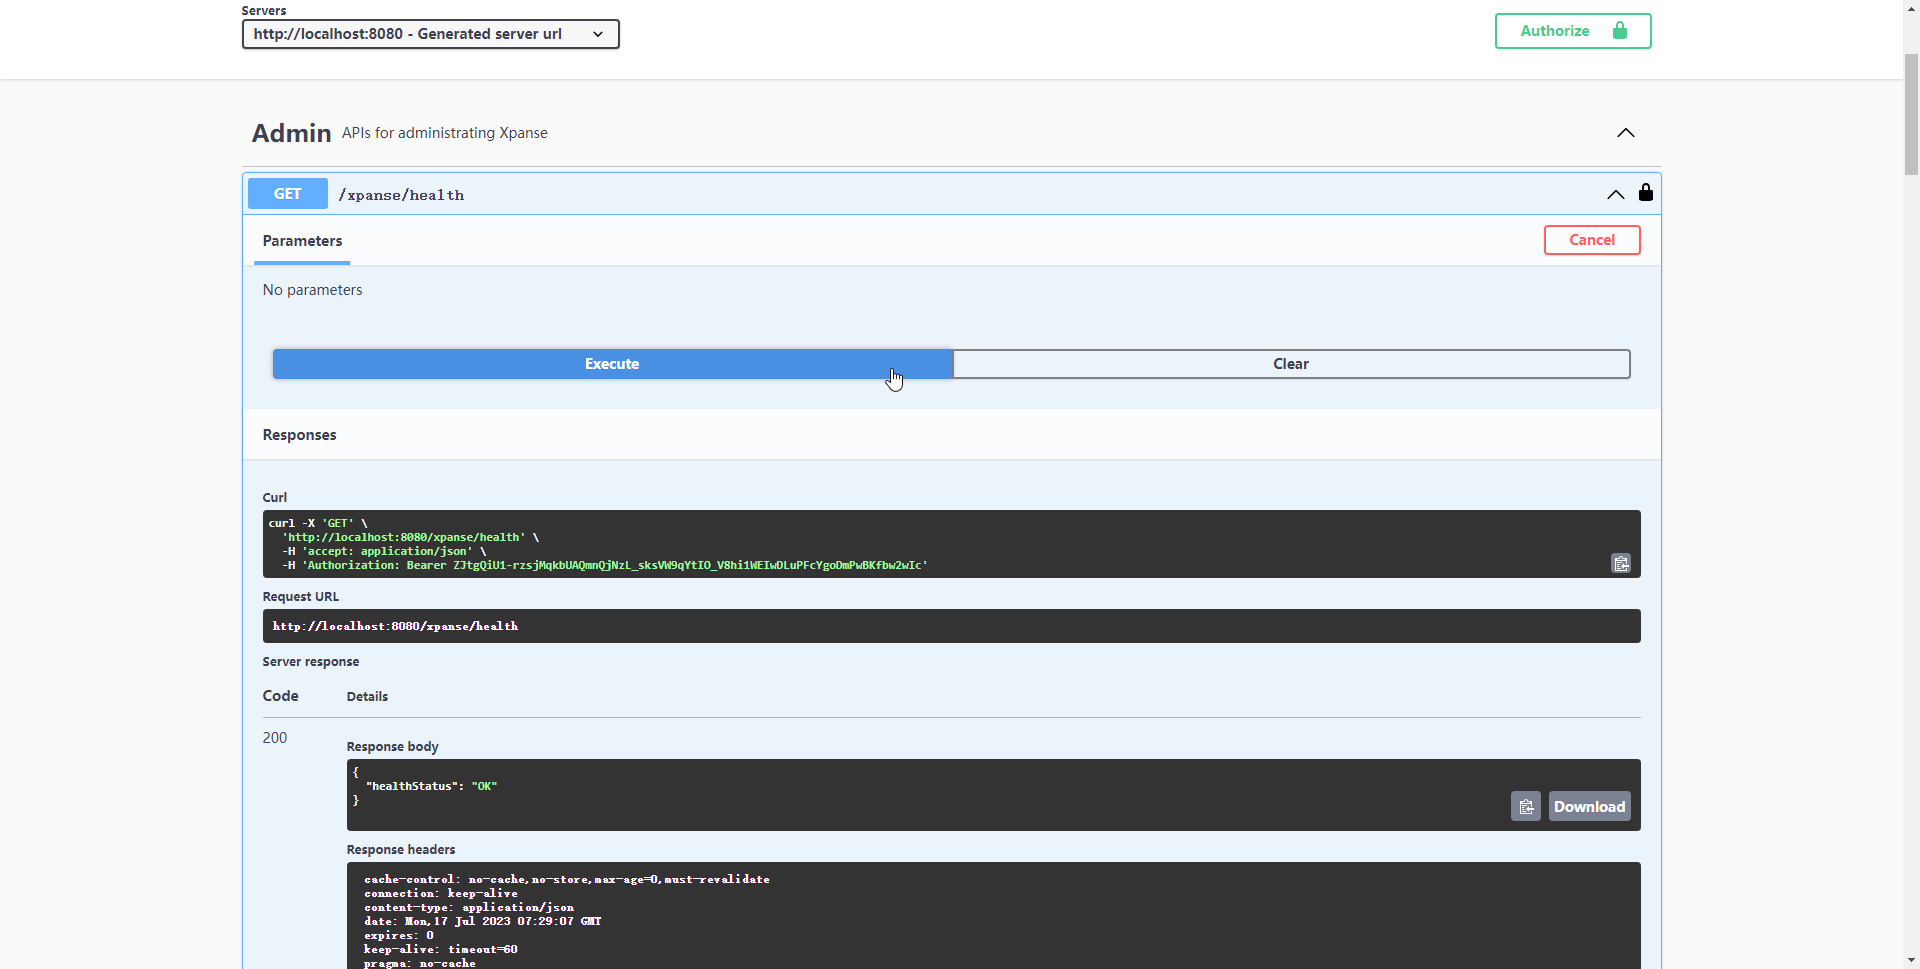
Close the authentication window and select the API which you want to execute and click to expand it,
then click on 'Try it out' and 'Execute' to execute the API method.
In the Curl command, you can see the request header named Authorization with the value of
${access_token} after prefix Bearer .

The other way is to use the Authorize REST API.
Call the method using browser.
In case of local development server, the URL is http://localhost:8080/auth/authorize.
The browser will redirect to the login page of the IAM service.
Fill username and password to complete user login.
After successful login in the IAM, the browser will back to the token API
URL with response model 'TokenResponse' with field 'access_token.'
Then you can use the value of 'access_token' to fill header 'Authorization' in the HTTP request when executing
authenticated APIs with CLI or the other HTTP client tools.

Disable Authentication and Authorization
If we want to disable Authentication and Authorization completely, then start the application with profile noauth.
If we want to disable only Authorization (RBAC), then we must start the application with configuration enable.role.protection=false
This might be necessary when we plan to run xpanse behind any other applications which will take care of authentication and authorization.