

2. Auto Headlight : Configure OpenXilEnv#
Follow chapter 1 before coming here : 1. Setting up Simulation Environment
Create Trigger File#
Write trigger files to map the input output variables between Carla and VAPI FMU examples in .tri file.
format : Receiver signal = Provider signal;
Current_Latitude = CARLAout__act_pos_x;
Current_Longitude = CARLAout__act_pos_y;
CARLAin__Headlight_Lowbeam = HeadLight_LowBeam;
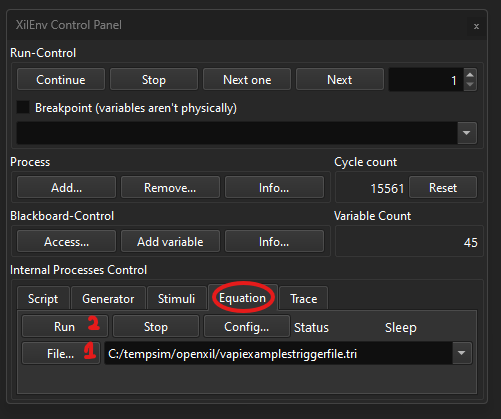
In OpenXilEnv software, open the control panel and Internal process control section, select the Equation tab. browse the trigger file which you have created or modified.and activate the trigger file by clicking run button.
Hint
Example Trigger file location : examples\auto_headlamp_example\simulation_artifacts\vapiexamplestriggerfile.tri
Create Script File#
Write script file to automate loading of FMUs and activation of trigger files.
starting the process can be automated by using below command with path to external process(FMU) as parameter.
// START_PROCESS (path to external process)
START_PROCESS (..\CarlaBridge\carlabridge_coupecar.fmu)
Getting the process state by using below command with name of external process as parameter. it is usually used with IF condition to check the state.
// get_process_state (external process name)
get_process_state (AutoHeadlightFMU.fmu)
Setting the signal values by using below command with name of signal and value.
SET_BBVARI(signal_name = value)
Activating the trigger file and also choosing when it should be used.
// START_EQUATION(Qty,trigger file name,timing, external process)
START_EQUATION(1,vapiexamplestriggerfile.tri,Before,AutoHeadlightFMU.fmu)
Sample script for the auto headlight example:
IF (get_process_state (..\CarlaBridge\carlabridge_coupecar.fmu) == 0)
MESSAGE (Starting Carla Bridge fmu)
START_PROCESS (..\CarlaBridge\carlabridge_coupecar.fmu)
ENDIF
IF (get_process_state (carlabridge_coupecar.fmu) != 0)
MESSAGE(Auto Headlight fmu started!)
SET_BBVARI(CARLAin__toggle_view = 1)
SET_BBVARI(CARLAin__operation_mode = 4)
SET_BBVARI(CARLAin__toggle_display = 1)
ENDIF
IF (get_process_state (..\vapifmus\AutoHeadlightFMU.fmu) == 0)
MESSAGE (Starting VAPI Headlight Example fmu)
START_PROCESS (..\vapifmus\AutoHeadlightFMU.fmu)
ENDIF
START_EQUATION(1,vapiexamplestriggerfile.tri,Before,AutoHeadlightFMU.fmu)
IF (get_process_state (AutoHeadlightFMU.fmu) != 0)
MESSAGE(Auto Headlight fmu started!)
ENDIF
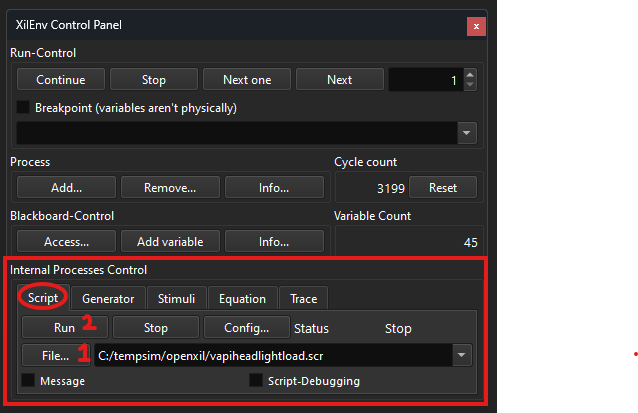
script file can also be loaded in similar fashion as trigger file but only change is one should select “script” tab and activate once file has been chosen.
Hint
Auto Headlight example script file location : examples\auto_headlamp_example\simulation_artifacts\vapiheadlightload.scr
Two Door example script file location : examples\auto_headlamp_example\simulation_artifacts\vapi2doorload.scr
Four Door example script file location : examples\auto_headlamp_example\simulation_artifacts\vapi4doorload.scr
Note: Verify paths and names of fmus while using it before loading it in the openxil. Adjust it accordingly if change is needed.
Assign script to button widget#
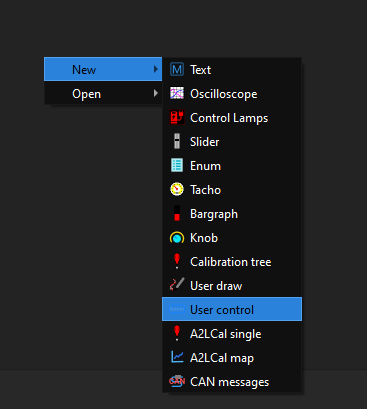
In the OpenXilEnv, right click to add user control widget as shown in the image.
right click on the widget and click on config button.
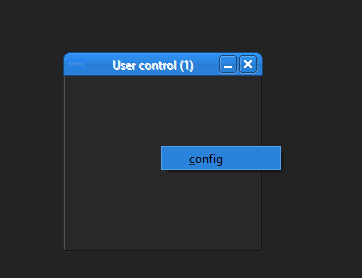
In this config, the parameters can be changed according to our wish. Add the button and configure on the right section to add name and script.
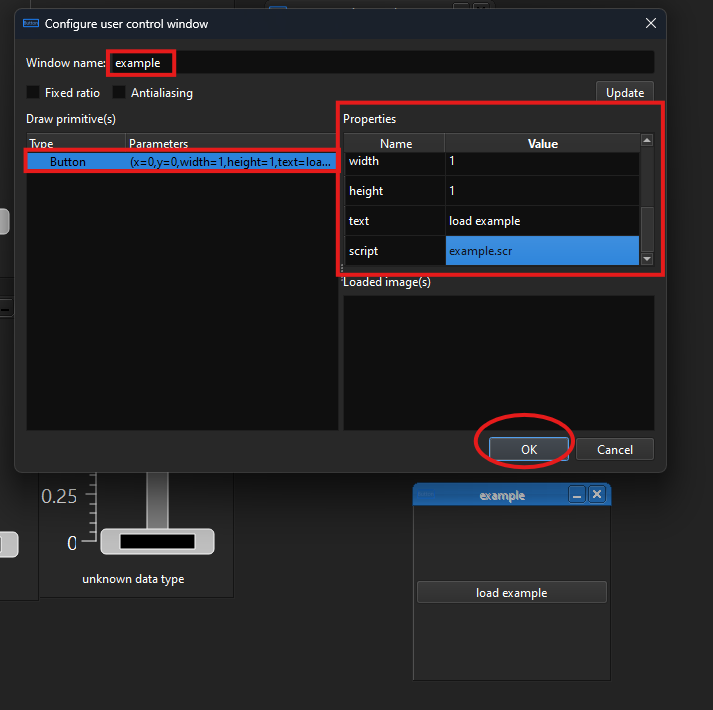
In this way the script will be assigned to button. and save the config before closing OpenXilEnv.
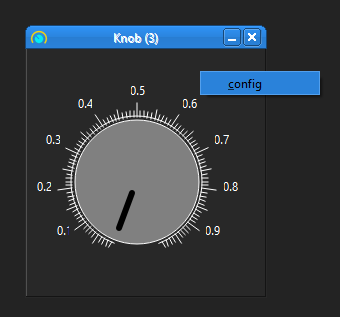
Add Widgets#
Add and configure widgets to simulate or control signal values
Add a new widget in OpenXilEnv by clicking right mouse button and choosing a widget.

Here in this example , text widget is chosen. this widget displays the signals and its attributes.
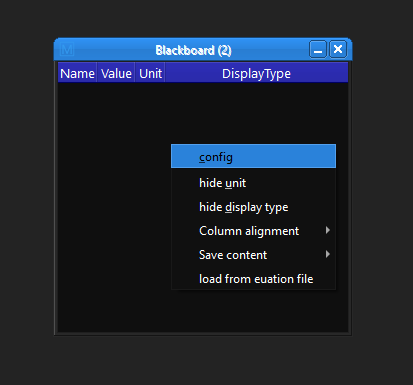
Signals are visible when respective external processes(FMUs) are initiated. And user can add them on to the widgets for analysis and control.
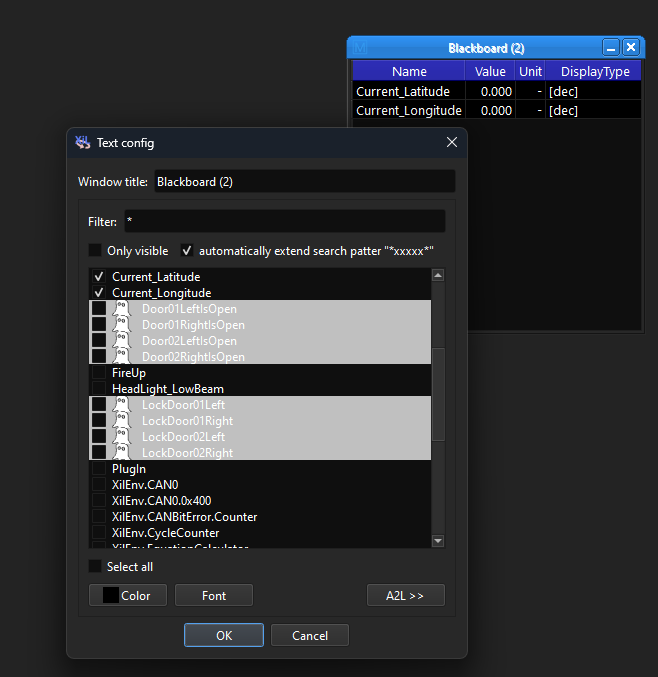
In similar way, other widgets can also be configured with respective signals.

Simulation with Openxil and VAPI only#
VAPI can also be simulated without use of CarlaBridge. By only utilizing the widgets present in Openxil and configuring them to the respective signals of VAPI. Values can be modified by user and VAPI FMU reacts to the changes.

Openxil and VAPI sequence diagram#